Monday, January 30, 2012

January Smash Swap

What is this?

On the Cricut Circle Canadian chat I started a swap for making our own "Smash Book."  There's plenty more handmade journals on youtube, they can be rustic or beautiful, functional or ornamental.  They are something personal, to put everyday flotsam & jetsam, aka ephemera.  Historically they have been called journals, or junque journals.  Smash book is an actual brand and what this swap has created is far more beautiful and original in my opinion.
Here's the criteria:

  • Pages will be journal size: an 8.5" x11" folded top to bottom becomes 5.5" x 8.5" 
  • Acid free supplies
  • Colour range: friendly and fresh, not muddy or dark. This is a swap for January, not soon enough for the mud to come but we will all be sick of winter by then I bet.
  • Participants can chose to commit to what type of paper they want to commit to or just leave it as a surprise. A special request to hint what the "extra"  will be so there isn't 20 pieces of ribbon. 
  • Usual swap rules: SASE, make sure your return envelope is not too small please; be generous with return packaging size & postage allowance; number of participants will be the number of pages and extras you send after the swap closes.


Details:

  • regular papers, not too flimsy. Time to break out stamps, glimmer, embossing tricks and dress them up a bit.
  • It is up to participants if they want to send bonus pages, enough for all. They could be more whimsical ie tissue, transparency, vellum, smaller size but big enough to bind.
  • Suggestions for "bonus extras:" clips, pockets, large papers "z" folded to fit, bags, dividers, to-do lists, charms, ribbon/yarn/string. 
  • Suggestions for unusual papers: map papers, ledger paper, folders, pockets, graph, lined, watercolour, beautiful hoarded paper packs that are just-to-pretty-to-use...
  • The book will be yours to bind how you please, any direction you prefer, and in whatever sequence you like. From there you can use it however you like.

I started chatter for this Nov 29, 2011. Deadline to sign up was January 7, mail by January 12th.  Its fun to have something nice and not stressful to look forward to after the Christmas commotion is done.

Here's what I have made

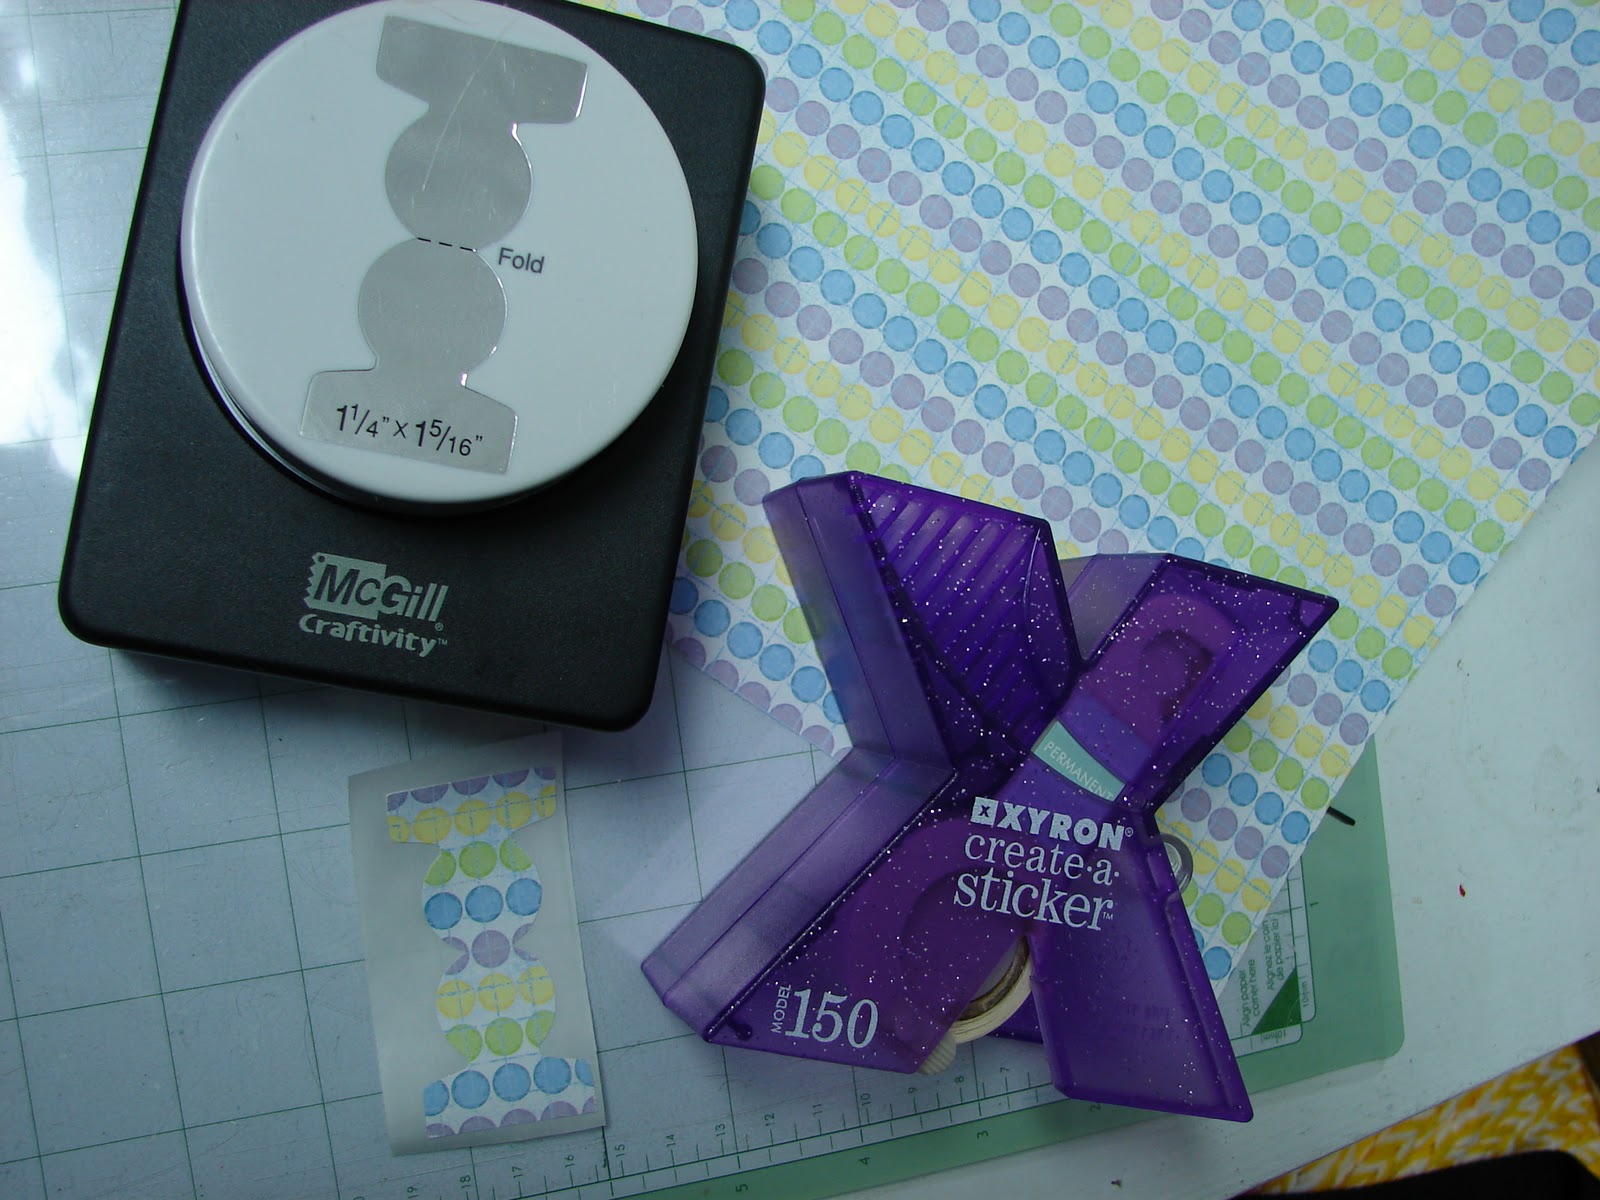
I could've made these with the cricut, but I like the way I can control where the pattern lines up in punch by using it upside down.

 These are mini charms.  I didn't glue them because both sides are nice.  Just fold them in half & glue them onto a tag, note card, page, whatever.  Hmm, they would be nice on the pins mentioned further along in this post...
Last tab punch, the X is the mini Zyron 1" sticker maker, I have 2, the original orange one, and this purple one I picked up from a thrift store for $2, score!  And, all these tabs fit into it nicely.
 These are the supplies I used to make the mini cork boards shown further down:  Pen, ruler, cutterbee scissors, scotch quick dry glue, a sheet of double sided adhesive, coffee-straw stir sticks, and super thin cork that a South African friend shared a piece of with me.  She brought it from her original home base and I have no idea where to get it from.  Over a year ago I saw mini cork memo boards on a youtube video and that was the inspiration to do these.  Sadly, I do not know where to find that video to credit back to.

 I won't bore you with my ammeteur efforts at mitering corners, you tube has great framing and mitering videos available.  I just winged it clipping and estimating the angles until they were nice.  I am holding the cork to show how thin it is.  Making template lengths for the sides speeded this up.  Also slitting the straws after they were cut and angled  was faster.  I left my scissors in the straw to show how simple the slitting was to do.  The adhesive sheet was applied to the cork & stabilized it nicely to cut to size.
 Here shows the detail of how the cutterbee scissors are so great.  These are nonstick micro tip scissors.  I use the blade edge to gently score away the backing & the scissor tips to peel it away so the plastic sticks to that backing.  Once they were assembled I twisted each one slightly and added the glue into the mitered corners to help make them more stable.  The mini-cork-boards are almost 3" wide x 2 1/4 high.
 This is humble plastic packaging, cut to swap size and corners rounded.  The same friend who shared her cork-paper graciously loaned me her "Close to my heart" stamps.  And she let me try her brand new brown "Stayz-on ink" which is reputed to be great for all slick surfaces.  It is, and does work well.  It takes forever to clean off the stamps, even with the appropriate cleaner.  Good friends really are a blessing.
With my gypsy I adjusted the measurements of a little cloud shape from the French Mannor cricut cartridge.  I cut from yellow paper, repeated with lilac paper, and stamped the yellow with CTMH borrowed stamps.  They line up perfectly with ATG gun glue on the plastic, I'm so pleased with that!  I doodled a bit of detail with gel pens on the yellow side, and swiped the lilac with brown ink to edge to reduce the bland "floating" effect.  The words say, " to thine own self be kind."
I have to find lil sewing dressmaker pins to stick into the cork to complete the effect.  What's the point of a cork-board if it doesn't have things stuck to it?  I'll post the other swap pages another day. It wouldn't be fair to release them to the world before participants get theirs back.

Saturday, January 21, 2012

Sympathy card swap

I joined a swap on the circle messageboard to trade sympathy cards.  Stumped for inspiration, a quick google images search revealed lots of white, purple, lilies, flowers...  I joined because it was a small swap and quite a creativity challenge.  These daisies are from the Botanicals lite cricut cartridge, and cut from white cardstock.  Working on a nonstick mat, I added platinum coloured stickles to the petals. Oops, almost forgot to grab a picture!
 I added gunmetal coloured stickles to the heart of the flowers. I thought the rest of the flower was too plain so I used "luster rubons" from my stash, apple green.  I don't think this product is made any more, I'm not surprised.  I started out using my fingers to apply but it was taking forever to build up any colour.  A packaging sponge that came with embossing folders speeded up applying the colour more heavily and it was easier.  This product is waxy and I have no idea how well it will stay on there.  I have mailed my cards in individual baggies to prevent any possible chance of green accidental transfer wrecking any of the other cards swapped.
The cards are 5.5 x 4".  The base paper is a deep purple cut at 5.25 x 3.75" and the 2 tone zigzag paper cut at 5 x 3.5" from my stash.  Somehow I like how the zigzags roll vertically, but I don't know why I like it.  I couldn't figure out what to do about the "floating" look.  I was thinking of grass or a flower pot but I couldn't figure out how to go about doing it so I opted to leave them simple.
 I used Fiscars brand clear acrylic "all around quotes" to stamp the inside of the cards with colorbox green pigment ink.  The quote says, "a moment lasts all of a second but the memory lives on forever."  I thought that was a respectful way to convey sympathy and caring without being too generic.  I look forward to the return mail to see what others creative minds have done.

Wednesday, January 18, 2012

Organization: Embossing Supplies

Merry Christmas to me!  I received a Cuttlebug (WARNING: LOUD Youtube video).  With this comes new organization issues.  This tool gives me ideas.  Many people have even made their own embossing folders from rough fabric, mesh grocery bags, coins etc.  All sorts of things can be texturized with it, paper, tissue, vellum, aluminum foil, but nothing thicker than 1/8."  Cuttlebug was one of the original manual cutting systems, cutting "die" plates can still be used.  I can't be bothered to invest in those since the cricut does that, any size I need.  I determined I needed to label each folder so I would know which was what.  That might help prevent purchasing a duplicate down the road.  I read that it is best to put the labels at the very edge of the folders, just the thickness of the label can affect the embossing.  I still need to label the machine itself with a reminder to always put the fold of the folder through first.  Prevention of inadvertent folder destruction?  I took apart all the packaging, trimmed away the bulk & kept the flat parts.  Never know when clear plastic is needed for a window or something.
My first label-maker, that lil guy is handy for all sorts of things.
I cut down a package of Recollections brand paper 8.5x11" into 4 pieces per sheet and punched holes into the corners using my crop-a-dile tool, and then my bind-it-all corner rounder.  I figured out a colour coding system & just kept the paper packaging for reference.  Erasing some of the brown becomes tan for TimHoltz, green for Provocraft, fushia for Sizzix, and plum will be for Fiscars texture plates when I figure out how to use them in this machine.  I still have room for 2 more brands if I should need them.  I did a reference emboss of each folder & put them on a single ring.  I noted the size of each folder on the sample, that may save an oops someday?
 Here is the box I found that fits them perfectly. 
The lid has a spot that I can tape the colour code against for easy reference.
  This box has a nice adjustable bookend thingy in it to keep the growing file from flopping over.  I used leftover cardboard for the dividers. I made the tabs with my McGill tab punch.  That is a heavy slightly clumsy punch to use, but it always works well.  I haven't quite mastered how I want them organized, but I'm starting with floral, theme, and texture and can improve as I go.  Some people have over 200 folders!  Not me, this is almost 30 since I found a decent sale last week.
I have learned a lot from the circle message-board members, the Provocraft message-board, and youtube is a great resource too.  Sometimes the hardest part of organizing is figuring out what to do with it all.