Showing posts with label Repurposing. Show all posts

Saturday, April 4, 2015

Busy Book aka Quiet Book aka Toddler interactive book

Long title, huge 16 page project!  We've been through 8 "bugs" since January so blogging went by the wayside.  I've been enjoying taking a detour from paper crafting to create a book for my toddler boy who is now 28 months.  Little hands will keep themselves busy, or we can guide them with interesting things.  Screens and electronics are nice, but they are only two dimensional.  How does anyone learn to manipulate their THREE dimensional environment without engaging with it?  Plus toddlers are major league growing and learning, even though their communication can't always keep up. 

So, last year I mined Pintrest and Google images and drove my family crazy planning 3 books.  All of March 2015 I've been driving everyone crazy as I try not to drive myself crazy building this one book.  I've had so much fun figuring out details and making sure it will grow with my boy for awhile.  I've also been researching "free motion sewing", basically doodle sewing by machine on Youtube. A new friend gave me her extra free motion sewing foot to try.  That lit a fire under my motivation and made it even more fun, and bonus it sped up the sewing.  Here are some process pictures to show the sheer mess I work with.  Trust me, I know what I'm doing and that works for me, LOL!  I think I take after my Dad's creative process, he would make a huge mess as he worked too.
organized piles of all my flotsam & jetsam donated and thrifted stuff

classic, sewing at the kitchen table complete with makeshift ironing board on a thick piece of felt fabric

free motion sewing in action

close up of altered free motion foot, zig zag stitch in use
Leah Day on Youtube shows exactly how to alter a generic free motion sewing foot to make this work.  The foot "hopping" she mentions wasn't a concern for my machine so I only altered the foot from closed (oval) to open (C) shape.  I recommend her videos if you are interested in learning free motion sewing.

Basically I checked my sewing tension, put on the free motion foot, left the feed dogs up, switched my stitch length to ZERO and switched from zig zag to straight stitch as needed, foot down of course.

After 7+ heavy days of sewing, many evenings of handwork details, I finished this book last night.  I will show more posts over the next few days since it is going to be an Easter gift to my little boy.  I'm so excited to see him enjoy it!  Happy Easter and Happy Spring everyone!!!

Saturday, November 1, 2014

Punchies

Here is the post showing my Mantle snowflakes, and the Christmas explosion that goes with it, and my poor old dog wondering what happened.  Using my Cricut Expression I made huge snowflakes from white paper, and holographic dollar store papers to hang above the mantle for the winter season.  They really were pretty because they were so simple.  I just came across the "waste paper" in my stash.  Funny the things that are squirreled away that turn up.  My inner crow was rejoicing, mmmmm, shiny!  Now, what to do with it?
An old tip is to punch scraps into shapes so the last bits truly are trash.  I follow Lindsey, "The Frugal Crafter" on YouTube, and she recently made a video diy-paper-sequins-without-a-fancy-die".  I wanted to try.  A friend gave me her hole punch and it was handy so I tried it.  I soon gave up poking holes into them, it was too time intensive for not much difference on such busy paper. 
Working on fun foam with a lowly click pen to push into the centre of each punchie yielded perfect sequin like cups.  So I got brave and dug out a little bitty dollar store flower punch, just as cute if not cuter.  The upper half of each picture shows them pen poked, the bottom half shows them flat.  I didn't bother poking them all, many remained flat.
So I punched,
and punched, and punched, and punched...  Look how they'd make cool eyes!
Then I thought, no need to mess around with glue.  Just stick them to 3/18" glue dots.  Except at first I didn't.  At first I messed around with Liquid glass, bubbles of it, just waiting, begging for cat intervention.  Thankfully they were not investigated by any cat people and the experiment progressed.  I put a dot of liquid glass on a few, others got completely covered with it.  When they were dry, they looked remarkably like pre-made glitter products, like these glitter gems, that are faceted, but not the same since my knock offs are smooth bubbles.
When will I learn, natural daylight isn't quite enough.  Sorry about the blueish hue, I promise that it was a bright and sunny day when I photographed these.
So I got smarter and put the punchies on the glue dots, THEN put the liquid glass on them in small and large bubbles.  Aren't they pretty?  The best part is, I have lots to play with, and they cost me almost nothing, and I gained 2 hours playing around in my craft room. 
Thanks for stopping by!

Saturday, December 14, 2013

Monoprint envelopes

Remember those monoprint papers I posted about Dec 4, 2013?  Or the hectograph post from back in July?  Here's what I did with them!  That tube in the middle is to make the envelopes lick-em-stick-em.  Splitcoast stampers has a homemade recipe for it, but for $4, the job is done.  I could always refill it I guess?  I saw http://canadianscrapbooker.ca/  Fall 2013 magazine featured this cool Kreatealope EnvelopeTemplates.  I first saw them on Splitcoast stampers email and I was hooked, I had to try this.  In the summer I found the templates at an out of town scrapbook store.  Who can travel without visiting scrapbook stores, pet stores, candy stores...  I digress :-D

The Kreatealope website has a video that shows just how easy it is; tear, fold, snip corners, glue 2 edges.  Like magic a pile is done very quickly if the steps are done assembly line style.  I don't mind the torn edges, they're just envelopes.  I could always trace & cut out to make neat ones if needed.  The bonus is that I monoprinted the papers double sided so the insides are just as pretty.  I think they would make cool security envelopes too.  This template is sturdy enough to get the job done, yet takes up almost no space to store.  The cellophane packaging is not going to stand the test of time.  I think I will punch a hole in the corners to hang on ring on the wall so they don't get lost in the craft room.  I bet crafty children would have fun making these?
Happy crafting to you!

Sunday, December 2, 2012

Quiet Book

I found this "Quiet Book," aka "Busy Book" at a rummage sale for 25CENTS!  What a score!  I made 2 of these types of books for my niece & nephew but picassa has sorted my pictures somewhere I can't find them to blog, of course.  These are such a labour of love to make, but so very worth it.

I cannot lay claim to making this book, I do not know who made it but I applaud their efforts.  It seems to be made from remnants & scrap fabric.  It looks to be well loved, some of the pieces are missing but it looks like it would still be appealing to any child. 

As always, click on any picture to enlarge.
Check out all the fun fabrics, all different qualities & types
Tie my shoe

Braid my hair...Put your hand in my mitten

Zip, now look inside...What time is it? (there is plastic hands on that clock to spin)

Make my face...Match the shapes

Fill my cars...Count the wheels

Hang the clothes...Tie my bow

Button my coat...Try my pockets

I can count...up to ten

Match the colours
It is on my list to restore the missing pieces of this book so my new little one will be able to enjoy it.  As with any activity a small child manipulates, they need to be adult supervised with common sense.  These home-made books do not come with safety certifications or recall notices.  If you choose to make a book for a child, please please please, advise the parents to be vigilant to choking hazard etc by supervising appropriate use of these fun manipulative little books.

Wednesday, November 28, 2012

Baby Shower Autograph book

My good friend recently hosted a baby shower for me.  It was a lot of fun & I really wanted to preserve a fun book of signatures from my guests.  This baby is expected early December 2012 so we planned to have the shower first & then a "meet the baby" tea late in January or early February 2013.  December is rife with holiday busyness, cold & flus and it just made sense to straddle the holiday rather than deal with all it's craziness.

 I found this old card kit in my stash.  It is still cute but quite dated looking, "Paper Magic, you make the Magic" by Sue Dreamer.  I Made a template, & used my Bind-it-all to punch 8 holes in the cards.
 I used some heavy cardboard to make the covers same as how I made the circle smash book.  I covered the covers with glue stick & "Max & Whiskers Basic Grey paper."  The baby nursery & shower theme is baby animals or zoo animals so this fit perfectly.  The covers are 1/8" larger than the card envelope size since I did punch a few envelopes to use as pockets inside the book.  I used the BIA corner rounder to round the outer corners.  Hockey tape sealed the edges of the covers nicely.  Tip:  Use sharp scissors to cut hockey tape, it is very sticky!
 Here is how it looks inside
 All the embellishments were premade as part of the card kit.  I had some making memories fabric tape that I used to cover the preprinted credits on the back of each card.  I used a bit of smash tape to note the date of the event and sticky notes to reserve the first & last pages for notes of the fun shower & tea party details.

I hope this post inspires you to have a look at your stash & think of new ways to enjoy using it.

Thursday, November 8, 2012

Bassinette Baby Basket Bumper

 Try saying that title 10 times fast!  Here is the sweet jungle animal fabric I found at a Fabricland store.  It is copyright 2010 Precious Moments Designer Collection, Inc.; Licence SPF Fabrics. 
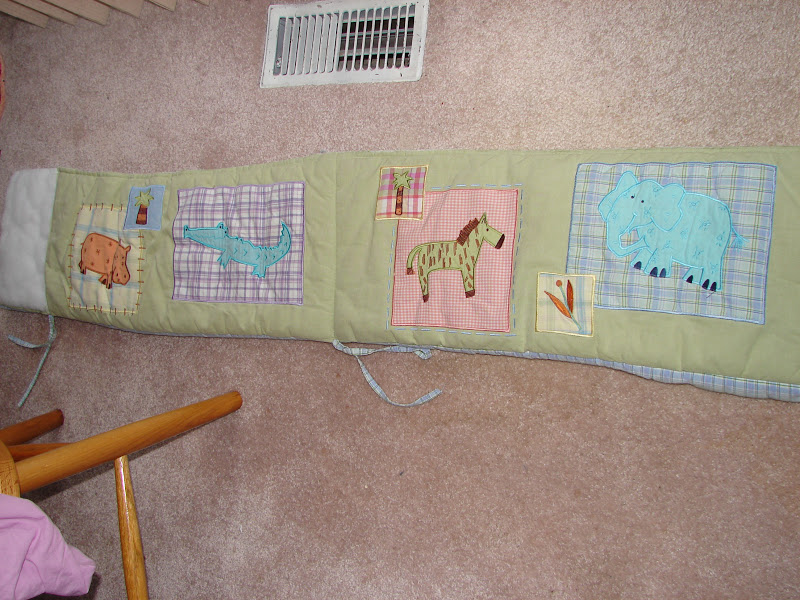
 Here is the remaining crib bumper that I bought at Value Villiage for $4, its a bit worn out & way too big, but by far cheaper than buying new batting & backing fabric.  An hour in the recliner with the seam ripper and I had more than enough supplies.  I washed it twice before commencing & was a little surprised to find the previous owner's detergent perfume still came through.  I guess I forgot the vinegar rinse, since that usually kills perfumed detergents.  The panels are cute & may get re-used into something, but I'm lacking ideas right now.
 Here is the finished basket bumper, it is not tied in this picture.  I forgot to show a picture of the backing fabric, it is white, blue, & green plaid backing fabric from the original bumper.  I also reused the ties & bias fold tape on the top edge.  Why not, it all matched perfectly.  If you click on the pictures to enlarge you will see my sewing is not perfect.  I'll admit it was pinned to death to hold it's shape for sewing & still not easily cooperative.  4 rounds of stitch picking didn't really make this project popular with me.  I added vertical stitch lines at regular intervals to keep the stuffing in place.  I couldn't resist this fabric for this purpose, and for about $20, & a few hours time, it is so worth it.  I won't bother with all the boring measuring & sewing details since this is a project blog & I doubt anyone will have this exact same basket or supplies to duplicate this.  It works out that the bumper is a continuous loop, about 10" tall & about 70" long.  The mat in the base is waterproof & I can use a pillowcase or fold burp-cloth flannels over it.  I have some flannel serged but am not sure if I want to put an elastic edge on them to become custom fitted sheets.
This basket was used by my Mom for me & my brothers, and for my son & 3 other family members.  Over 14 years ago I made a different bumper for my son of fabric with cute cat faces.  I remember he would have the sweetest little mumbling baby conversations with them.  Sorry but I have no digital pictures of that to show.  It is said babies can see 7-15" as newborns, and they are most drawn to look at interesting faces.  I seem to do a mix of practical sewing like this or a binge of pattern sewing.  Thanks for looking at what I've been up to!

Monday, January 30, 2012

January Smash Swap

What is this?

On the Cricut Circle Canadian chat I started a swap for making our own "Smash Book."  There's plenty more handmade journals on youtube, they can be rustic or beautiful, functional or ornamental.  They are something personal, to put everyday flotsam & jetsam, aka ephemera.  Historically they have been called journals, or junque journals.  Smash book is an actual brand and what this swap has created is far more beautiful and original in my opinion.
Here's the criteria:

  • Pages will be journal size: an 8.5" x11" folded top to bottom becomes 5.5" x 8.5" 
  • Acid free supplies
  • Colour range: friendly and fresh, not muddy or dark. This is a swap for January, not soon enough for the mud to come but we will all be sick of winter by then I bet.
  • Participants can chose to commit to what type of paper they want to commit to or just leave it as a surprise. A special request to hint what the "extra"  will be so there isn't 20 pieces of ribbon. 
  • Usual swap rules: SASE, make sure your return envelope is not too small please; be generous with return packaging size & postage allowance; number of participants will be the number of pages and extras you send after the swap closes.


Details:

  • regular papers, not too flimsy. Time to break out stamps, glimmer, embossing tricks and dress them up a bit.
  • It is up to participants if they want to send bonus pages, enough for all. They could be more whimsical ie tissue, transparency, vellum, smaller size but big enough to bind.
  • Suggestions for "bonus extras:" clips, pockets, large papers "z" folded to fit, bags, dividers, to-do lists, charms, ribbon/yarn/string. 
  • Suggestions for unusual papers: map papers, ledger paper, folders, pockets, graph, lined, watercolour, beautiful hoarded paper packs that are just-to-pretty-to-use...
  • The book will be yours to bind how you please, any direction you prefer, and in whatever sequence you like. From there you can use it however you like.

I started chatter for this Nov 29, 2011. Deadline to sign up was January 7, mail by January 12th.  Its fun to have something nice and not stressful to look forward to after the Christmas commotion is done.

Here's what I have made

I could've made these with the cricut, but I like the way I can control where the pattern lines up in punch by using it upside down.

 These are mini charms.  I didn't glue them because both sides are nice.  Just fold them in half & glue them onto a tag, note card, page, whatever.  Hmm, they would be nice on the pins mentioned further along in this post...
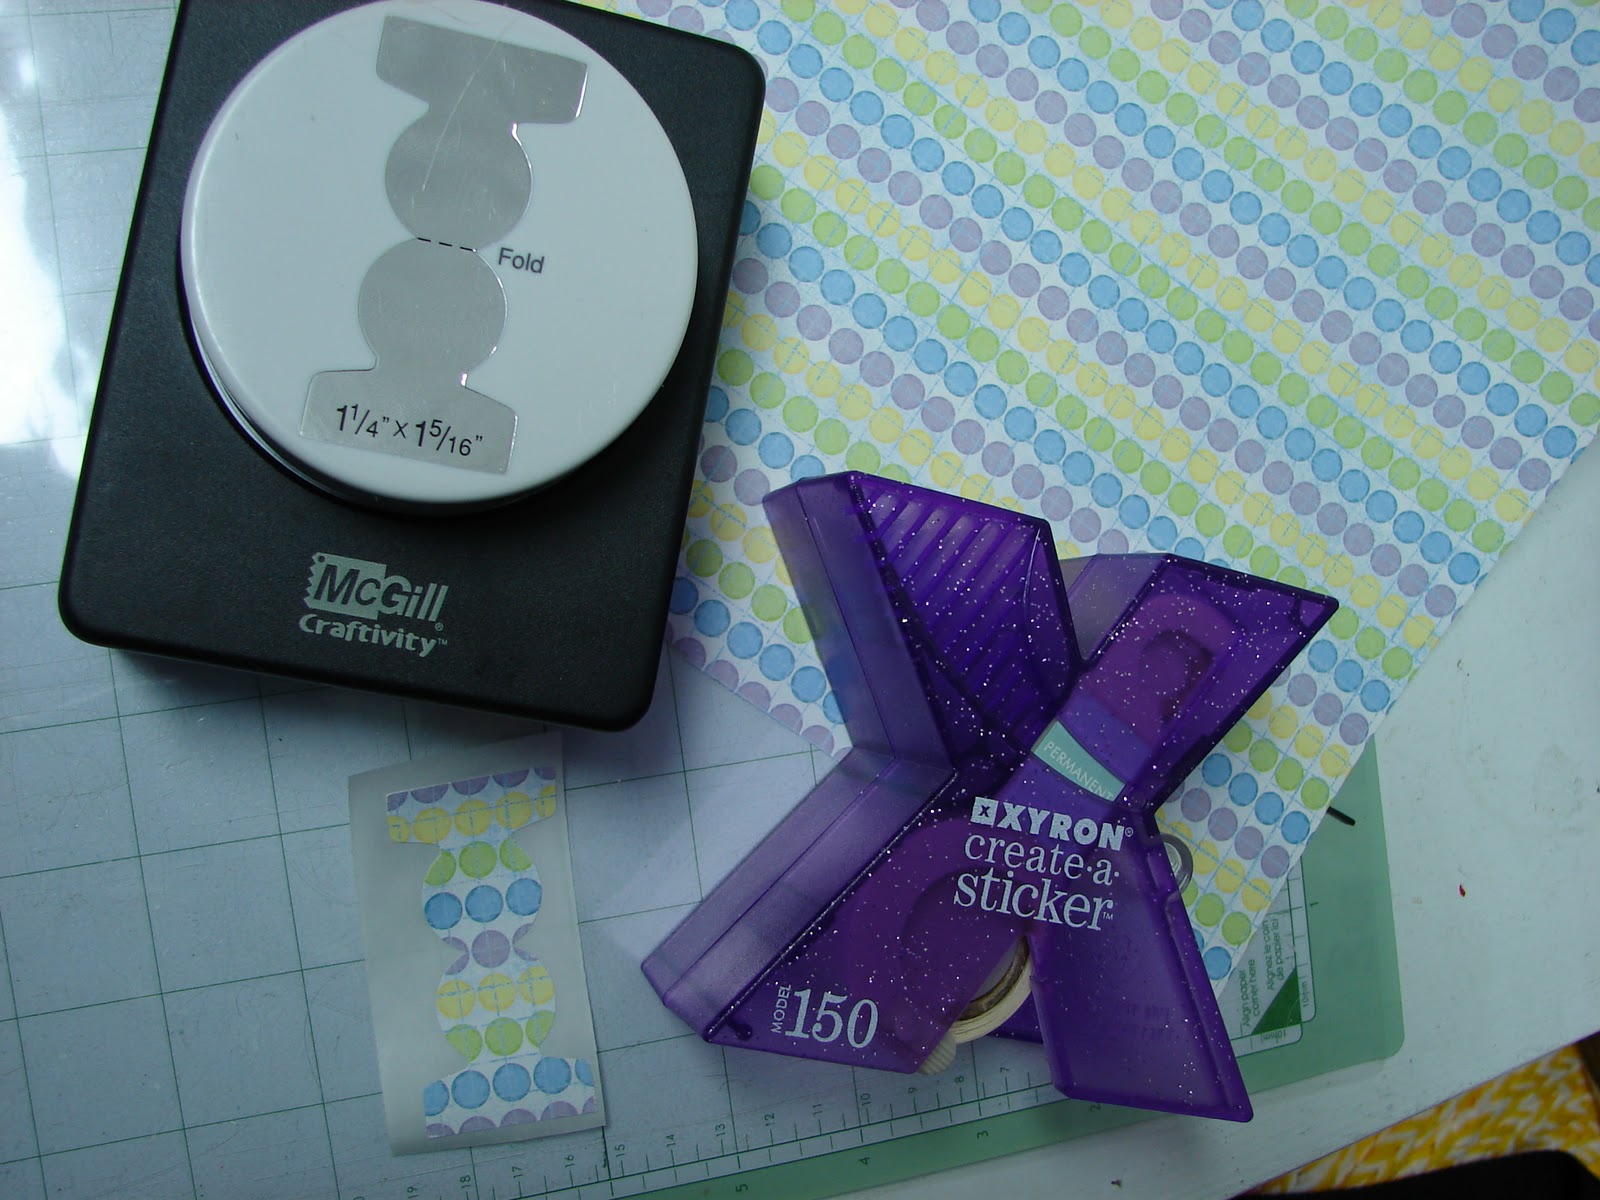
Last tab punch, the X is the mini Zyron 1" sticker maker, I have 2, the original orange one, and this purple one I picked up from a thrift store for $2, score!  And, all these tabs fit into it nicely.
 These are the supplies I used to make the mini cork boards shown further down:  Pen, ruler, cutterbee scissors, scotch quick dry glue, a sheet of double sided adhesive, coffee-straw stir sticks, and super thin cork that a South African friend shared a piece of with me.  She brought it from her original home base and I have no idea where to get it from.  Over a year ago I saw mini cork memo boards on a youtube video and that was the inspiration to do these.  Sadly, I do not know where to find that video to credit back to.

 I won't bore you with my ammeteur efforts at mitering corners, you tube has great framing and mitering videos available.  I just winged it clipping and estimating the angles until they were nice.  I am holding the cork to show how thin it is.  Making template lengths for the sides speeded this up.  Also slitting the straws after they were cut and angled  was faster.  I left my scissors in the straw to show how simple the slitting was to do.  The adhesive sheet was applied to the cork & stabilized it nicely to cut to size.
 Here shows the detail of how the cutterbee scissors are so great.  These are nonstick micro tip scissors.  I use the blade edge to gently score away the backing & the scissor tips to peel it away so the plastic sticks to that backing.  Once they were assembled I twisted each one slightly and added the glue into the mitered corners to help make them more stable.  The mini-cork-boards are almost 3" wide x 2 1/4 high.
 This is humble plastic packaging, cut to swap size and corners rounded.  The same friend who shared her cork-paper graciously loaned me her "Close to my heart" stamps.  And she let me try her brand new brown "Stayz-on ink" which is reputed to be great for all slick surfaces.  It is, and does work well.  It takes forever to clean off the stamps, even with the appropriate cleaner.  Good friends really are a blessing.
With my gypsy I adjusted the measurements of a little cloud shape from the French Mannor cricut cartridge.  I cut from yellow paper, repeated with lilac paper, and stamped the yellow with CTMH borrowed stamps.  They line up perfectly with ATG gun glue on the plastic, I'm so pleased with that!  I doodled a bit of detail with gel pens on the yellow side, and swiped the lilac with brown ink to edge to reduce the bland "floating" effect.  The words say, " to thine own self be kind."
I have to find lil sewing dressmaker pins to stick into the cork to complete the effect.  What's the point of a cork-board if it doesn't have things stuck to it?  I'll post the other swap pages another day. It wouldn't be fair to release them to the world before participants get theirs back.

Wednesday, October 26, 2011

New toy!

 Here's a picture of the box.  I won't bore you with the operation details of how to run this thing.  Youtube is a much better resource for researching these binding tools.  It came down to the Zutter Bind-it-all or the "Cinch."   I went with the BIA because it is smaller, weighs less, has rectangular holes, and seems to make the round rings stay round better than the Cinch.  And the BIA was available locally so no waiting for mail, no shipping, taxes, or duty to ramp up the cost.  I have no experience using any of these machines.  I figured if I ever wanted/needed round holes, I could just measure it out and use my "crop-a-dile" tool to do the holes and use the BIA to close the rings up.
 These are my first attempts using the machine.  I had a pile scrap 8.5x11" paper kicking around, mostly white space, wasted printouts and junk notices.  I cut them in half, and folded each half.  Depending how much white space/print, I sorted them to leave the folds inwards or outwards before punching.  As you can see below I goofed one and made the scrap cardboard the wrong way out.  Now they're handy little scratch note books.

I've been hunting for youtube of how someone easily pops the rings off to reuse them without bending them all up.  I'm sure some smartie out there has done it and hasn't posted their secret, yet!  I learned these are not quite practical size because the O-rings (binding) are 1", they are a bit too big and clunky for a purse.  Overall they are a satisfying first attempt.
I really want to make some scrap-book paper junque journals next.  There's many pretty journals on youtube for junk-journals, smash-journals, art-journals, mash-journals...  They're all about the same concept, yet very visually interesting tools.

Sunday, May 22, 2011

Finger Knitting

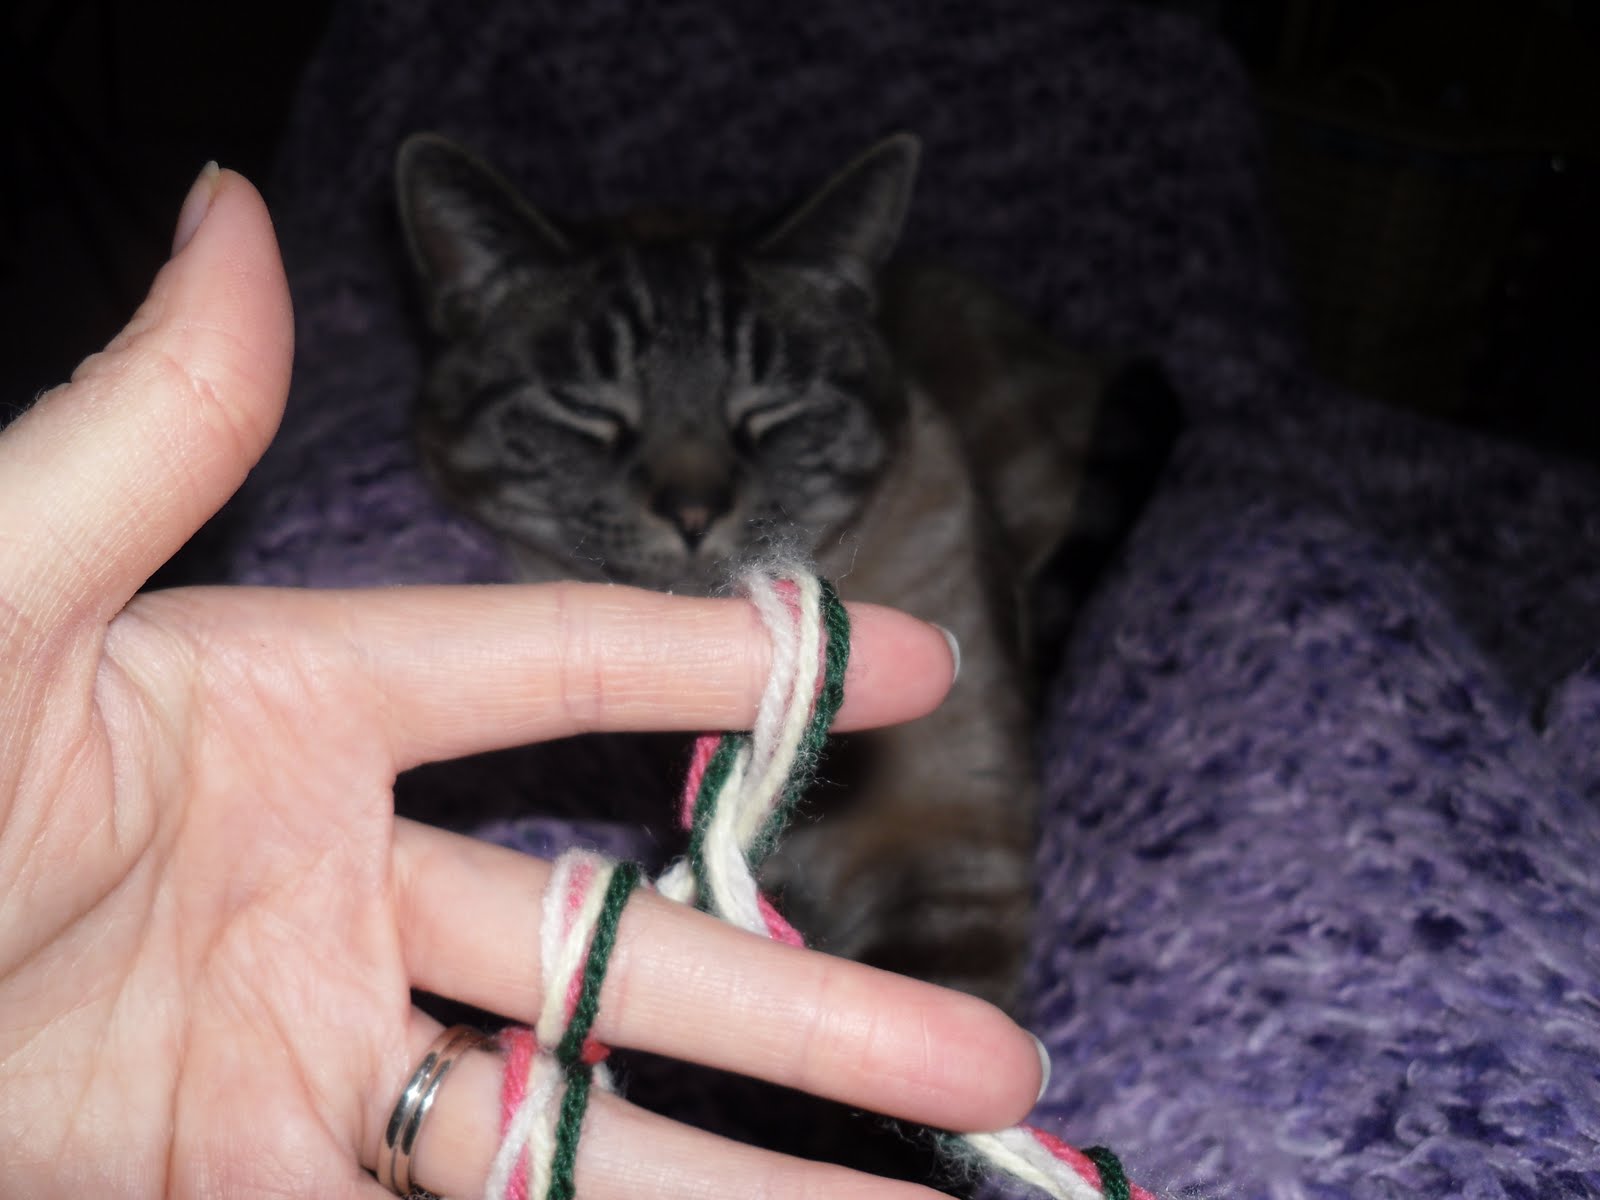
I did lots of pictures.  Boomer enjoyed helping with this part.  Here's what can be done with the oddball plied acrylic yarns.  Tie a slip knot & slip it on your non-dominant pinky finger.
This is an exaggeration of how the loop is before it is looped over each of the remaining fingers.
Four fingers looped:  check!

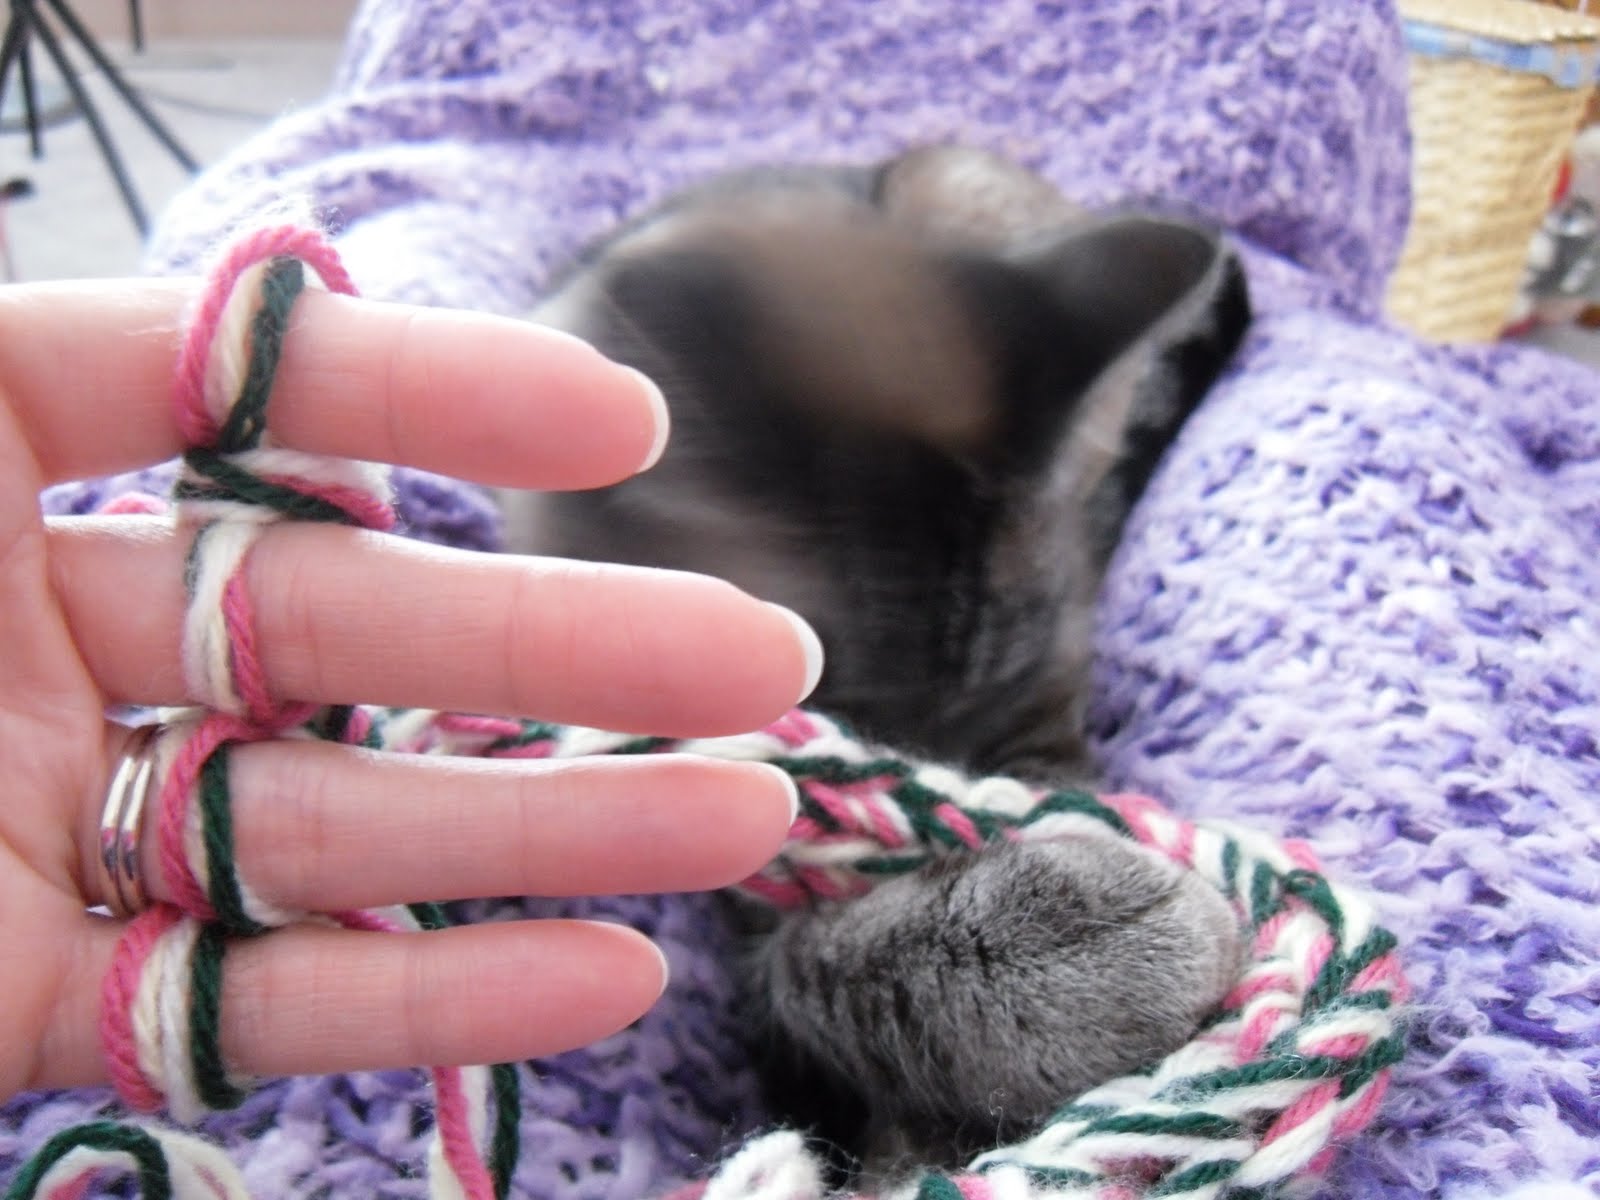
I went along for quite awhile as you can see by what boomer has grabbed.
Bring the yarn up over the index finger & down across your palm.
It doesn't matter what your preference is to start at the top or the bottom as long as you are consistent.  I start at the top.  One at a time loop the link closest to your palm over the draped strand to the back, without allowing the draped yarn to be dragged off too.  That makes a new loop on your hand.  Index, middle, ring then pinky...  I skipped posting pictures of index & ring progression.
There's pinky waiting to be looped... 
Save your spot, Boomer needs some scratchies.  If you need to stop at any time & slip in  a pen with a pocket clip, this is how you know where to pick up again.  Top of the pen is top of your hand, easy peasy.  I only had a pencil handy for this picture.
See where the tip of the pencil is in the picture below? It kinda looks like a hollow in the tube.  
See how Boomer is such a big help.  This goes along quick because it is such a chunky yarn.  Don't forget to tug the tail down periodically as you go along.  Not Boomer's tail!
Now you have a giant coil of finger-knitting, its very similar to spool knitting.   Tie it off by pulling the end through the loops & tugging tight.  If you leave an un-knit tail about twice as long as the coil you can use it to do the stitching.   
I used a pipe-cleaner twisted into a needle.   Grab 2 loops each pass to connect them...
A little trial & error to make it into a chair mat.  Boomer was done playing with the yarn & moved on to playing with the pipe-cleaner.  If you are too generous leaving more & more spaces to get it stitched up faster it makes the edge rippled & its not as cushy.   This isn't a new project, but its relaxing & easy to do during TV plane or car trips.