Showing posts with label Sharpie. Show all posts

Tuesday, February 10, 2015

Artfully Sent Congrats card


Quick card, about 30 minutes, made using unknown papers, and the CTMH Artfully Sent Cricut cartridge.  I backed the "congrats" with silver glitter paper and coloured it with Sharpie markers.  The green starburst behind it was silver, recoloured green with Sharpie marker.  The envelope sized automatically with the automatic settings set at 7".   I made this for a my son's friend who's graduating high school early because he has enough credits.  Every Mom knows that's a success!
Sorry I'm still struggling with some pictures coming out sideways with blogger.  I have no technical fix skills to stop it, so I will continue to apologize each time it happens.

Tuesday, July 29, 2014

CTMH + NEW Shin Han Touch Markers

CTMH is switching their markers to the Shin Han brand.  Here are three very good links showcasing the markers.  Shin Han Touch twin markers 1 min 2 seconds, Shin Han colourless blender pen 1 minute 2 seconds, and http://www.touchmarker.co.uk/.  CTMH will be releasing more videos detailing these markers but here's the 411 until then.  I have summarized this from multiple YouTube videos and CTMH consultant videos for your reference.  Sorry for the lack of pictures, this is pure information at its best that I can share.  I think of it as retro internet, lots of info, not much icing, LOL!

CTMH will be launching Shin Han markers with the new August annual 2014-15 Idea book catalogue.  There will be 24 marker colours to choose from, and one colourless blender pen, each  $5.95 USD or $6.50CAD.  The colours are complementary to CTMH colours, including neutrals and flesh tones.  They will be available for Hostess rewards redemption on gatherings (parties).

These alcohol based markers are square, so they do not roll off the table.  They are tried & proven quality Japanese product available for over 20 years.  They feature dual (replaceable) tips; a brush tip and a chisel tip.  They are comparable quality to Copic brand markers.  They are fast drying, low odour that dissipates quickly, and refillable.  It is not known at this time if CTMH will have refill ink or replacement nibs (marker tips) available.

Three things that are important to know:   Store these ShinHan markers horizontally, they will fit in CTMH small, medium and large organizers to store.  Use a light pressure with these markers.  A heavy hand will damage the nibs.  These markers are juicy, so they will seep through most papers to whatever surface is underneath.  A pad of scrap paper, or a non-stick mat under your project is ideal to prevent ruining your table.  Or just use high quality cardstock.

Using a light touch, and repeating layers is the best way to increase desired colour saturation for shading.  When colouring a line-drawn-style stamped image, it is recommended to use heat-set solvent ink, pigment ink, or heat embossed ink to prevent the lined image from being dissolved and smeared.  These markers will blur water based dye ink (stamped) images.  That is not a bad thing if you use a pale ink for a line-less effect for your project.

Utilizing the blender pen and blending techniques the colour variety is quite broad.  Layering ink lightest to darkest is the easiest way to control the level of desired colour saturation. This way achieves soft, blended, watercolour-like or pastel images.  OR go ahead and try dark to light blending for more masculine effects, heavy visual images, teenage style, graffiti, or cartoon images.  They're your markers, the more you play, the easier they get to use.

The colourless blender pen is an essential tool to complement your ShinHan marker set.  Simply scribble off to clean the colour away.  While a project is still fresh coloured or damp, you can:
Remove excess ink colour
Dilute or soften ink saturation
Patch a mistake
Tidy an edge
Blur an edge
Create highlights
Define a shadow
Create dots, stripes, and details

So, big deal, 24 markers, wow.  24 markers; each colour self layered 3 times =  4 colours per marker x 24 = 96 colours.  If you take those 96 colours and do a shade grid, one colour each line vertical, then repeat horizontal = 9216?!?   BUT half of those are duplicates because of the nature of the grid, so divide by 2 = 4608 colours?!?  That's a bit more versatile value I guess, assuming my math isn't too wonky.  Please correct me if I've goofed up and I will happily amend my calculations.

Alcohol ink Markers can be used for more than just colouring, after doing a test spot, try re-colouring these things:
canvas
chipboard
complementing your mixed media projects
gems & rhinestones
plastic- sequins, pearls, shrinky dink plastic
glass
ribbon
fabric
buttons
metal -brads, eyelets, staples, charms

Don't be afraid to cruise the internet to see what & how Graffiti Artists, Cartoonists, or Art Journaling Artists are creating with their alcohol markers.  Knock-off markers are available online for cheaper prices.  If they are not labeled "Made in Korea" they are fakes.  The fakes will have spelling mistakes on the labels, poorly fitting nibs, caps that are disagreeable to remove/apply, and are often more smelly.

Splitcoast Stampers Blending Alcohol ink markers tutorial.  Is there anything paper related SPC can't do?  Oh, and one last link Kaszazz brand Alcohol markers document, a really good resource for all things alcohol markers, beautiful instructional booklet.  I printed one out for reference, it's that good.  I know its not the same brand, but techniques are similar for almost all the alcohol marker brands it seems.

I will leave it with you to investigate techniques of using markers.  I am a complete newbie to these since Sharpie are my normal go-to alcohol markers.  I'd love it if you left a comment telling me about how you use your markers, techniques to share & try, fails...  Anything really!  Thanks for stopping by, I hope this is helpful information for you!

Spoiler alert!  I've got a fun stamping project share coming up, starting August 1!

Wednesday, November 27, 2013

Sparkle Xmas Card

This was a new technique I learned at the November 2013 scrapbooking crop sponsored by Kimi Orton, owner of ScrapTherapy.  She gave very good written & verbal directions on how to use glitter, I will paraphrase them here.
1.  Sprinkle glitter on Sookwang adhesive paper in the usual way, save the remainder & dump it back in the container.
2.  Spend some time with a "peeloff" of choice.  What is a peeloff?  It is a lazer cutout vinyl sticker, sortof like a stained glass window if that makes sense? Peeloffs come in all sorts of variety so have a look at your local scrapbook store to see what you can find.  Weed the vinyl: Use a pokey tool to remove the filler pieces, or save them in a 2 step process with transfer tape if the image allows dual use.  I didn't save the packaging to tell you what this Christmas village house was from, sorry.
Tip:  I used the tip of my microtip nonstick scissors to poke the little bits out.
3.  Trim a piece of transfer tape, apply it to the vinyl, burnish well.
4.  Peel up transfer tape & apply vinyl to glitter paper.  Remove the transfer paper.  Question: is it okay to use preglittered paper?  Answer: YES.
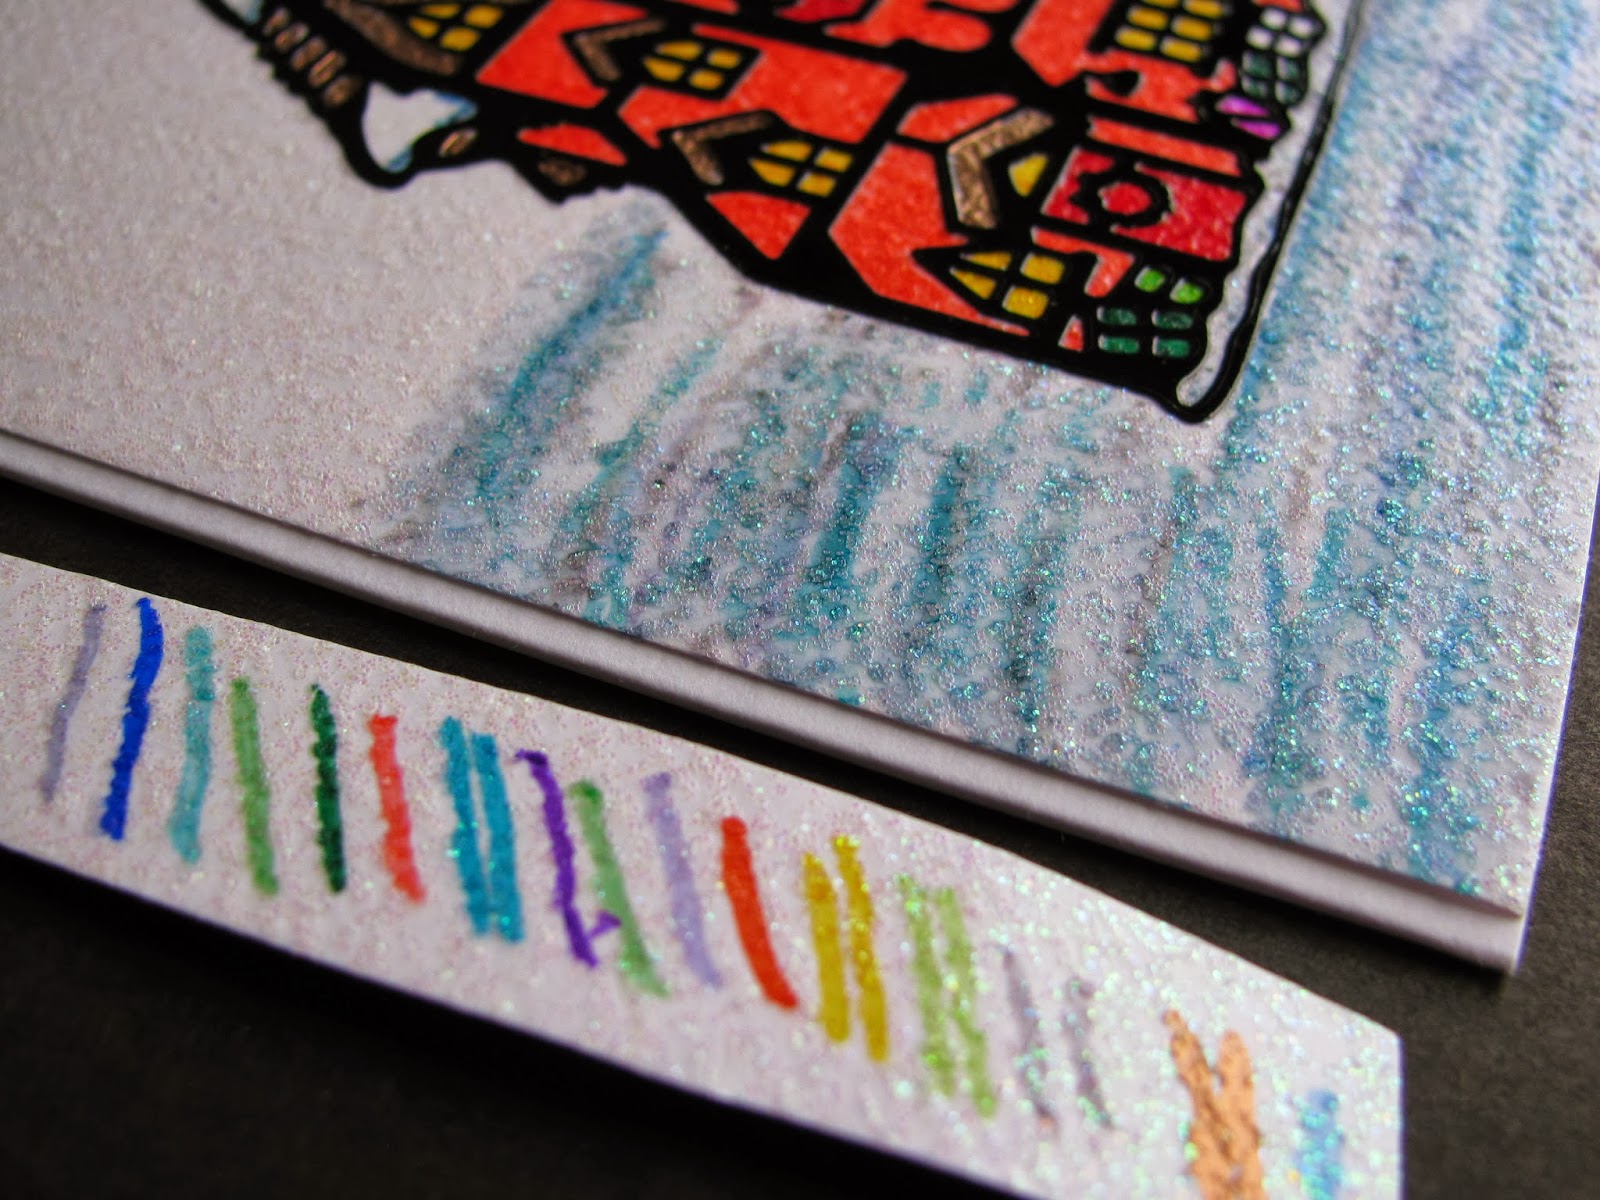
5.  Get busy colouring with alcohol based markers (copic, CTMH, Sharpie, Bick...)
I used Sharpie markers because that is what I have.  I couldn't find my alcohol blending pen, so I bought a Copic 000 no  colour blending pen.  Blending the variegated stripes of colour softened them nicely.  I was even able to fix an oopsie colouring on the overhanging snow in the roof.  You can see I was testing Sharpie markers on a scrap; I used a range of blue, grey, silver for the "snow."  I'm not entirely happy that it looks like the house is floating on the background.  Considering I was first time playing with technique I don't think it was a big deal, it's still pretty.  The card is a CTMH shaped card, from my consultant kit, they come all tucked in their envelopes.   It was a pleasant surprise to have a lovely edge on the card.  I traced the shape on the back of the sparkle paper and manually trimmed it out.  That's it.  I will have to percolate on it a bit to decide what will fix the floating look, maybe some doodling?  Its now winter, so time to enjoy avoiding the cold!

Saturday, May 4, 2013

CTMH Liquid Glass

Hi again.  A friend showed me a trick with glue I have not seen anywhere so I would like to share it. As always, click on any picture to enlarge.
 I used unbleached kitchen parchment paper & made a row of dots of Liquid glass, and let them air dry.
 I coloured on the parchment paper with Outdoor Denim colour CTMH markers & then dripped on a few dots of Liquid glass, those are the 2 lil dots in the lower part of the picture.  They give me eye-deas!  On some clear dry drops I coloured them with the base & shade markers, to the left is the base, to the right is the shade.  They would be nice accents for flowers, boy theme projects, rivets, water bubbles, bullet points for journaling...
Here is my results using sharpie markers.  The penny is to reference size of the dots.  The dots closer to the penny were done by colouring on the parchment paper & covering with the liquid glass.  The darker coloured dots to the left were coloured with the same colour sharpie on dry dots.  The bottom dots are clear to show the difference.  The one on one's position on top of the 11 is a dry dot upside down showing it would make neat distortion effect.  It is a bit cloudy on the flat surface which could be attributed to air drying on the parchment paper?  I would adhere these dots to a project using more liquid glass. 

A few words about this Liquid Glass adhesive glue.  It is super strong & bonds most surfaces really well (paper, cardboard, metal, wood, plastic, fabric, fibres).  There is a possibility it could stain through fabric if just used to tack down so you would need to plan for that with strategic cover up elements like buttons, flowers or something layered over contact points.  If you get it on your fingers, it is there for awhile & feels like dry crazy glue (if you've ever had that stuff dried to your fingers, you know, it's just strange feeling.)  It dries in about 10-15 minutes beautifully clear & glossy.  I've used it to glue down old rub-ons of footprints that were dry & wouldn't stick, they looked like epoxy stickers when done (it was a great save for that old project).  After using Liquid glass a good tip is to thump the bottle against your table to bring it down out of the nozzle, then to squeeze the bottle gently to blow any remaining out of the tip to keep it clear.  Storing it upright also helps.

I always wanted to try this:  Look what happens when you dry it (on parchment paper) with a heat gun!  It reminds me of baby drool, kids slime crafts, learning to beat egg whites, learning to pull taffy or candy, or even scuba bubbles...  The clear blob is a dot of glue heated.  The double " blob is marker coloured on the paper & dripped with Liquid glass & heated.  The bottom half of the squiggle is purposefully over heated & became caramel coloured, The middle section is bubbled a bit with the proximity of the heat gun, the top half is air dried clear.  The puffy bubbles are firm, which could be a great texture experience in a brag book.  This adhesive is great value, a little goes a long way!

Sunday, January 6, 2013

Nursery Vinyl

This project has been a labour of love.  I planned & thought & was stalled multiple times.  A friend helped me put up the vinyl in the nick of time, 4 days later my baby boy was born.  I will give you the details of what I did & the pictures can be clicked on to enlarge if you like.

 I ordered Oracal 631 (indoor) vinyl from OhMyCrafts.com on a sale of irregular vinyl with bonus transfer tape.  I snipped colour samples of each piece for reference with the cartridge handbook.  I then planned out the colours for the animal layers.  I had to do multiple pages on the gypsy with assigned colours for the layers.  I used cricut Zooballoo cartridge & my Gypsy to plan out the animals & letters. The animals are cute, and mostly only 2 layers.  The animals are 10.6" and the letters are automatically sized to match.  I spelled out the names of the animals on separate pages about 1/3 the size of the animal letters.  After double checking everything I kiss cut the vinyl on my Expression cricut machine (12x24" cutting mats).  I cut apart all the pieces, weeded the waste vinyl out, and sorted the animals layers so they would be ready to apply.  I won't go into vinyl application instructions here, there are plenty of talented youtube videos & other bloggers who have explained it beautifully.  My friend & I used a lazer level & post-it notes to guestimate positioning around the room.  I didn't note what measurement we used but the top of the upper animals is one height, and the bottom of the lower animals is the second height.  If I remember right it is about 2' between those lines.  I also could've cut a shadow layer for the base of each animal but I didn't want to add more work to this project.

The alphabet is purposefully mixed up for visual interest.  It will be a great memory game later, IE Where's the Fox? 

Here they are on your left as you enter the room & look to your right.


 Hippo & Elephant are kind of traitors, they were difficult to align and demanded multiple attempts by hand to apply.  Using transfer tape for the majority of the vinyl helped.  But, those two brats are probably going to have to be recut & redone since they languidly hang on the wall, baiting everyone who looks to smooth them back down (petting?).  They were threatened with the hairdryer to stay stuck but alas, they continue to rebel.  Washing or wiping the walls pre-application might've helped too.  The cricut tool kit was indespensible for this project. 

Sitting nursing my little one I see picky things like funny spacing.  Unicorn, Cat & Elephant layers are all the same with lilac as the top layer, pink as the bottom layer.  Giraffe could have had his layers the other way with tan on top, brown on bottom.  Interestingly, the tan vinyl seems to fade into the pale blue wall & is hard to see.  Sharpie markers helped to distinguish mouthes & details on a few animals.  I really like the hand doodling of lips, eyelashes & whatever other sweet details evolve with love.  Quail was outlined while on the wall , Vulture & Tiger could also use outlining.  It would've been smart to graffiti them before they go on the wall, but hey, they're up now & I might get to it, eventually. 
2 hours paper planning
4 hours planning on gypsy
2 hours cutting
2 hours weeding
1 hour organizing layers
5 hours visiting with friend & putting up
 = 20 hour project worked on over 2 months, well worth it!

Happy New Year everyone!

Saturday, September 22, 2012

Seventh Challenge, Canadian Swarm 2012

Seventh Challenge by: Lilygirl:  Here is my challenge to you!!
1. Steal an object from a family member, friend or neighbour ( for the faint of heart an object found in a thrift store will do in a pinch)
2. Alter object using at least 2 Cricut cuts.
3. Quietly and unnoticed return altered object to original owner/spot (if this is a thrift store find, gift it unnoticed to someone ie. hang on neighbours fence porch, door etc..)


What did I "steal" to meet this challenge?  Identity?  Maybe.  How about I steal some dignity?  We all need more Ha ha's in life!

I was able to use some of the gypsy freebies that came with my circle memberhsip renewal, specifically the "Moustashes & Glasses" digital cartridge.  I figured out it is about 4cm the width of the average nose, very scientific guessing with a ruler, right?  I picked out all the moustashes, and made the very skinny one 43.8mm wide x37.5mm high, and let the others automatically proportion themselves a la gypsy.  These are different types of vinyl, the brown is wood grain ConTact paper, the white & silver is Dollerama shelf liner. 
 The silver is ConTact paper.  It looked quite blah.  All cuts were done "kiss cut,"  blade dial 3, cricut pressure dial 3.
Look how nice they become with some help from Sharpie markers!  The brown & plum coloured ones were done with Permapaque markers by Sakura.  They're nice, but they don't reveal the metallic shine as nicely as Sharpie does.  
 I have another post coming, I just need a photogenic feline for the final reveal of this crime!


Sunday, July 10, 2011

Belated Cards

These are some belated birthday cards I made with my little cricut machine.  I used "Carousel Lite" cricut cartridge, Silver Contact paper, and sharpie markers to colour them.  The carousel on the left is cut at 4.5", oops, too big, I'll save it for something else.  The one on the right is cut at 4".  I used a piece of scrap paper to block the marker to make nice straight lines at the bottom.
 These are 3 bumper cars one is slightly bigger than 2", On my Gypsy I altered the other two.  The one on the right is slightly smaller and narrower width, and the one in the lower left corner is angled a little forward to slant it.  I also "hid" the extra details of each cut because I did not want the number 7 on each of them.  The "Happy Birthday" were extra cuts I did when I made cards with pretty holographic scrap paper.  I figure its easy enough to cut extra pieces of useful phrases & test cuts while I've got everything sitting out & in progress.  It saves rushing last minute style sometimes.
 I had to tip the cards to show the pretty shine the silver contact paper gives, the cards are normal 4x6 proportions, just pre-made Recollections brand blank cards & envelopes.
 The border trims are scrap Basic Grey brand paper.
I added the black seat detail, edged the bumper cars with black sharpie and  hand wrote the numbers, no particular meaning. I think they turned out pretty well.

Sunday, June 19, 2011

Canadian Cricut Circle Calling Card

I've been torturing the participants of the CCC Swap about an surprise enclosure for everyone for participating.  I decided that I'll probably never be able to afford to go to a big Cricut Swarm gathering.  The only other way to get an official circle charm is to participate in a swarm or Circle membership.  
 I've already posted my experiments with shrink plastic.  Here is what I was really wanting to make.  I cut out the circle antennae thing on my expression with Gypsy assistance.  I punched holes using my "CropaDile" tool.  I used that liquid sharpie & traced a Maple Leaf that I printed from the internet somewhere.  It wasn't perfect sizing so I had to trace a bit smaller.  This is the before & after pictures.
I definitely made extra & played around with an older magnetic Making Memories stamp set.  The supporting tool wasn't quite long enough so I improvised with a 6" metal ruler which worked well.  I used pigment ink from my stash, its dollarstore unknown brand.  The red paper is leftover posterboard from the post about making a Valentine mailbox.  The maple leafs I punched with a manual Marvy brand paper punch.

 I had a post all done about making these additional calling cards to go with the Canadian charm, but it went bu-bye by mistake for me.  Maybe one day I will learn how to back up my posts in case Blogger bites the bullet & all my posts vanish.
Here is the charm compared to the original charm I received when I signed up to be a circle member.  The green string was a lucky find at a chinese store.  It took me awhile to figure out how to attach the charm to the CC when it occurred to me to just tie it on & call it done.

Wednesday, June 15, 2011

Shrinky Dinks!

Well, I remember them being called ShrinkyDinks.  I have read a few places online that say plastic with the #6 recycle symbol also works as shrink plastic, but I have not tried that.  Other internet reading cautions that when heating plastic to do it in a well ventilated area.  Apparently some plastics when heated release a very fine powder, and of course fumes are always something to be cautious of.


Here's my nice set of sharpie markers.  I wrote each colour on a scrap of this shrink film to see how the colour changes when heated.  The strip on the right is what some permapaque markers by Sakura look like once shrunken.    A little experimenting up front helps get better results.  The colour gets darker after shrinking for some, more intense for other colours..

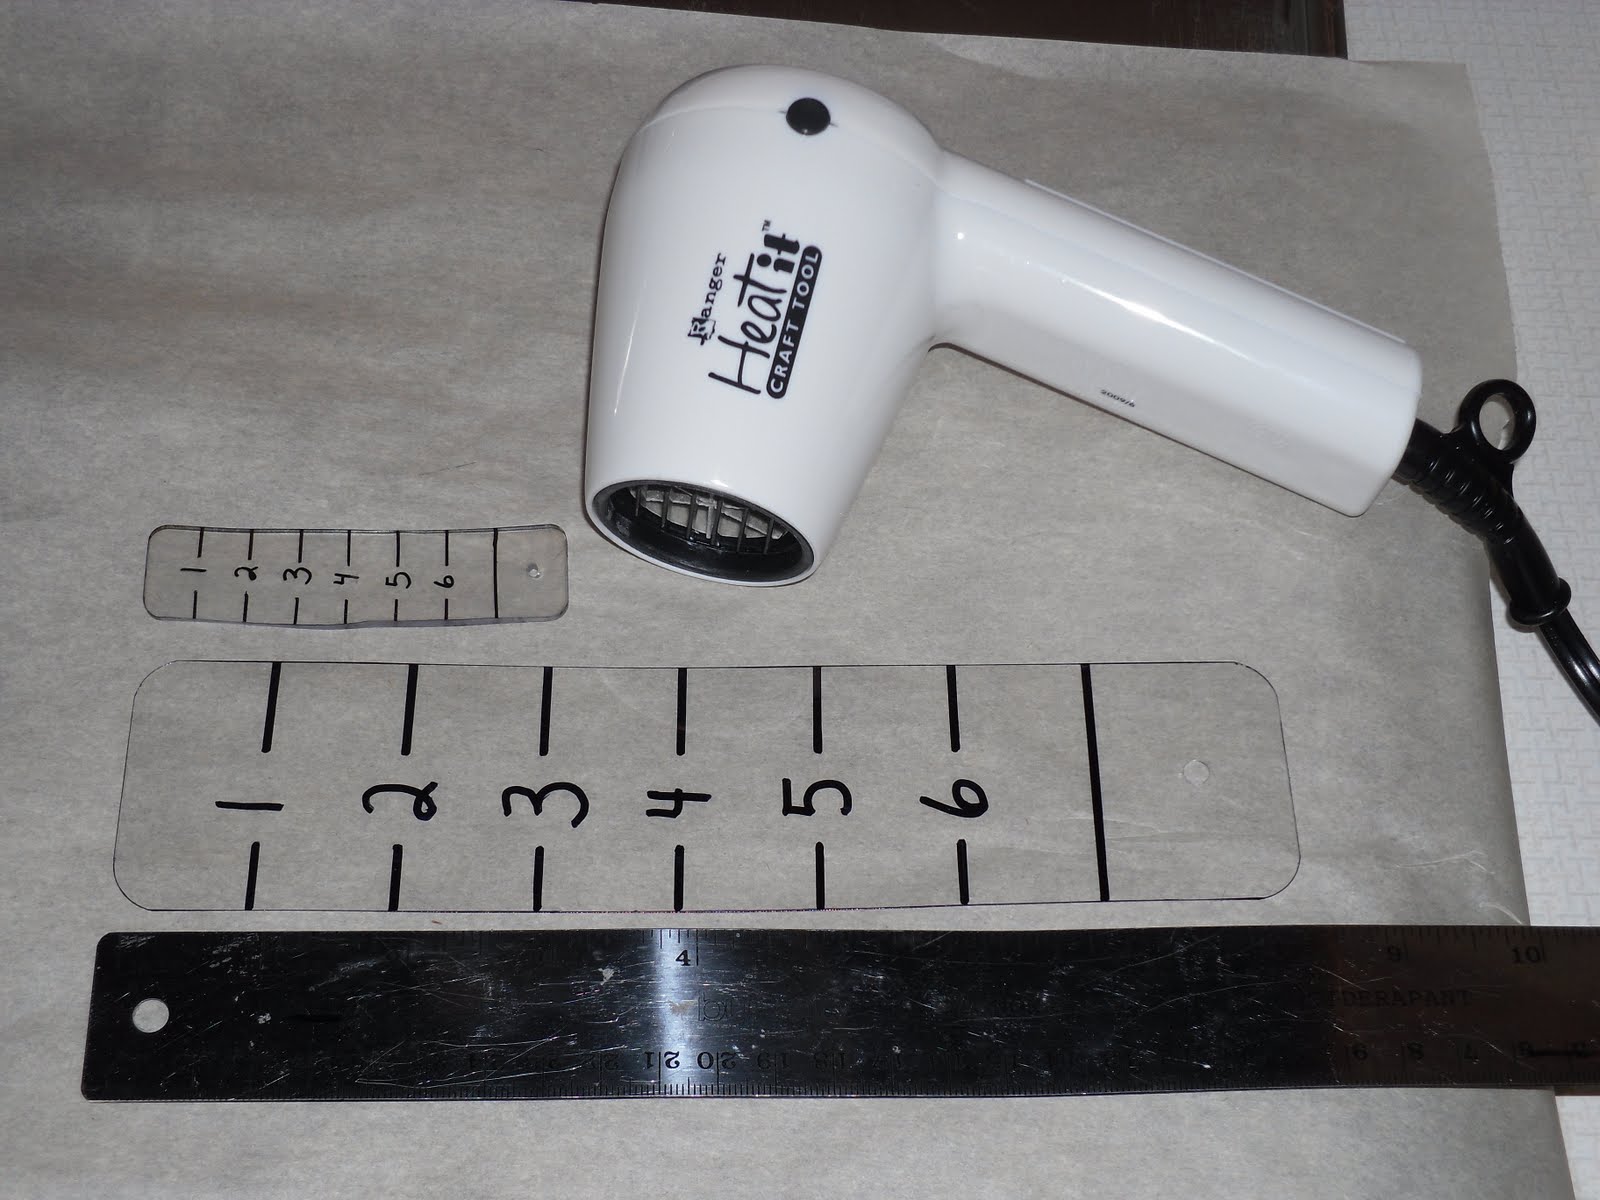
This is a sample ruler to determine shrinkage.  The package says it will shrink 20%.  Ya, using cross multiplication I figured out its more like 35-37% shrinkage.  I'm not a math person but I do remember how useful that equation is to solve for an unknown.  Here is where going back and forth between imperial & metric is an asset for simple measuring.  6"=15cm.  I have no idea how to make a teeny decimal point number translate into imperial.  I'm no math teacher so you can do an internet search for "cross multiplication" if you need a refresher.

I did an inch ruler, each number is one inch apart.  The side bars on one side are 1/2" marks, the other side is 3/4" marks.  They don't lay 100% flat once shrunk to the stopping point.  I really like my Ranger heat gun, its hot, low force, easy to hang onto, and best of all its quiet!
This shrink film stuff gives me ideas like the little shrunken head apple faces from old elementary school projects.  I wonder how distorted I could get doodle faces to look on shrink plastic, hee hee hee!  I shrunk these on an inverted cookie pan with parchment paper to prevent super bonding to the pan.  I used an old chopstick to push the pieces around while heating.  I did it over my stove cooktop with the fan blowing high and the patio door open to drag in fresh air.  Be careful if you try this yourself.  There will be another post using shrink plastic in July.

Sunday, May 29, 2011

Birthday card

I needed to make a quick birthday card for a little girl.  I learned how to make a "shaped edge" card using  my gypsy from a nice video by Sheila's "Shes a SassyLady"blog a while ago.  This shows how I put the images on the virtual mat.  The left hand dark arrow on the screen points the direction the mat goes into the machine.  Yes, I've goofed & put the wrong end in before.  The mat can go in the machine from either end, but if you have a plan & put it in backwards its an oopsie moment.
This shows how I put the paper on the mat so I don't have to cut it out 4 different times.  This is a great way to use scraps or smaller pieces of paper.  There is one blue piece I didn't even bother to cut off to fit the mat. As long as paper hangs off the end & not the sides of the mat its no big deal.  I learned to plan out my mat from the Cricut messageboards.
This is how it looks after its cut out & the extra paper is peeled away.  The spatula tool is helpful to get them off the sticky cutting mat.  I cut out the lilac base already, you can see partial little girl silhouette on the left edge.
Here is the finished card with the layers glued together using a zig glue pen.  The little girl & cat is from "Meow Lite" cartridge, the candle is from "Wild Card" cartridge, the cupcake is from "Gypsy Wanderings" a preloaded cartridge in the Gypsy, and Happy Birthday is from "Paper Pups" cartridge.  The gypsy definitely makes it easier to fully access the images on the cartridges I own.
This is some scrap hologram type paper from a wrecked gift bag.  It has some sort of plastic coating, so I used a sharpie to colour it.  I noticed that if I keep colouring it in, the colour gets darker with each layer, a sweet lil discovery I think :)  The 4 square scrap shows the colour progression; the top one is not coloured, then one coating, two coatings, and three coatings at the bottom square. 
Here is the inside, again with the sparkle.  I know she liked it

Sunday, February 6, 2011

More doodling

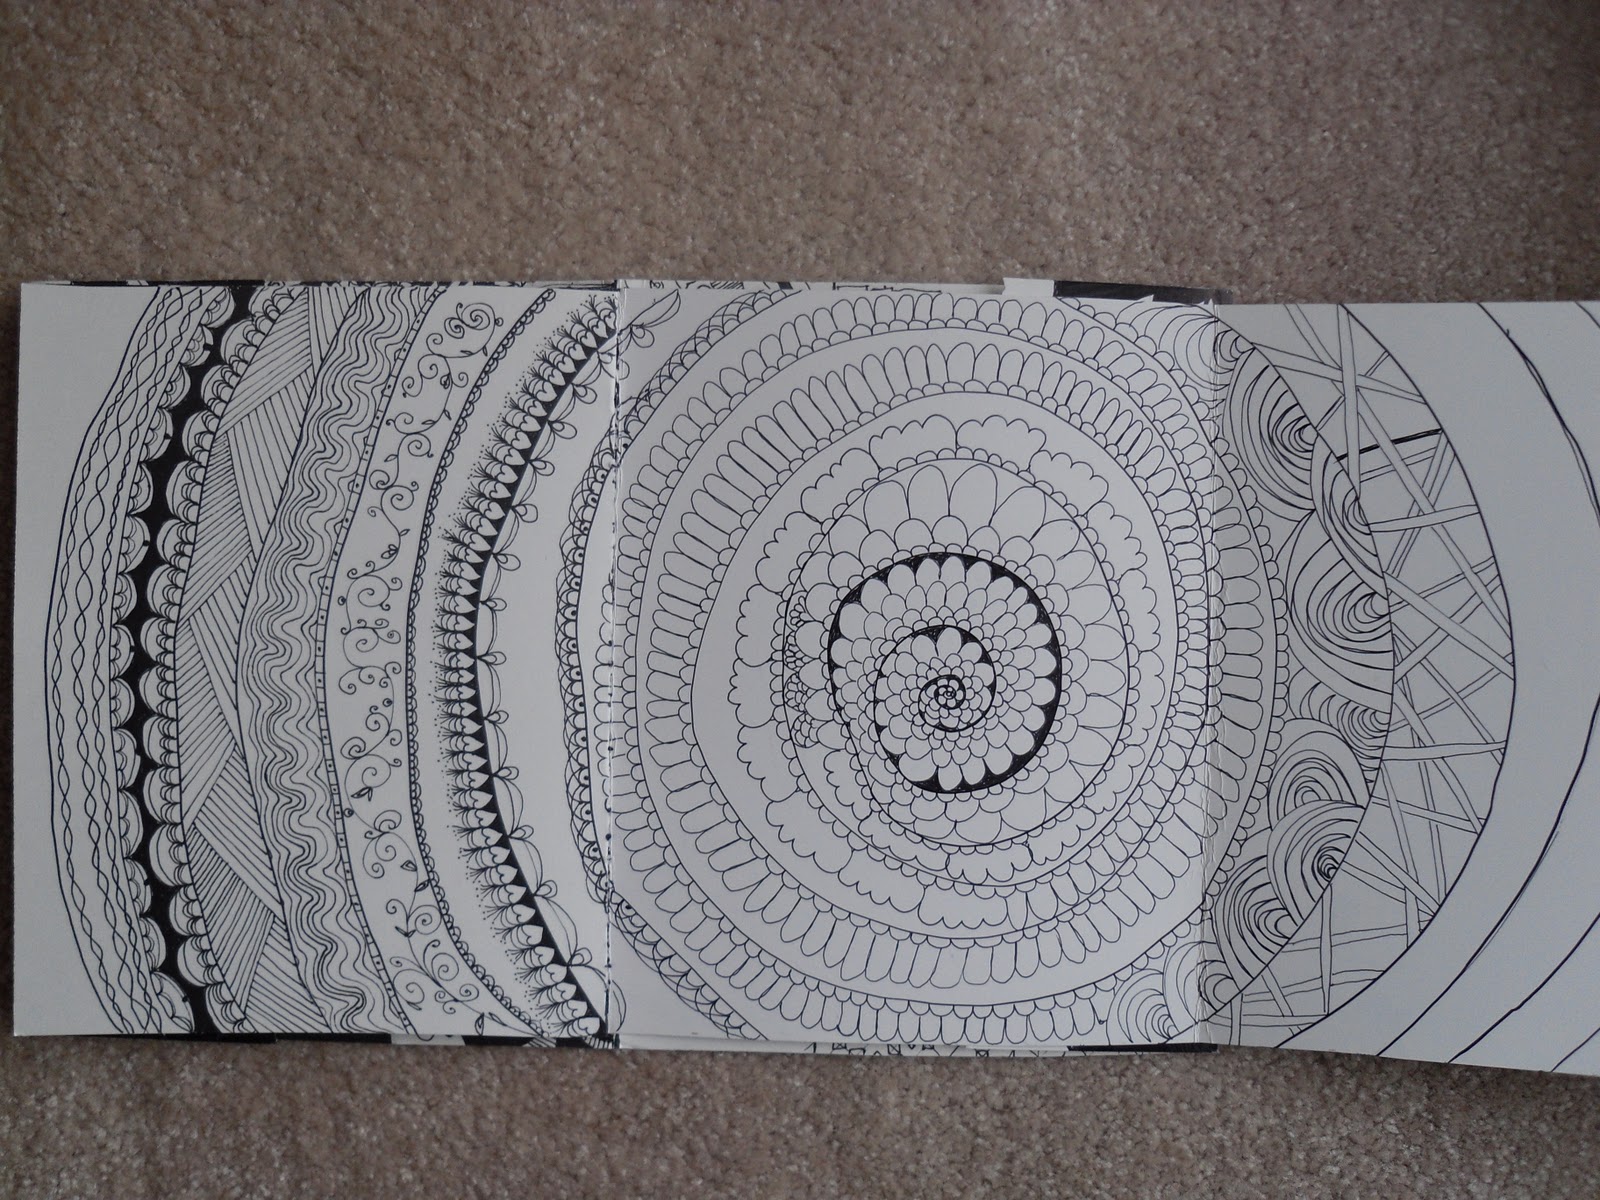
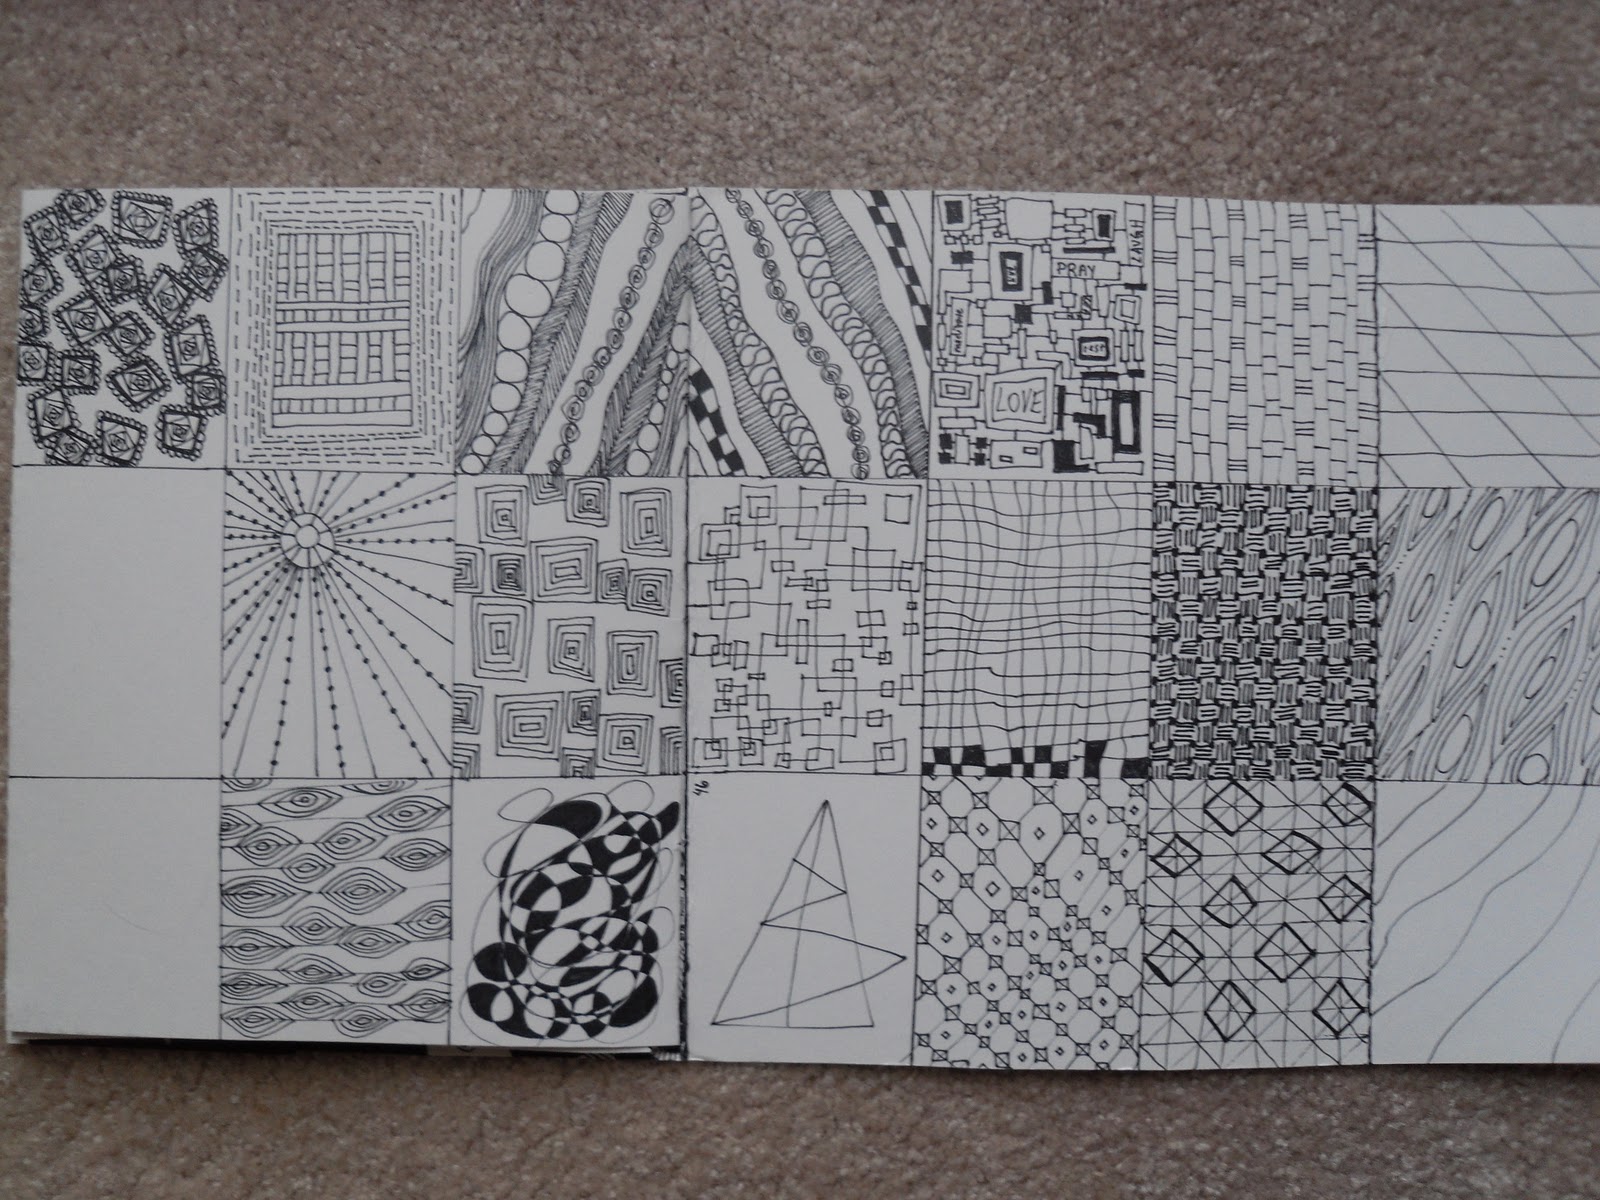
I've been busy all over the internet, loooove You Tube, Google images, & of course blogs everywhere for inspiration. My first picture post was the last page of a doodle booklet i've got going on.  I made the booklet from a piece of poster board from some local dollar store.  I will try to remember how I made it & post directions in a few days.  I need to go back & find the artist blog where I learned to make it to give proper credit.  So if that was the last page of the book I really should show the rest of the pages.  I'm hoping they will inspire someone else to get doodling, its relaxing in a meditative way.  I like that no special tools or pens or anything are needed, just a few minutes to let my mind wander away constructively.  Go ahead & click on the pictures to magnify.  Another neat thing is "Ctrl" & "+"  magnify images & "Ctrl" & "-" reduce images, love using that to see details or to relieve my tired eyes.
This is the cover of the book opened out flat to show front & back.  Oooh, I just picked all my pictures out at once & then I can go through & add in the text.  More blog learning, yippeeee!!!!

 This is page 1, being a flap style book you can see a crease sort-of.  I don't mind it.  I think this is my favorite page of the book.

 Page 2.

 Page 3, I traced an old CD to get the nice uniform circles.

 Page 4, looks kinda like a shell or something swirling.  I'm not sure, but I will probably add to this one when it occurs to me.

 Page 5, its really 3 parts because of how the book folds out.  I like how the book changes appearance as it is unfolded.  That was a totally unexpected effect.

 Page 6, I may go back & drip some rubbing alcohol on this to spread the Sharpie ink around for visual interest, not sure yet.

 Page 7, this is one that looks different closed over page 6, lots of room for more details.

Page 8, this is the last pages.  I did this booklet entirely with a Sharpie pen, the dual point marker is my favorite as it is easy to switch fine or medium tip points all I like.  I worked on this book for about a month, in fits & spurts in 2010.  There is room for more to be added but I got stalled & put it away for awhile.  I wanted a reference point for all the cool techniques & styles I've seen & this was an easy way to dump it in one spot.  I've got a second book started somewhere using colour Sharpie markers & will post that some time in the future.