Showing posts with label Paint. Show all posts

Wednesday, December 11, 2013

Monoprints

These are plastic templates I cut with my cricut expression from the CTMH cricut Artbooking cartridge.  They are dirty because I have been monoprinting with my Hectograph that I made back in July.  To make these templates, I used plastic pocket folders that I got for 30cents each with back to school sales.  That tip I learned from Lindsay at "the Frugal Crafter" on youtube. 
One side is shiny, the other matte.  I saved the scraps and used them as window accents in my recent Halloween-mini-book.
Here is a really good cricut tip:  cricut image direction.  She expains how to know which direction an image will cut on your mat.  I put a piece of tape on my cricut to remind me.  Glamorous?  Fashionable? No, not even remotely.   Practical, you betcha!
The arrow of green painters tape on the handbook shows you the 6" x 12" overlays are in different orientations (vertical and horizontal).
So here are my monoprints!  I was so excited to finally try these.  In about an hour, with a modest selection of cheap inexpensive acrylic paint I got on sale at Michaels, (50 cents each, a real score!), I went with the recomended 4-7 colours, and played with a brayer and wasted printer paper.  Here is a fun video showing how to do it Gelli plate monoprinting layers.  I kept it simple with these, but some of the uglier less pretty pages can get overprinted later to get more visually complex.  That's where some real art comes in.


I have a stack of blank school-work that a certain teenager generates.  Well, the school doles them out, he just leaves a lot of them blank.  They are begging to get monoprinted, and will be even more interesting with the assignment questions and various doodles that did get done.  I will show you in another post what I've done with these papers.

Playing with supplies, it does my art happy!

Saturday, June 25, 2011

My secret

Okay, as promised, here's what I figured out recently.
  The shimmer spritz sprays are beautiful, but expensive.  Some people on the internet have figured out how to make their own, and thats the best kinda sharing the internet does.  Tim Holtz makes these Ranger brand micro misters, they're small, maybe they hold 10cc (2 teaspoons)?   The problem with most sprayers is they eventually get clogged & need to be rinsed under hot running water.  I've played with the airbrush kids marker Sprayza set, thats a lot of blowing work!  I was snooping around a local craft store & had a look at the airbrush supplies.  It dawned on me that airbrush paint is super fine, so I bought a bottle, blopped a few drops into the mini spritzer, added water to fill & WHOOOO HOOOO!!!  It works beautifully!  It doesn't glob up into cement in the spray bottle because its already a water based product.  The bottle says to wear a mask if using, but thats airbrushing, for a pressurized superfine spray mist purpose.  I'm using water in a spray bottle in small amounts.  As you can see it gives great coverage across the bottom quarter of the page.  Any spray bottle would work well with this.  

If you try it & use it a lot, you should wear a mask,
 protect your lungs, they're important too.
AND
Never spray alcohol mixed with paint or dye.  Alcohol was never meant to be inhaled and that could do some serious lung damage.
Post back & tell me what you made with it, I'd love to know!  If you share my secret, go ahead but please reference credit back here to nothousework.blogspot.com  Thanks!
Viva la internet sharing, hee hee!

Friday, June 24, 2011

Canadian Eh!

To continue yesterday's post, here are the pictures!  I have had this rattling around in my head for a few days now. I got this done over two days.  I've been surfing the internet for Canadian inspiration and was only sort-of inspired.  I've been reading the Circle message-board chat & all these great challenges have been coming through.  There's always a challenge to use what you've got; to use a cricut cartridge you haven't used; to use a new product.  The ones that caught my attention were to make something Canadian (I started that challenge), and to make a layout ready for pictures.  This is some handmade paper that I got from a bulk pack at Costco a few years ago.  Its nice, but a bit bland.
 I bought 3 colour sprays to try.  Basic colour theory allows most colour combinations to be made from yellow, red, and blue.  I also have white and black so then whatever colour I make would be bright or dark enough.

These sprays all have a fine pearlized shine to them.  I used lemon meringue (yellow) Tattered angels brand glimmer mist; "perfect copper" and "forever blue" perfect pearls brand mists. I sprayed the blue across the top half to deepen the colour to more night sky looking.  Then I spritzed the copper close to the page & let the colour pool so I could tip the page to let it run across in streaks.  The yellow was added more to the right & middle of the page to bring out a green colour.
 The below picture shows more mists used.  I will keep secret until tomorrow how I made the bottom half of the page pearlized creamy looking.  These spray mists use up fast, kinda disappointing to me.
I used the gypsy digital font cartridge and welded the letters together.  I manually snipped off the inside lower curl of the C afterward because I didn't want to cut it out again, I just didn't like the look of a tail curling in like that.  I don't know the brand of papers used, they were all scraps, yippee!  It's way easier to assemble these layer things on the mat with a glue pen than to chase them all over a layout.
This is my first guess at placement of pieces.  I manually cut out the Inukshuk from scraps.  An Inukshuk is the singular Inuit word meaning "in the likeness of a human" or "someone was here" or "you're on the right path."  I just really liked the idea of early graffiti, hee hee!  The circle was a scrap of aluminum foil that I used to sharpen a punch.  I saved the circle in my scrap bin, but it didn't make the cut to be cast as the moon.
Here is the words layered.  I really like the look of the plaid peeking out.  I haven't glued anything down yet, still playing around.  The leafs are layered the same way the words are, cut from the gypsy wandering digital cartridge.  I edged the page with tattered angels glimmer glaze "midnight rendezvous" (deep denim blue) which is a fine glimmer paint to visually ground the edges.  The head has 2 layered leafs for visual interest.
This is it, this is the final look of the page layout.  The northern lights appearance don't seem to show up so well in the picture but for real they shimmer.  I also like the celebration effect, not quite hockey arms up, "we scored!" look either.  Oops, looks like I didn't snip the curl off the C on the plaid shadow layer in time for the pictures.  I just amputated it off now, no-one will know, eh.  Canada day coming up soon, I hope you have a nice one!

Sunday, April 10, 2011

Older projects

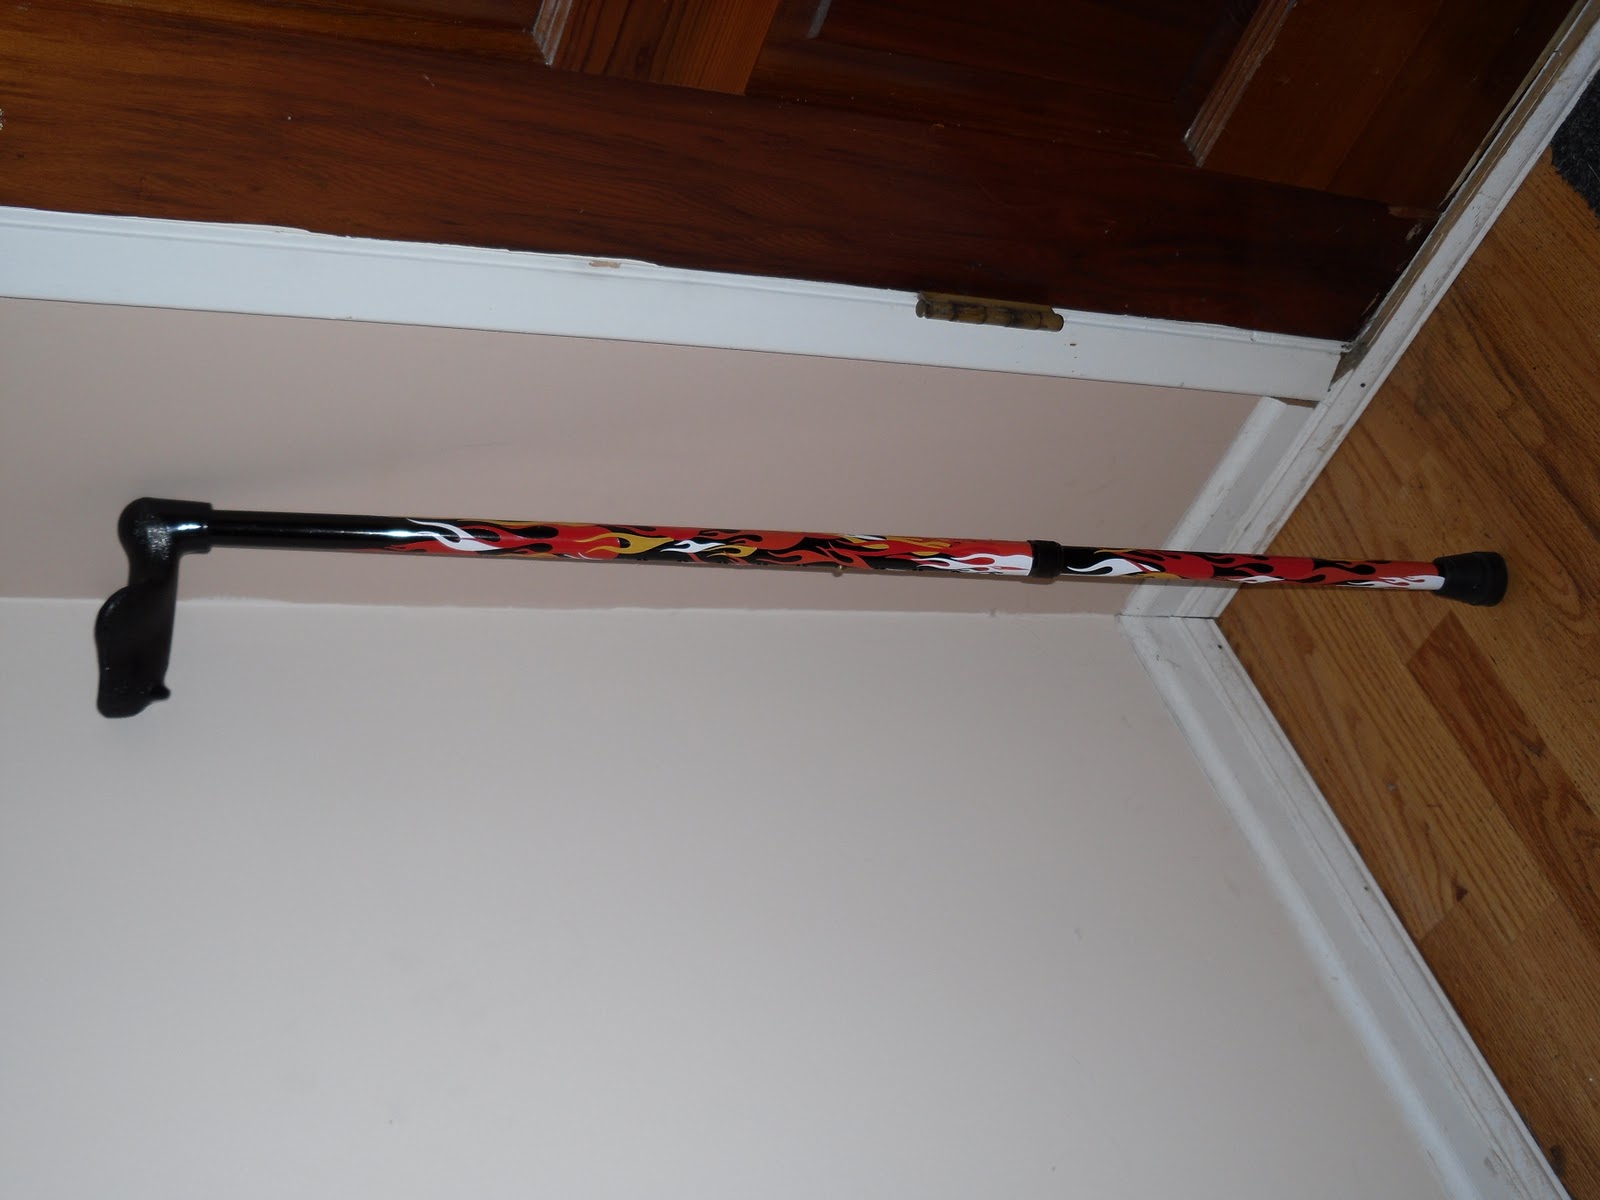
These are some older projects I've done.  A good friend was recuperating from a surgery & I offered loan of a cane.  It was just sitting around & she could use it so the match was made.  We were  gabbing away over tea & a devious idea occurred.  I asked, if the cane were decorated, what would she have on it?  Bubbles?  little cars?  flames?  She replied, "Oh, definitely flames."  I asked ascending or descending?  She specified ascending so it would seem that with every strike the ground was on fire.  The idea was set.  I asked a local auto detailing shop for some scrap vinyl & together with Gypsy & "Indie Art" cartridge I cut out a whole lot of flames in varying sizes, white, yellow, orange, & red.  Again with the sideways pictures, sorry about that.

She didn't know I was doing this & I speedily delivered it on April fools.  We had a happy giggle.  We're all so happy she's mobile again. This is not a reminder to hurry up & return it, its a statement piece now, hee hee! 


I make our own dog beds from time to time.  I take an old blanket & fold it in half, marker a line down it, fold it in half the other direction & marker again (divided into quarters).  I bomb it to my sewing machine & zigzag like crazy 2 seams parallel, bookending the black lines.  Once they are cut apart (between the zigzaging) they make fine dog beds.
 Of course Boomer has to try them first.
 Looks like they are Boomer approved!


Last year I bought Kiddo a foam filled chair.  The problem is it was the last one, on sale & bright orange.  My brain couldn't leave such a good price.  I thought, oh yeah, I can dye that cover.  I bought some RIT dye, several packages of dark blue & several packages of navy blue.  I twisted that cover onto itself, soaked it & added it to a big bucket with the dye.  Thankfully I remembered to wear gloves for this.  Once it had sat for about 20 minutes, it was squeezed out some with Hubs help & re-twisted the other direction for a repeat soak in the dye.  RIT instructions were followed & this is the result.  We called it "the tiger chair" since Kiddo loves tigers.  Occasionally it is called the moldy orange.  Boomer doesn't care, despite the demonic glowing eyes, he approves.

Here's my orchids blooming last year, shared with some mini daffodils.  Yippee for spring!

Sunday, March 6, 2011

Zombie Things

What is this?  Some good guesses were: something ceramic? something bone? a bat? a stick? 
All  will be revealed at the end of the post...


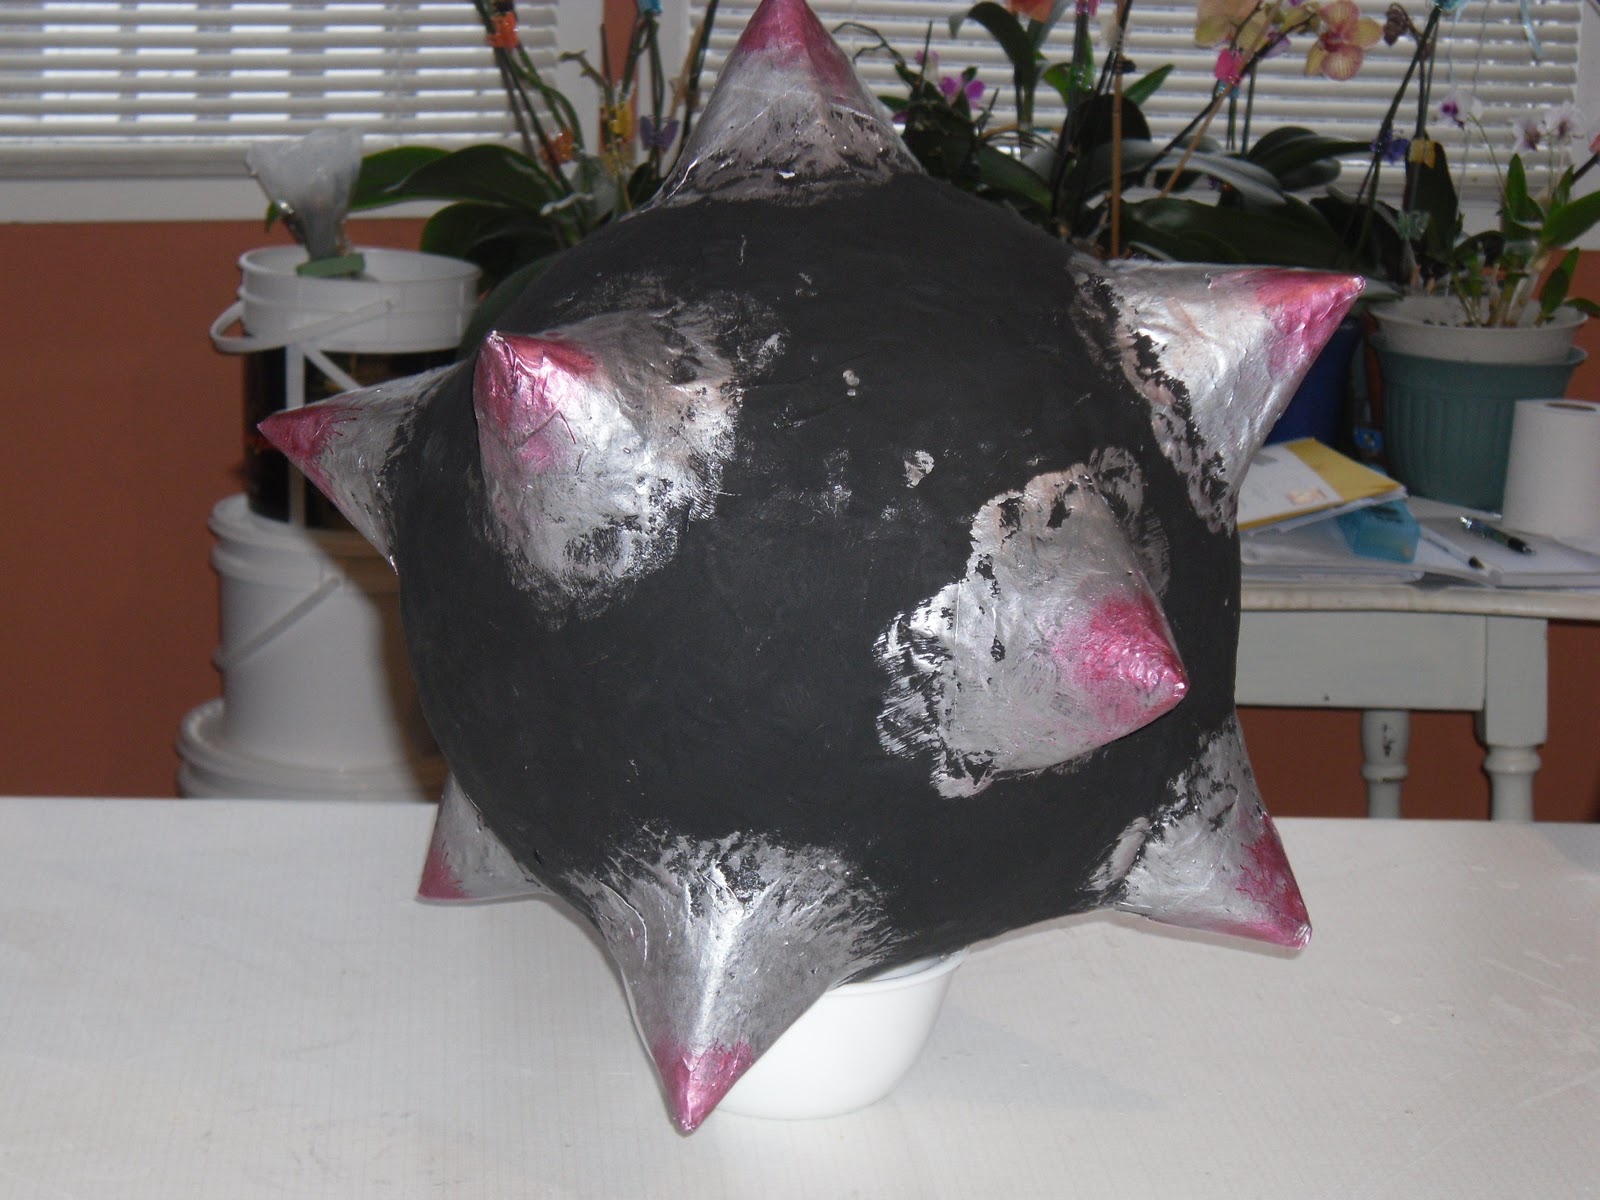
Ahhh, free-bee 18" beach ball, your fate is set to be repurposed.  Yes, those are my orchids in the background.  I like that they need watering once a week, occasional fertilizer, yet they bloom in a showy way for almost 3 months.  My kinda plants!  Lets never mind the miscellaneous piles sharing the same table shall we.

Lowly paper mache, so simple, so inexpensive, so messy, so perfect & most importantly, so easy!  An internet search refreshed my memory on the details & paste recipe, one part flour, two parts water ratio.  I did add some cinnamon to cut the funky smell of wet newspaper.  As the slurry gets thicker its ok to cheat & add a bit of water to keep it going.  The ball is propped up on a bowl to keep my sanity.  Bigger strips of newspaper get faster coverage but don't cover curves well.  Squeegee-ing each strip between fingers before applying cuts down the sloppy drippyness & speeds up drying time since the whole thing is less soggy.

I'm an impatient kinda gal.  I thought about setting this thing outside to freeze dry & it occurred to me it might not stay round.  A heat gun seemed to be a ridiculously slow option, I tried & I got bored.  An industrial heat gun was not attempted, I didn't want to risk a fire.  But the lowly hot air popper was just sitting there, begging for work.  No need to turn the house into a sauna turning up the furnace, thanks hot air popcorn popper!  I propped it on a wooden spoon to improve the blowing angle.  If you try this, stay nearby. I got 3 layers done in about 2.5 hours.  I was able to run 2 loads of laundry & make myself some lunch too.

I used some advertising papers that were a bit stiffer & traced a plate for the template for the spikes.  Once all the circles were traced & cut out, they were folded in half & cut, taped into cones & then taped to the ball.  

3 more layers of papermache were done for a grand total of 8 layers.  I did set it near the heat vent for drying, poor lil popcorn maker needed a rest!  
After an overnight dry-out, I happily cut into this thingie to pull out the ball.  Puncturing it was satisfying somehow!  

 Here's the candy haul, 2kg bucket & a bag of graveyard parts I scored after Halloween.  Hooray for sales!

 Before filling it up, I made a cardboard washer for reinforcement inside, lowly zap straps to the rescue to hang it up.  In hindsight I should've added 2 more"washers," incrementally larger.  Once full it is heavier than it  appears.

I layered in some newspaper before adding non-toxic all-purpose white craft glue to close it up.  No need to glue the contents to the inside I figure.  I used the same glue to add some more newspaper over top to make it all smooth again.  I figured glue would be a better bond at this point.

Here is the zap strap closure.  Humble zap straps, tough & strong.  Good thing too since this thing weighed almost 8lbs when it was fully loaded.

Painted with acrylic paint, black base & silver points.  Kiddo did a good job painting eh!  He used a kids blow painting "Sprayza" set to put the red on the points, his own great twist on this creation.
Each kiddo got 5 whacks at it until it dropped & was beaten into submission.  People are doing amazing things with paper mache, who knew its not just for kids crafts anymore!  


In answer to the question at the beginning of this post...
A mannequin arm!
 Its great as it is, but to be a dismembered arm it needed cosmetics.
 Acrylic paint to the rescue!  Four different colours of red & a couple different browns really improved the effect.  This was the fastest of the project details to achieve, just dig in & smear paint on.
 another view, same arm
Pictures taken with my cell phone, not bad for 2 megapixels!  I used gorilla glue to put the hand on at the wrist, but it didn't hold.  It made  a great club to beat the pinyata just the same.  The Zombies were thrilled!
One more Zombie post coming, have a great week!  Oh & while I've got you, don't forget to mark your calendar, April 7 is National No Housework Day!

Sunday, February 27, 2011

Zombie Things

I've been working on the details of this party for about 1 1/2 months now.  Mostly happy & kinda sad its all done but by all accounts it was a successful party.  We started out with Zombie bowling & I made these nifty Tshirt decorations to have a coordinated Zombie bowling league.  
I started by hunting inexpensive Tshirts & it dawned on me undershirts are the ticket!  They work out to be about $2.50/shirt & that is definitely doable.  We won't talk about the time that this took, but it was so worth it.  

I got busy with my Gypsy & picked some graphics from the "Happy Hauntings" cartridge for the font & "Pumpkin Carving" cartridge for the face.  I have always wanted to try freezer paper stenciling.  There are lots of blogs & you-tube videos about how to do this & I extend a grateful thanks to bloggers who have shared their knowledge.  Freezer paper is a food grade paper that has plastic bonded on one side.  

I had to cut the freezer paper to 12X12 proportions to fit my mat & then made the stencils with my cricut expression.  I made sure to cut extras, which seems like overkill at the time, but it did save time since the "Zombie" word was fussy cutting & not all of the cuts came out cleanly.  Its a bit of a learning curve with the settings on the machine to cut nicely each time.  Every machine seems to cut slightly differently so I won't bother boring you with settings, especially since I can't remember which combination worked best.  I do remember playing around with pressure, blade depth & multi cut settings.  An older mat is less frustrating  to remove the paper, but a new sticky mat definitely cut better.  I highly recommend using the spatula tool to assist peeling paper off a new mat.

I washed the shirts in fragrance free dye free detergent & did not use fabric softener to dry.  This is the template face, ironed shiny side down onto the Tshirt, I used the cotton setting on the iron.  I did all the ironing in one batch.

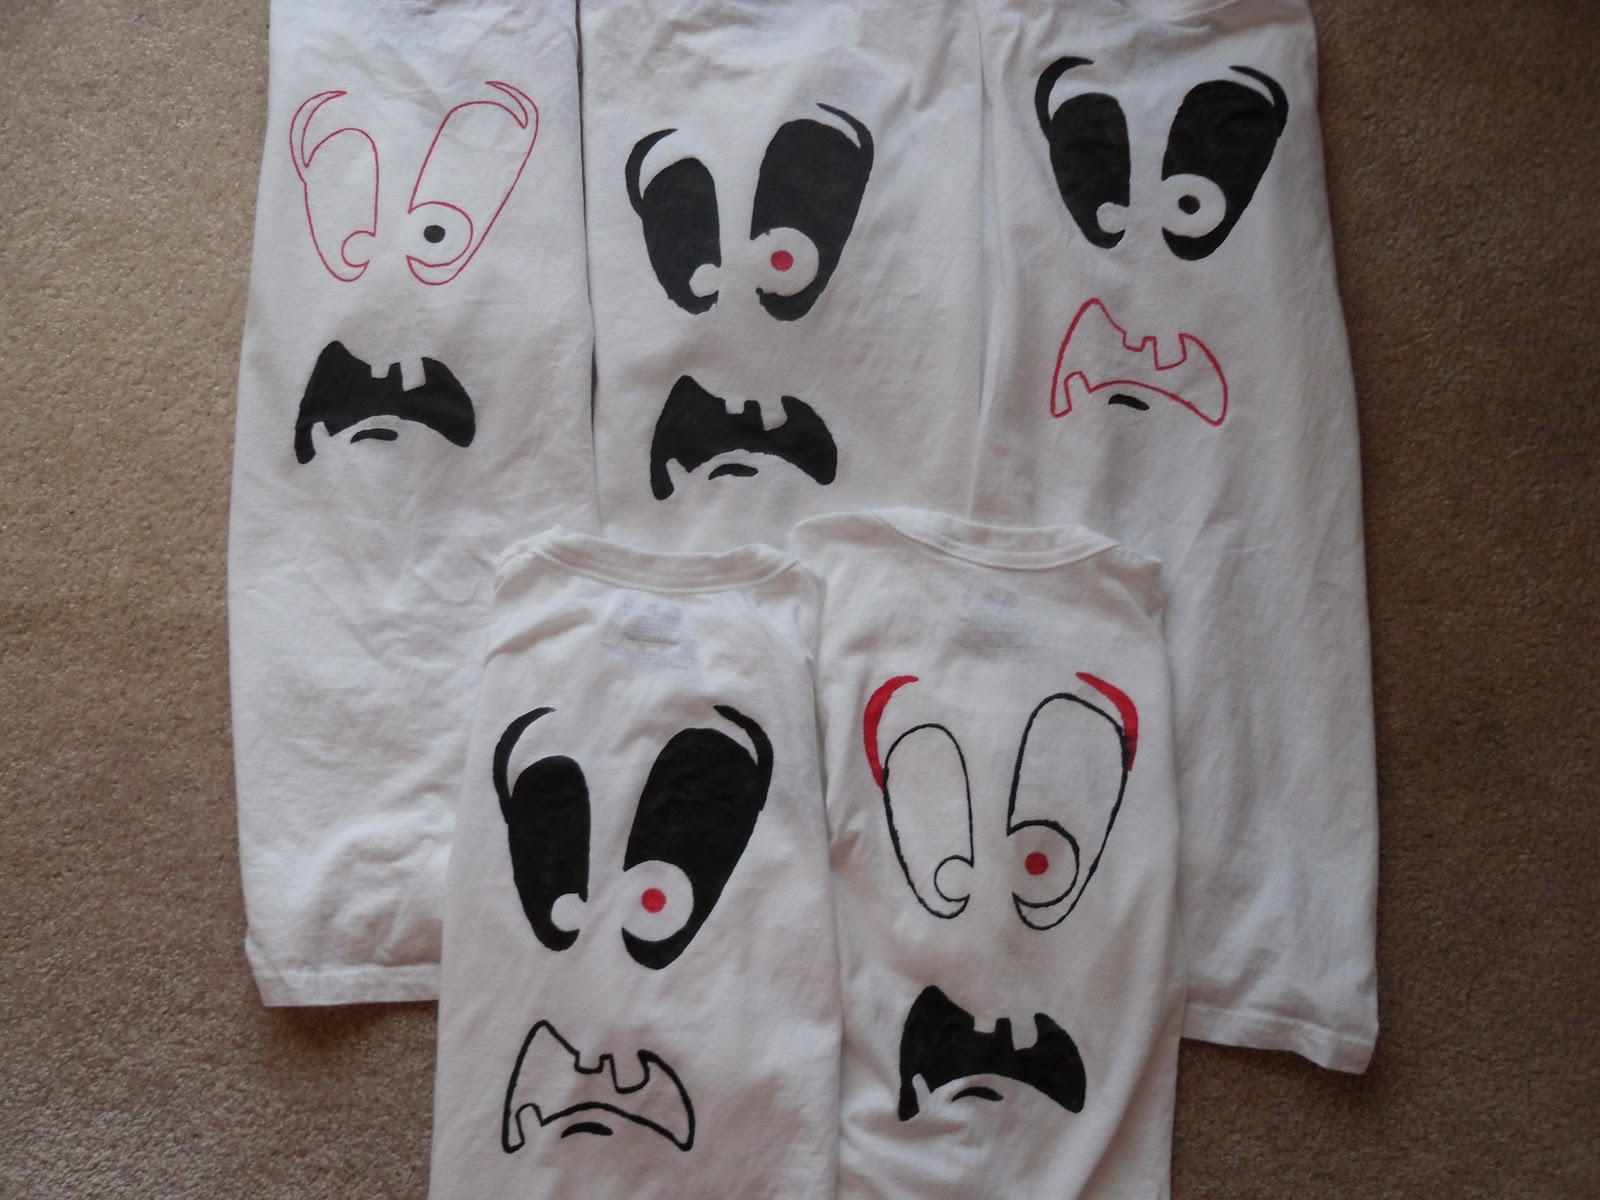
This is a black Marvy Ushida brand permanent fabric marker that I used to mark out the stencil, I also used a red marker.  These markers are supposed to be permanent after 4 hours with no other preparations.  Best thing is to put some cardboard inside the shirt before starting & to work from the top down.  The ink does smear a little on your hand if you jump around.  I had 2 black markers in use & switched back & forth so the tips would stay juicy.

This is the fronts of the large child undershirts.  I was getting tired of dabbing markers & needed to speed up my process so I did a lot of the filler with Tulip brand black fabric paint, which is also supposed to be dry in 4 hours & can be washed after 72 hours.  I wanted a chunky tip Marvy fabric marker, but they were sold out.  Turns out the paint was faster & easier on my hands to apply, even if it was  a bit messier.  I let them all dry overnight & peeled the freezer paper off in the morning.

This is the fronts of the adult small undershirts.  I wanted the word to be on the left shoulder like a name badge but by the time I'd ironed & started it was too late to go back.  So to quote a good friend, if you can't be perfect, be consistent!  You know who you are & thanks for the gem of knowledge, it got me through!
 This is the back of the adult small shirts.  

 This is some of the zombie bowling league in action!  I needed two different sized shirts since zombies are not all the same size!
Stay tuned, there's more zombie goodness coming!  I hope you have a  great week.