Showing posts with label Swaps. Show all posts

Tuesday, September 11, 2012

Second Canadian Online Circle Swarm

We did it again!  We've shied away from calling this an "annual" swarm because there's no way of knowing if Provocraft, parent company of Cricut products, will be keeping "the Circle" membership annual after the major changes done to it this year.  This is a longer post, sorry, no pictures today.

I will post the challenges today, & then post which challenges I completed in later posts.  I have learned so much from these online swarms, both participating & helping organize them.  I am thankful for the comraderie & friendship of online women (predominantly) who share their time & talents to help make these things fun and possible.

Welcome to the SECOND Canadian online Circle Swarm, Sept 2012 

Sept 6, 7, 8, 9, 2012.  Deadline for entering challenges Oct 8, 2012.
This is Canadian because it is being hosted in the "Canadian Chat" section of the Cricut Circle message board. 7 Prizes were generously donated by circle members.  Each prize donator was able to issue a fun challenge. Each challenge completed = an entry into the prizes draw, lottery style. Deadline to enter: Oct 8, 2012.   

Here are the Challenges: 
Sept 6, 2012 First challenge by SherriHend180  
Create a Halloween Decor Item. It can be a sign, banner, luminary, treat bag, etc. The sky is the limit.

Your project must include the following:
1) At least one Cricut Cut
2) The colour purple

Your project must include one of the following:
1) Glitter
2) Ribbon
3) Use of a cuttlebug folder.

Sept 7, 2012 Second challenge by: missmel9
Requirements:
•A card with a black cat
•Use 2 Cricut cuts
•Use the colors black, white and purple
•There must be stitching on the project (machine, hand or faux)

Sept 7, 2012 Third challenge by: JenniferHawkins2
Make a birthday card using the following sketch:  (aggghhh, won't copy & paste right now, I will have to try again later).

 Of course, be sure to use a Cricut cut on your project and a Cuttlebug embossing folder if you have one!

Sept 8, 2012 Fourth challenge from BoomerKnows for DugsPookie 
Create a layout of a real life event, not the usual celebrations of birthday parties, graduations, anniversaries...  It can be 12x12, 8.5x11, single page or 2 pages.  A "real life" event could be: a flubbed day on holidays, something every-day normal that is memorable to you. 
Also try to incorporate a “new-to-you” technique or product that you've always wanted to try.  IE: sprays & masks, embellished cricut cuts, rosettes, pop-dots, glitter, page maps, sewing...  Whatever you like but tell us about it & what you enjoyed/hated about trying it.

Sept 8, 2012 Fifth challenge by BoomerKnows
1.  Cut a “Gang Symbol” for the circle, or any club you belong to but have been meaning to show pride in membership.  It can temporary or permanent. It can be made from vinyl, a sticker, iron on fabric, a mask to spray-paint, fabric paint & freezer paper…
2.  You must go graffiti it proudly onto something you display & use regularly.  Some suggestions: cell phone, day planner, tablet, laptop, car, t-shirt, jacket, hoodie… 
3.  Have fun Circle member rebels & non-rebels!

Sept 9, 2012 Sixth challenge by SaraAndrews1  
Make any type of project and use Something Old and Something New!!    Easy Peasy!  Your project needs to have One Cricut Cut.

Sept 9, 2012 Seventh Challenge by Lilygirl: 
1. Steal an object from a family member, friend or neighbour ( for the faint of heart an object found in a thrift store will do in a pinch)
2. Alter object using at least 2 Cricut cuts.
3. Quietly and unnoticed return altered object to original owner/spot (if this is a thrift store find, gift it unnoticed to someone ie. hang on neighbours fence porch, door etc..)

Be aware, (beware?) A surprise bonus challenge could (did) crop up!!! 

Bonus Challenge for fun, Sept 10, 2012:  Scrapbook your flubbed project, using all 3 criteria.  What’s a “flub” you ask?  Oh, y’know: the cake that turned out like a brick; the sewing project that’s not-quite-right (wonky even); the painting that annoys the cr*p out of you but no-one can really see why but you.  You get the idea.  It can even be a successful flub, one that you salvaged at the last minute! 
1.    Use at least one paper you don’t entirely prefer
2.    Minimum one cricut cut
3.    Create only from your stash.  (exception would be glue or  something you ran out of essential to completing the challenge). 

The criteria to participate in this swarm are NOT strict, just guidelines to challenge everyone to have some fun. This is a Cricut Circle membership swarm, just something we drummed up to have some fun with our membership.  To enter, members create their entries, take a picture and post what was made along with a few details of interest. As bonus incentive these projects can contribute to existing challenges:  “use-what-you-have” challenge, a “spending ban” challenge, a new project for your blog, or “try a new technique” challenges floating around.


We also had a modest participation in a "Treat bag Swap."  Each participant will mail ONE bag of scrapbooking treats & loot, with some Halloween theme treasures & some candy to make it more festive with Halloween right around the corner.  Of course, autumn theme products and any other pretty treasures to round it out are welcome too!  The bags should be about $25 value.  The “bag” can be decorated as simply or festively as desired.
This swap is “Round Robin style.”  From the list of participants each person will PM the person below them on the list for their mailing address & mail them a treat bag.  The person at the bottom of the list will mail a treat bag to the person at the top of the list.  In this way each person will score a fun treat bag delivered by (happy) mail!  
These are questions another circle member utilized for a different swap but they really help personalize the swap.
1. Are you a huge Halloween fan or do you just prefer fall in general over Halloween specifically?
2. Favourite candy or treat (& any dietary restrictions or allergies)?
3. What are your favourite crafting companies (besides PC)?
4. Name 3 items on your crafting wish list.
5. Favourite colour.
6. Share little about yourself and/or your crafting.


I choose to blog this swarm as a way for non-members to copy outright or just borrow inspiration from.  We all learn from each other & these challenges are really nice fun examples of messing around with our hobbies. Sometimes we just have to make our own fun, but its nice to have friends join together to show what they're creating too.


Wednesday, April 4, 2012

Thank You card #2 for swap

Hi again!  As promised I'm showing the second thank -you card I made for the online swap.  I also added a new badge to my blog for Close To My Heart (CTMH) products.  I'm learning like crazy here!  I joined up for the great consultant package.  The products are really nice quality and the catalogues are beautiful, friendly and products are reasonably priced.  Maybe I'll even make a sale?  I won't be nagging people to go look, but if anyone is interested, I did post my first and possibly only picture of myself there.

Enough about that, back to the card!  Oops I did it again!  A new super sticky cricut mat, paired with thin-ish quality paper = time scraping the mat for one stinking useable cut, grrrr!  I should know better, nothing like  an impromptu refresher course!
The one on the left is what I was aiming for, but didn't work out.  I dug through my paper stash & found a sheet of "little yellow bicycle" brand paper called "blue linen" and it looked better, but not with the dark blue contrast bits.  I used a soft blue recollections brand paper for the base & talk bubble.  I cut the bird & its components from the "3Birds on parade" cricut cartridge at 3.32" x 3.52".
 Using the gypsy really helps make quick work of this.  We won't talk about how the first prototype was also sized too small on that chewed up blue sheet will we...  I will note that leaving all these bits on the mat until assembly is the best trick ever.  So much better than hunting down bits during assembly and wondering if something is forwards/backwards, or MIA with these itty bitty pieces of paper.
 The white scallop base is from "the cricut "art philosophy" cartridge, exclusive to CTMH, sized 5"x4".  I used a "7 gypsies" brand roll-a-stamp for the "greetings."  I hadn't thought this through very well until I saw the bird looked mysteriously floating.

So I dug back into my stash & found some brown paper, ripped it into roughly 1/2" strips, rolled them around a chopstick & twisted them a bit.  I used a glue pen for the little bits and my big pink ATG gun for assembly.
That's better, birdie has a perch!  I added recollections brand iridescent blue rhinestone sticker for the sparkle in the eye.  No lottery kiosks were visited to find little pencils.  Well, maybe just one?   Honest, Dollar stores all over town did not have small pencils.
The inside is printed on white paper, and complements the cover nicely.  You will have to go here to see the free-printable-thank-you-card inside!

Happy Easter everyone!

Saturday, March 17, 2012

Sympathy card swap returns

These are my return mail from the sympathy card swap.  I did not create these cards, but you can see mine here my sympathy card swap entry..

There's only one blogger and I do not know who created which card to give credit to them so I will respect their privacy and just say, THANK YOU!

The inside is blank.  details Feb 7, 2012 post  I really like the punched edge detail.

The inside is blank.  The doily has been gently coloured robins egg blue.  The top layer looks to be an Imagine machine creation.  This would also be a lovely blank sentiment card, "thinking of you" or "missing you."

The inside says, "When the joys are still remembered But the sorrow has quietly gone, There will always be a special place In the hard - where love lives on."  Lovely divided embossing, very elegant looking.
The inside says, "Our caring thoughts are with you during this difficult time."  Its so simple and genuine looking.

The inside says, "Praying for friends to comfort you, faith to uphold you, and loving memories to heal your heart."  Each of those squares have been glued on individually.  If I had done this, I'm sure they would all be cattywonkers!

The inside says, "May you find comfort in God's love."  This is very sweet and genuine looking.
Again, big thank you to everyone for letting me join in.  This was a really nice challenge.

Wednesday, March 14, 2012

Another card swap

I joined another card swap on the cricut circle message-board.  Everyone is creating 2 cards.  I chose thank you cards, since they're handy to have.  I dug out my old Fiscars "Scrapboss" manual embossing system, and the stencil template "Whimsical letters"  to hand emboss the word Thank you on the negative cuts of the butterfly. I did do a practice emboss to gauge the size, and found I could place 2 at a time between the stencil layers.  Once I set the centre letters, they were fairly quick to do.  A lucky find was I accidentally embossed the "y" not quite right, so I redid them right over the mistake & its not obvious at all.

 I used coordinations colour core paper, 3 are sanded, the one in the lower left corner is only half sanded to show before & after.  These are for the inside of the cards.  Can you see which one is goofy?  hint, look for the "h."
 I used gypsy wanderings cartridge, butterfly top layer cut out at 3.68"x3.53" and the corresponding base layer cut at 3.87"x 3.47".  The base layer is embossed using sizzix brand  "dotmatrix" embossing folder and sanded before the top was glued on.  The lil bows are "peapod" coloured twine, a gift from a sweet friend.  Its a lucky bonus that the same twine looks nice with both colour variations of this card.
I'm a bit blocked about the second card, I have the inside all planned out but the outside is not cooperating.  hmmmmm, I'll have to show those when they're done.

Saturday, March 3, 2012

Smash swap returns

Well, not really a "smash book" since that is a brand, but that is how we've identified this swap.  

What's that you say?  Get to the pictures?  Okay, here ya go!  

One last thing before I dig in:  These are NOT my creations for this swap.  I added links for those that do have blogs.  Click to enlarge any picture.

On your left hand side is her calling card. The "life" tag which goes into a slot on the pink page.  The top 2 pages are one side, the bottom 2 pages are the back side.  You can visit her blog here Creations with Becka

The bottom 2 pages show front & back.  Isn't that so pretty the masking with plum mist spray?.  Those bands are meant to help hold the book together when its complete.  Check out the clear transparency page with the pretty swirls!  You can visit her blog here ScrapaholicJen
Look at all the lovely add in's!  Stamping, shiney, and oh, there's a lil green pocket.   Can't. stop. looking...
I couldn't resist, these were all different parcels, so I opened 2 different ones to show.  The top of the page is one package, the bottom is another.  Seriously, inspiring!  You can visit her blog here Jeannie Cards aka Image Queen


The top shows the front & back of one page, the bottom shows the front & back of the second page.    On your left hand side is a simple coin envelope stamped & look at the goodies inside!  You must enlarge to appreciate the details, these are real layers not just printed paper.

These are the fronts of 2 pages. so lovely!  That green butterfly with the brown tag sparkles.  I don't know how she did that but look at the double pocket on the right side.  The paper doesn't show, but that is some sort of printed transparency under the dragonfly & it hides the double pockets!  More beautiful extras too.

This is the front & back plus the extras.  The pro/con tag fits in under the green zigzag strip pocket,  really inspiring details!  The stopwatch has embossed texture, circled with a shiney accent glue of some sort.

Top is front of 2 pages, bottom is front & back of another page.  Aren't those sweet stamps?  Pretty clips and things too!  You can visit her blog here Crazy Cricut Lady

The top is 2 different front & backs of the same page entry with lovely misting and stamping.  The bottom is 2 different pockets (same page entry).  Some page tabs, and check out that key!  I tucked one into the side to show the pocket is open on 2 sides so it will be different depending how its bound.  You can visit her blog here Singing Shell

The top is one side, the bottom is flipped over to show the back. Can you see the hidden pocket on the butterfly paper? Clever!!!  You can visit her blog here Chasinkeegan
I now realize the light is kinda dingy in these photos, trust me, that's my winter daylight lighting again.  In real life they are very very fabulous!  My pages can be found here Not Housework- smash swap entry  and here is the link for my smash swap completed book in all its glory if you want to look.  It is fun hosting these swaps & getting first peek at all the gorgeous entries.   These were mailed back January 31 so just in the nip of time to stay as a January swap.  Happy spring everyone!

Wednesday, February 8, 2012

The Smash Swap Book

I learned from a youtube video that the best way to bind irregular books is to start with a template.  How to bind a junque journal of different size papers.  I'm so glad to find the link to give proper credit.
The key is to make a template first.  Mine is 16 holes.
Here are some papers I used from my stash, and good ole simple Elmers glue-stick to make the covers pretty.
 After I covered the cardboard I used hockey tape to seal the edges to give a nice finished look.  Click on the picture to enlarge, it shows how I clipped the tape so I could lap it in layers at the corners.  Notice it is not matching up on both sides of the corner so that once it is beaten around it shouldn't come apart.
 I sealed the papers with ModgePodge glue, and while it was wet I used this glimmer spray, from Lindy's stamp gang.  A sweet friend sent me 2 bottles, very cool surprising contrast glimmer colour.  You add water to this product so it is very light to mail in its dry state.
 I won't show the swap pages yet.  I saw on another youtube vide "somewhere" that they used tabs and punched those to function in the binding.  I thought that was pretty neat since some pages are smaller and thicker.  I used the Bind-it-all on the ones on the left, and the Crop-a-dile on the yellow tabs.  They both work equally well in the binding.
 I added more pastel papers to pad out the book, the baggie shows the extras that are still waiting to get added in, and the band that will be needed to keep it closed.  It's my new favorite book for sure!
As soon as I have word all the participants have their swaps back I will show you the pages.

Monday, January 30, 2012

January Smash Swap

What is this?

On the Cricut Circle Canadian chat I started a swap for making our own "Smash Book."  There's plenty more handmade journals on youtube, they can be rustic or beautiful, functional or ornamental.  They are something personal, to put everyday flotsam & jetsam, aka ephemera.  Historically they have been called journals, or junque journals.  Smash book is an actual brand and what this swap has created is far more beautiful and original in my opinion.
Here's the criteria:

  • Pages will be journal size: an 8.5" x11" folded top to bottom becomes 5.5" x 8.5" 
  • Acid free supplies
  • Colour range: friendly and fresh, not muddy or dark. This is a swap for January, not soon enough for the mud to come but we will all be sick of winter by then I bet.
  • Participants can chose to commit to what type of paper they want to commit to or just leave it as a surprise. A special request to hint what the "extra"  will be so there isn't 20 pieces of ribbon. 
  • Usual swap rules: SASE, make sure your return envelope is not too small please; be generous with return packaging size & postage allowance; number of participants will be the number of pages and extras you send after the swap closes.


Details:

  • regular papers, not too flimsy. Time to break out stamps, glimmer, embossing tricks and dress them up a bit.
  • It is up to participants if they want to send bonus pages, enough for all. They could be more whimsical ie tissue, transparency, vellum, smaller size but big enough to bind.
  • Suggestions for "bonus extras:" clips, pockets, large papers "z" folded to fit, bags, dividers, to-do lists, charms, ribbon/yarn/string. 
  • Suggestions for unusual papers: map papers, ledger paper, folders, pockets, graph, lined, watercolour, beautiful hoarded paper packs that are just-to-pretty-to-use...
  • The book will be yours to bind how you please, any direction you prefer, and in whatever sequence you like. From there you can use it however you like.

I started chatter for this Nov 29, 2011. Deadline to sign up was January 7, mail by January 12th.  Its fun to have something nice and not stressful to look forward to after the Christmas commotion is done.

Here's what I have made

I could've made these with the cricut, but I like the way I can control where the pattern lines up in punch by using it upside down.

 These are mini charms.  I didn't glue them because both sides are nice.  Just fold them in half & glue them onto a tag, note card, page, whatever.  Hmm, they would be nice on the pins mentioned further along in this post...
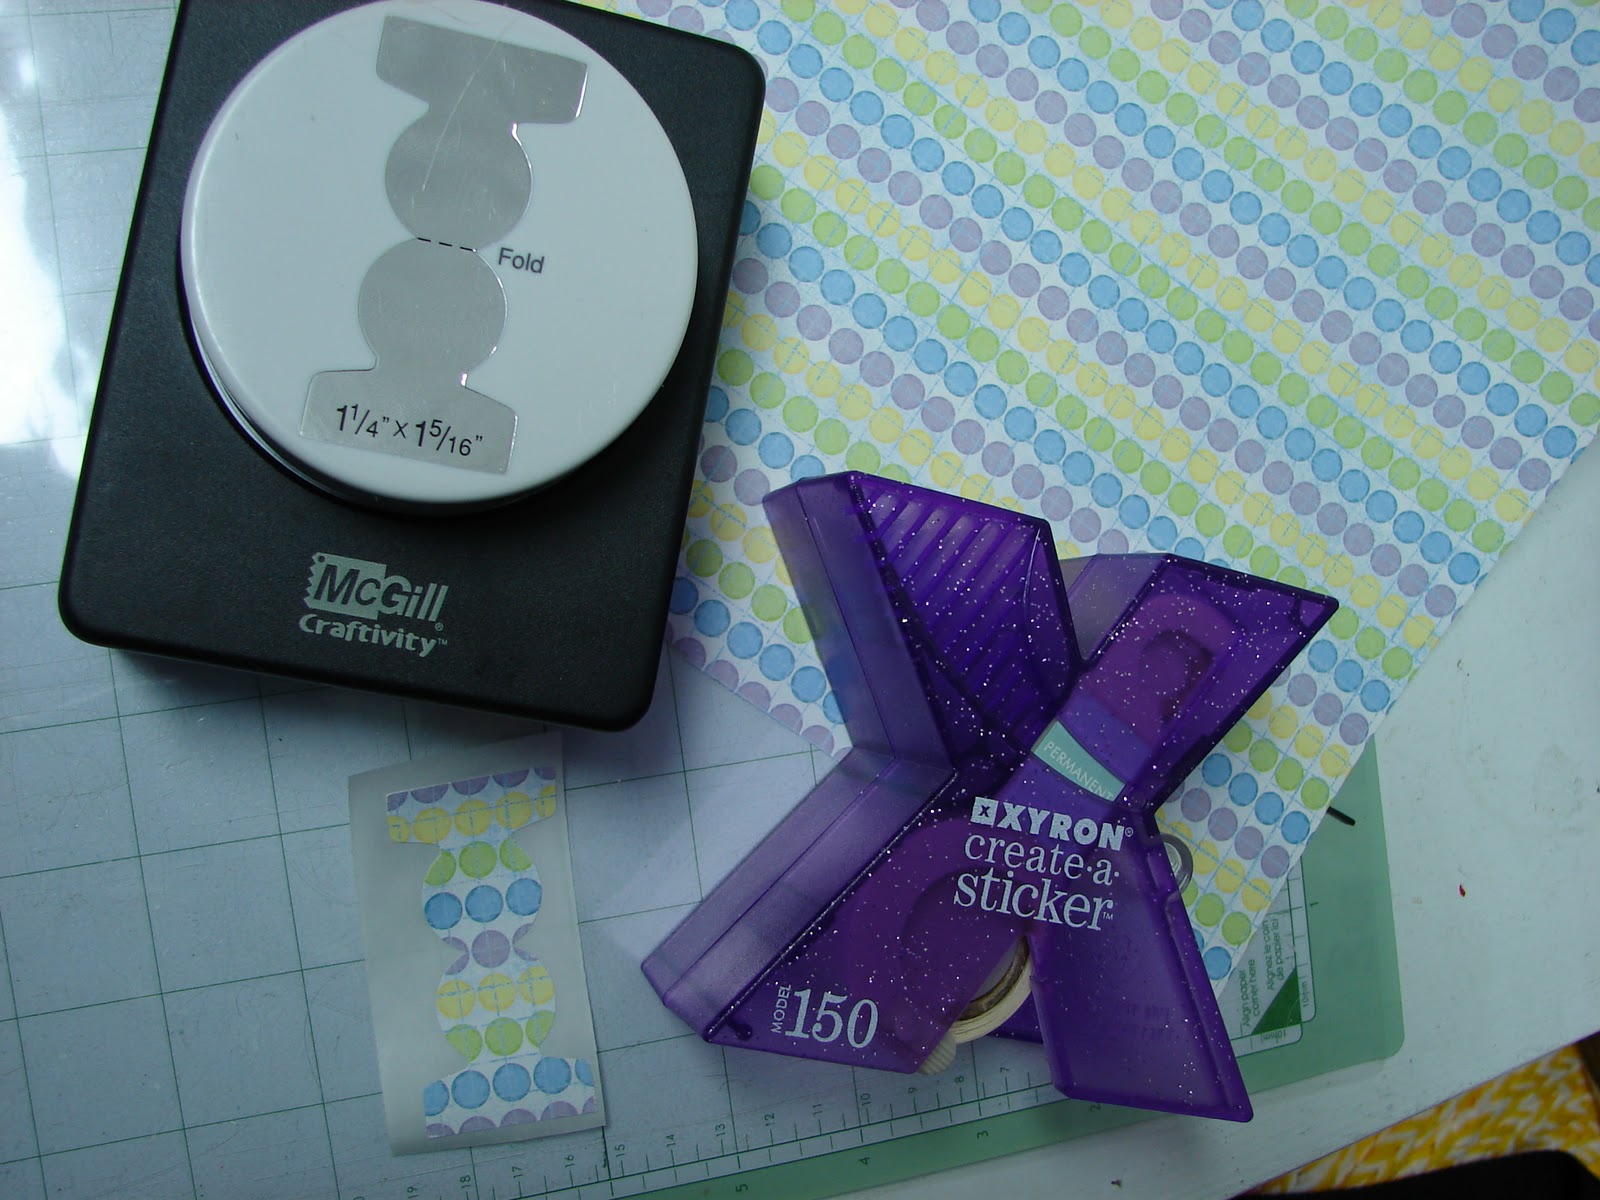
Last tab punch, the X is the mini Zyron 1" sticker maker, I have 2, the original orange one, and this purple one I picked up from a thrift store for $2, score!  And, all these tabs fit into it nicely.
 These are the supplies I used to make the mini cork boards shown further down:  Pen, ruler, cutterbee scissors, scotch quick dry glue, a sheet of double sided adhesive, coffee-straw stir sticks, and super thin cork that a South African friend shared a piece of with me.  She brought it from her original home base and I have no idea where to get it from.  Over a year ago I saw mini cork memo boards on a youtube video and that was the inspiration to do these.  Sadly, I do not know where to find that video to credit back to.

 I won't bore you with my ammeteur efforts at mitering corners, you tube has great framing and mitering videos available.  I just winged it clipping and estimating the angles until they were nice.  I am holding the cork to show how thin it is.  Making template lengths for the sides speeded this up.  Also slitting the straws after they were cut and angled  was faster.  I left my scissors in the straw to show how simple the slitting was to do.  The adhesive sheet was applied to the cork & stabilized it nicely to cut to size.
 Here shows the detail of how the cutterbee scissors are so great.  These are nonstick micro tip scissors.  I use the blade edge to gently score away the backing & the scissor tips to peel it away so the plastic sticks to that backing.  Once they were assembled I twisted each one slightly and added the glue into the mitered corners to help make them more stable.  The mini-cork-boards are almost 3" wide x 2 1/4 high.
 This is humble plastic packaging, cut to swap size and corners rounded.  The same friend who shared her cork-paper graciously loaned me her "Close to my heart" stamps.  And she let me try her brand new brown "Stayz-on ink" which is reputed to be great for all slick surfaces.  It is, and does work well.  It takes forever to clean off the stamps, even with the appropriate cleaner.  Good friends really are a blessing.
With my gypsy I adjusted the measurements of a little cloud shape from the French Mannor cricut cartridge.  I cut from yellow paper, repeated with lilac paper, and stamped the yellow with CTMH borrowed stamps.  They line up perfectly with ATG gun glue on the plastic, I'm so pleased with that!  I doodled a bit of detail with gel pens on the yellow side, and swiped the lilac with brown ink to edge to reduce the bland "floating" effect.  The words say, " to thine own self be kind."
I have to find lil sewing dressmaker pins to stick into the cork to complete the effect.  What's the point of a cork-board if it doesn't have things stuck to it?  I'll post the other swap pages another day. It wouldn't be fair to release them to the world before participants get theirs back.

Saturday, January 21, 2012

Sympathy card swap

I joined a swap on the circle messageboard to trade sympathy cards.  Stumped for inspiration, a quick google images search revealed lots of white, purple, lilies, flowers...  I joined because it was a small swap and quite a creativity challenge.  These daisies are from the Botanicals lite cricut cartridge, and cut from white cardstock.  Working on a nonstick mat, I added platinum coloured stickles to the petals. Oops, almost forgot to grab a picture!
 I added gunmetal coloured stickles to the heart of the flowers. I thought the rest of the flower was too plain so I used "luster rubons" from my stash, apple green.  I don't think this product is made any more, I'm not surprised.  I started out using my fingers to apply but it was taking forever to build up any colour.  A packaging sponge that came with embossing folders speeded up applying the colour more heavily and it was easier.  This product is waxy and I have no idea how well it will stay on there.  I have mailed my cards in individual baggies to prevent any possible chance of green accidental transfer wrecking any of the other cards swapped.
The cards are 5.5 x 4".  The base paper is a deep purple cut at 5.25 x 3.75" and the 2 tone zigzag paper cut at 5 x 3.5" from my stash.  Somehow I like how the zigzags roll vertically, but I don't know why I like it.  I couldn't figure out what to do about the "floating" look.  I was thinking of grass or a flower pot but I couldn't figure out how to go about doing it so I opted to leave them simple.
 I used Fiscars brand clear acrylic "all around quotes" to stamp the inside of the cards with colorbox green pigment ink.  The quote says, "a moment lasts all of a second but the memory lives on forever."  I thought that was a respectful way to convey sympathy and caring without being too generic.  I look forward to the return mail to see what others creative minds have done.

Monday, January 9, 2012

Happy New Year!!!

I can still wish everyone a Happy New Year, it is my first post of 2012.  Wow has it ever been Busy with Christmas, NYE festivities, work, life...  blah blah blah, boring.  Onward, I finally photographed the rest of the swap tags to showcase.

Lots of pictures coming, I tried to note blog links to share the talent. Not everyone blogs & I respect that but I won't post nonbloggers identities unless I have been given express permission to.  There were 19 participants, a record for our swaps.  Many generous people did multiple tag entries to help get us to the goal, 25 tags!  Here is the blog post showing the ones I made Christmas swap- tags x 3, and here are the returns from the Christmas tag swap hosted on the  Cricut circle messageboard Canadian, chat.

As always, click on any picture to enlarge. Unless specified, these are all by different people.

These 3 tags are one entry by image_queen.  Aren't they gorgeous?  Looks like she had some real fun playing with variables, they're similar but not the same.  Here's a link to her jeanniecards blog
These 3 tags are one entry by image_queen.  She also sent her cute mini calling card with her tags.
These 6 tags are also one entry by image_queen.  I had a hard time dividing them out, I realized pictures were the best way to show what she did.
Here's a link to GypsyLady's blog, she made the Santa tag.
Gorgeous!
I tried to capture the shine in the embossed ink, but the iridescence of the snowflake tag background was too elusive, trust me, it's lovely!
Here is the embossing of the animal and the pretty but subtle shine & curve of the poinsettia.  The pointsettia tag was created by this blogger, Scrapaholicjen.
These 3 tags were from one person.  The metal charm for the tags on the left hand side had all different words: wishes, jungle, yuletide, Christmas, season, greetings, joyful, merriment, holiday, tradition, SantaClaus, and snowflake.  The centre tag has red fabric.  The right hand tag is a mini snow globe with Santa & his reindeer flying through a snowstorm.  They were all created by ginaballoons
Soooo sweet!
Check out the embossed texture.  Here is the link to the blogger that made the snowman Chasinkeegan
The picture really doesn't do these justice, I did try...  Here is a link to the blogger who created the lil elf tag Ms.Mara.  Here is a link to Scrapperdee's Blog, she created the green Christmas stocking tag.
Are you jealous yet?  Here is the link to the Santa dancing tag Croatiancrafter.
These are from the same person.
I didn't show the backs of all the tags, but I tried to showcase the more unusual ones.
Whew!  I'm ready for a nap.  I never did get them organized into an advent  calendar like I meant to, but I'm all ready for Christmas 2012 now!  I'm so proud to be able to participate in these great swaps.  The talent and sharing is so very inspiring.  Happy New Year everyone!!!