Showing posts with label Zombie. Show all posts

Monday, October 1, 2012

Zombie Halloween

I wanted to title this, "My little Zombie" because of the cute factor and vague reference to "My little Pony" but decided against it.  These were Halloween 2011 pictures.


I cut out the word Zombie from Happy Hauntings cartridge using gypsy & cricut, about 3.5"  high.  The papers are from my stash.  I used orange & brown chalk on the yellow layer to dingy it, it was too bright.  In the above picture the "ie" are bright yellow still, just showing the contrast.  The grey stars lower border paper is covering up a yellow/red diamond pattern border that was far too bright and circus looking.  I chewed up the ripped edges of the red photo frames, inked them with brown and deep red.  The October 31 bling is "Me & my big ideas" brand bling stickers I found on clearance.

Posted by PicasaHappy Halloween!

Sunday, March 13, 2011

Zombie Things

Fun Zombie party contest details?  These were some mighty fine events I tell ya!  Everyone knows Zombies aren't the smartest things, but they can be very funny!  Instead of announcing best bowling score, there was a prize for worst bowling score.  The bowling teams didn't know about that until after the bowling was all done of course.  There was also categories for Best Costume, Foozeball Winner, & Best Burp, which a Mom won, hee hee hee!  The funniest competitions were the Best Zombie Face, Best "BRAINZZZZ" Statement, and Best Zombie walk.  The Best Zombie dance was hysterical!  Overall everyone won something, had a blast running around & laughed their guts out.  Competitions were the best way to goof around & keep the Zombies occupied while waiting for pizza.  No one wants to deal with hungry Zombies for too long, it wouldn't be pretty to have them turn on the few brave adults supervising.

What zombie party is complete without Zombie survival kits, aka loot bags!  I used my gypsy to design & cricut to cut out letters from clear contact paper.  "Happy Hauntings" cartridge for the Zombie-like font, & "Street Signs" cartridge font for the survival kit wording.  I don't recall the settings but "kiss cut" was what I did, enough pressure to cut through the vinyl but not cut the backing.  Kiddo helped me apply the lettering & he had this great idea to use his blow pens for the detail.  Smart kiddo this one...

This is a "Sprayza" red marker attached to the blow pen.  Some of the clear letters had black sharpie run over them for contrast before applying to the survival kits.   
A close-up picture.
Some of the completed survival kits, waiting for pinyata candy.
This could be our last birthday party, but it was definitely the best!  I can't believe I missed having a competition for messiest pizza eater, that would've been great too!  Cheers & I hope you have a great week.

Don't forget to mark your calendar, April 7 is National No Housework Day!

Sunday, March 6, 2011

Zombie Things

What is this?  Some good guesses were: something ceramic? something bone? a bat? a stick? 
All  will be revealed at the end of the post...


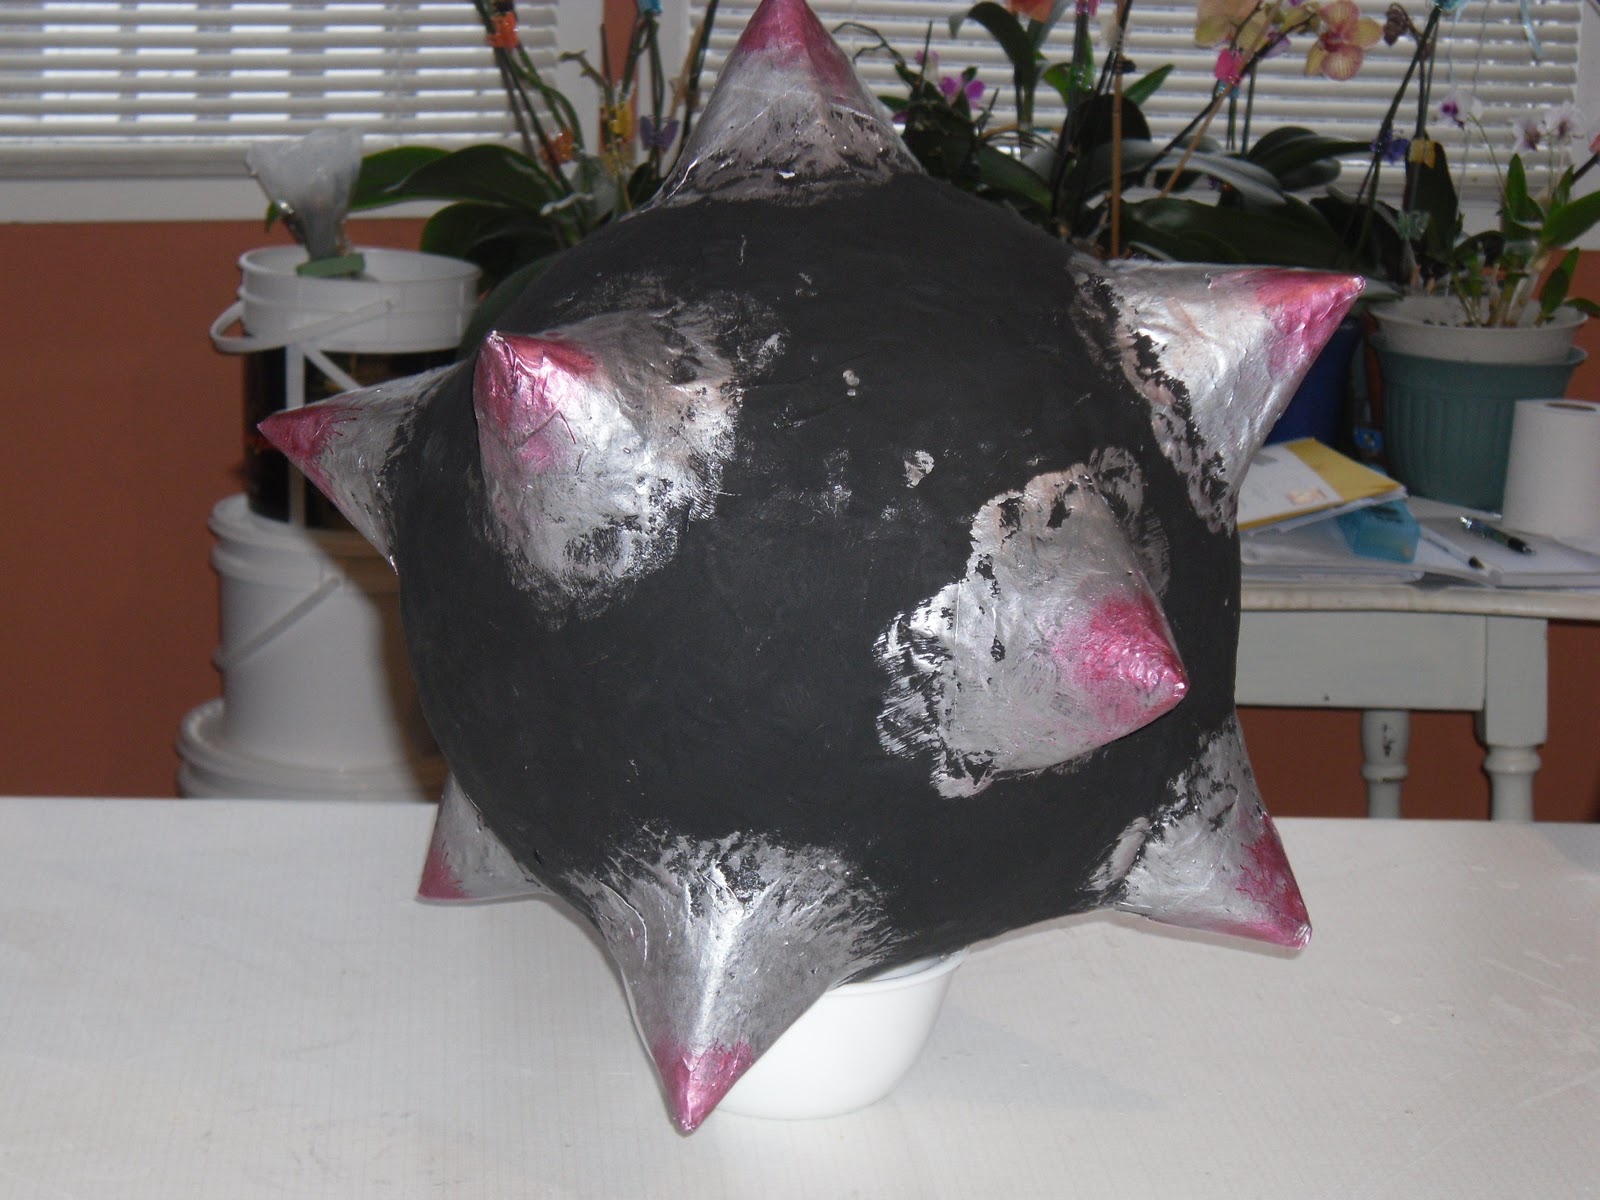
Ahhh, free-bee 18" beach ball, your fate is set to be repurposed.  Yes, those are my orchids in the background.  I like that they need watering once a week, occasional fertilizer, yet they bloom in a showy way for almost 3 months.  My kinda plants!  Lets never mind the miscellaneous piles sharing the same table shall we.

Lowly paper mache, so simple, so inexpensive, so messy, so perfect & most importantly, so easy!  An internet search refreshed my memory on the details & paste recipe, one part flour, two parts water ratio.  I did add some cinnamon to cut the funky smell of wet newspaper.  As the slurry gets thicker its ok to cheat & add a bit of water to keep it going.  The ball is propped up on a bowl to keep my sanity.  Bigger strips of newspaper get faster coverage but don't cover curves well.  Squeegee-ing each strip between fingers before applying cuts down the sloppy drippyness & speeds up drying time since the whole thing is less soggy.

I'm an impatient kinda gal.  I thought about setting this thing outside to freeze dry & it occurred to me it might not stay round.  A heat gun seemed to be a ridiculously slow option, I tried & I got bored.  An industrial heat gun was not attempted, I didn't want to risk a fire.  But the lowly hot air popper was just sitting there, begging for work.  No need to turn the house into a sauna turning up the furnace, thanks hot air popcorn popper!  I propped it on a wooden spoon to improve the blowing angle.  If you try this, stay nearby. I got 3 layers done in about 2.5 hours.  I was able to run 2 loads of laundry & make myself some lunch too.

I used some advertising papers that were a bit stiffer & traced a plate for the template for the spikes.  Once all the circles were traced & cut out, they were folded in half & cut, taped into cones & then taped to the ball.  

3 more layers of papermache were done for a grand total of 8 layers.  I did set it near the heat vent for drying, poor lil popcorn maker needed a rest!  
After an overnight dry-out, I happily cut into this thingie to pull out the ball.  Puncturing it was satisfying somehow!  

 Here's the candy haul, 2kg bucket & a bag of graveyard parts I scored after Halloween.  Hooray for sales!

 Before filling it up, I made a cardboard washer for reinforcement inside, lowly zap straps to the rescue to hang it up.  In hindsight I should've added 2 more"washers," incrementally larger.  Once full it is heavier than it  appears.

I layered in some newspaper before adding non-toxic all-purpose white craft glue to close it up.  No need to glue the contents to the inside I figure.  I used the same glue to add some more newspaper over top to make it all smooth again.  I figured glue would be a better bond at this point.

Here is the zap strap closure.  Humble zap straps, tough & strong.  Good thing too since this thing weighed almost 8lbs when it was fully loaded.

Painted with acrylic paint, black base & silver points.  Kiddo did a good job painting eh!  He used a kids blow painting "Sprayza" set to put the red on the points, his own great twist on this creation.
Each kiddo got 5 whacks at it until it dropped & was beaten into submission.  People are doing amazing things with paper mache, who knew its not just for kids crafts anymore!  


In answer to the question at the beginning of this post...
A mannequin arm!
 Its great as it is, but to be a dismembered arm it needed cosmetics.
 Acrylic paint to the rescue!  Four different colours of red & a couple different browns really improved the effect.  This was the fastest of the project details to achieve, just dig in & smear paint on.
 another view, same arm
Pictures taken with my cell phone, not bad for 2 megapixels!  I used gorilla glue to put the hand on at the wrist, but it didn't hold.  It made  a great club to beat the pinyata just the same.  The Zombies were thrilled!
One more Zombie post coming, have a great week!  Oh & while I've got you, don't forget to mark your calendar, April 7 is National No Housework Day!

Sunday, February 27, 2011

Zombie Things

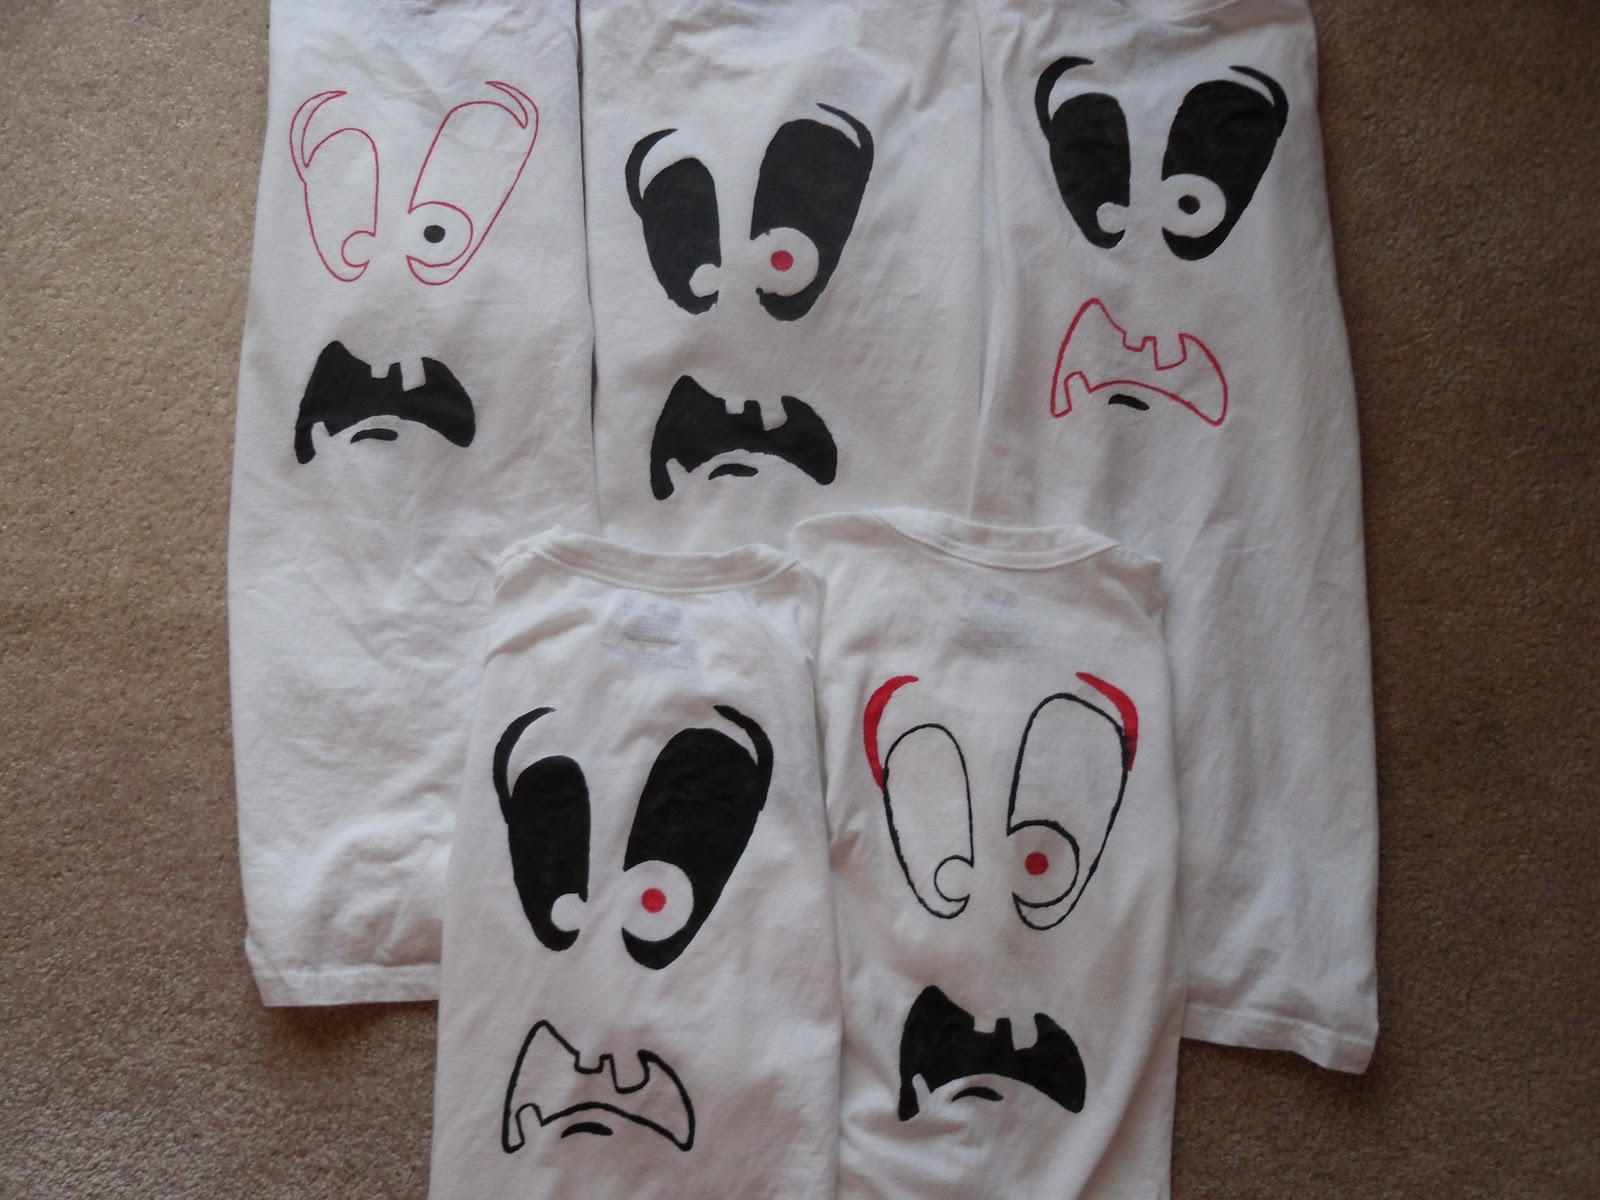
I've been working on the details of this party for about 1 1/2 months now.  Mostly happy & kinda sad its all done but by all accounts it was a successful party.  We started out with Zombie bowling & I made these nifty Tshirt decorations to have a coordinated Zombie bowling league.  
I started by hunting inexpensive Tshirts & it dawned on me undershirts are the ticket!  They work out to be about $2.50/shirt & that is definitely doable.  We won't talk about the time that this took, but it was so worth it.  

I got busy with my Gypsy & picked some graphics from the "Happy Hauntings" cartridge for the font & "Pumpkin Carving" cartridge for the face.  I have always wanted to try freezer paper stenciling.  There are lots of blogs & you-tube videos about how to do this & I extend a grateful thanks to bloggers who have shared their knowledge.  Freezer paper is a food grade paper that has plastic bonded on one side.  

I had to cut the freezer paper to 12X12 proportions to fit my mat & then made the stencils with my cricut expression.  I made sure to cut extras, which seems like overkill at the time, but it did save time since the "Zombie" word was fussy cutting & not all of the cuts came out cleanly.  Its a bit of a learning curve with the settings on the machine to cut nicely each time.  Every machine seems to cut slightly differently so I won't bother boring you with settings, especially since I can't remember which combination worked best.  I do remember playing around with pressure, blade depth & multi cut settings.  An older mat is less frustrating  to remove the paper, but a new sticky mat definitely cut better.  I highly recommend using the spatula tool to assist peeling paper off a new mat.

I washed the shirts in fragrance free dye free detergent & did not use fabric softener to dry.  This is the template face, ironed shiny side down onto the Tshirt, I used the cotton setting on the iron.  I did all the ironing in one batch.

This is a black Marvy Ushida brand permanent fabric marker that I used to mark out the stencil, I also used a red marker.  These markers are supposed to be permanent after 4 hours with no other preparations.  Best thing is to put some cardboard inside the shirt before starting & to work from the top down.  The ink does smear a little on your hand if you jump around.  I had 2 black markers in use & switched back & forth so the tips would stay juicy.

This is the fronts of the large child undershirts.  I was getting tired of dabbing markers & needed to speed up my process so I did a lot of the filler with Tulip brand black fabric paint, which is also supposed to be dry in 4 hours & can be washed after 72 hours.  I wanted a chunky tip Marvy fabric marker, but they were sold out.  Turns out the paint was faster & easier on my hands to apply, even if it was  a bit messier.  I let them all dry overnight & peeled the freezer paper off in the morning.

This is the fronts of the adult small undershirts.  I wanted the word to be on the left shoulder like a name badge but by the time I'd ironed & started it was too late to go back.  So to quote a good friend, if you can't be perfect, be consistent!  You know who you are & thanks for the gem of knowledge, it got me through!
 This is the back of the adult small shirts.  

 This is some of the zombie bowling league in action!  I needed two different sized shirts since zombies are not all the same size!
Stay tuned, there's more zombie goodness coming!  I hope you have a  great week.