My crafting meanders from a sparked idea, or a dreaded deadline. Sometimes it will seem like this site is abandoned. My crafting might be unoriginal or eccentric but least its not housework! I hope you enjoy your visit, all I ask is that you make or do something that makes you happy too.
Showing posts with label Stencil. Show all posts
Saturday, December 28, 2013
Endless Summer
This is a quick scrapbook layout of me, made with the CTMH Artbooking cricut cartridge. It is on page 67 of the handbook, button 30; except the palm tree, I swapped that for the evergreen tree on the other button (page 66). British Columbia isn't known to have live outdoor palm trees. The base paper is Kraft cardstock, the other papers are Recollections brand from my stash. I inked up the edges with mini pigment ink, but I don't know which colours now. I just played around on scraps until I liked the colour. I did use White daisy pigment ink and a deep blue dye ink to stamp in the honeycomb corners. I learned from another blogger Obsessedwithscrappin "fun hexagon background" on youtube that the honeycomb overlay perfectly fits the Honeycomb #c1537 stamp set. I need to find my yellow chalk to tint the white on the upper right corner. I think it will lend visual interest to the layout, even though its opposite the lighting on the picture, LOL! This is my modest attempt at waiting out winter. Stay warm & keep on craftin!
Saturday, December 14, 2013
Monoprint envelopes
Remember those monoprint papers I posted about Dec 4, 2013? Or the hectograph post from back in July? Here's what I did with them! That tube in the middle is to make the envelopes lick-em-stick-em. Splitcoast stampers has a homemade recipe for it, but for $4, the job is done. I could always refill it I guess? I saw http://canadianscrapbooker.ca/ Fall 2013 magazine featured this cool Kreatealope EnvelopeTemplates. I first saw them on Splitcoast stampers email and I was hooked, I had to try this. In the summer I found the templates at an out of town scrapbook store. Who can travel without visiting scrapbook stores, pet stores, candy stores... I digress :-D
The Kreatealope website has a video that shows just how easy it is; tear, fold, snip corners, glue 2 edges. Like magic a pile is done very quickly if the steps are done assembly line style. I don't mind the torn edges, they're just envelopes. I could always trace & cut out to make neat ones if needed. The bonus is that I monoprinted the papers double sided so the insides are just as pretty. I think they would make cool security envelopes too. This template is sturdy enough to get the job done, yet takes up almost no space to store. The cellophane packaging is not going to stand the test of time. I think I will punch a hole in the corners to hang on ring on the wall so they don't get lost in the craft room. I bet crafty children would have fun making these?
Happy crafting to you!
Wednesday, December 11, 2013
Monoprints
These are plastic templates I cut with my cricut expression from the CTMH cricut Artbooking cartridge. They are dirty because I have been monoprinting with my Hectograph that I made back in July. To make these templates, I used plastic pocket folders that I got for 30cents each with back to school sales. That tip I learned from Lindsay at "the Frugal Crafter" on youtube.
One side is shiny, the other matte. I saved the scraps and used them as window accents in my recent Halloween-mini-book.
Here is a really good cricut tip: cricut image direction. She expains how to know which direction an image will cut on your mat. I put a piece of tape on my cricut to remind me. Glamorous? Fashionable? No, not even remotely. Practical, you betcha!
The arrow of green painters tape on the handbook shows you the 6" x 12" overlays are in different orientations (vertical and horizontal).
So here are my monoprints! I was so excited to finally try these. In about an hour, with a modest selection ofcheap inexpensive acrylic paint I got on sale at Michaels, (50 cents each, a real score!), I went with the recomended 4-7 colours, and played with a brayer and wasted printer paper. Here is a fun video showing how to do it Gelli plate monoprinting layers. I kept it simple with these, but some of the uglier less pretty pages can get overprinted later to get more visually complex. That's where some real art comes in.
I have a stack of blank school-work that a certain teenager generates. Well, the school doles them out, he just leaves a lot of them blank. They are begging to get monoprinted, and will be even more interesting with the assignment questions and various doodles that did get done. I will show you in another post what I've done with these papers.
Playing with supplies, it does my art happy!
One side is shiny, the other matte. I saved the scraps and used them as window accents in my recent Halloween-mini-book.
Here is a really good cricut tip: cricut image direction. She expains how to know which direction an image will cut on your mat. I put a piece of tape on my cricut to remind me. Glamorous? Fashionable? No, not even remotely. Practical, you betcha!
The arrow of green painters tape on the handbook shows you the 6" x 12" overlays are in different orientations (vertical and horizontal).
So here are my monoprints! I was so excited to finally try these. In about an hour, with a modest selection of
Playing with supplies, it does my art happy!
Labels:
Cricut Tricks,
CTMH,
Experiments,
Paint,
Plastic,
Stencil,
Vinyl
Sunday, February 27, 2011
Zombie Things
I've been working on the details of this party for about 1 1/2 months now. Mostly happy & kinda sad its all done but by all accounts it was a successful party. We started out with Zombie bowling & I made these nifty Tshirt decorations to have a coordinated Zombie bowling league.
I started by hunting inexpensive Tshirts & it dawned on me undershirts are the ticket! They work out to be about $2.50/shirt & that is definitely doable. We won't talk about the time that this took, but it was so worth it.
I got busy with my Gypsy & picked some graphics from the "Happy Hauntings" cartridge for the font & "Pumpkin Carving" cartridge for the face. I have always wanted to try freezer paper stenciling. There are lots of blogs & you-tube videos about how to do this & I extend a grateful thanks to bloggers who have shared their knowledge. Freezer paper is a food grade paper that has plastic bonded on one side.
I had to cut the freezer paper to 12X12 proportions to fit my mat & then made the stencils with my cricut expression. I made sure to cut extras, which seems like overkill at the time, but it did save time since the "Zombie" word was fussy cutting & not all of the cuts came out cleanly. Its a bit of a learning curve with the settings on the machine to cut nicely each time. Every machine seems to cut slightly differently so I won't bother boring you with settings, especially since I can't remember which combination worked best. I do remember playing around with pressure, blade depth & multi cut settings. An older mat is less frustrating to remove the paper, but a new sticky mat definitely cut better. I highly recommend using the spatula tool to assist peeling paper off a new mat.
I washed the shirts in fragrance free dye free detergent & did not use fabric softener to dry. This is the template face, ironed shiny side down onto the Tshirt, I used the cotton setting on the iron. I did all the ironing in one batch.
This is a black Marvy Ushida brand permanent fabric marker that I used to mark out the stencil, I also used a red marker. These markers are supposed to be permanent after 4 hours with no other preparations. Best thing is to put some cardboard inside the shirt before starting & to work from the top down. The ink does smear a little on your hand if you jump around. I had 2 black markers in use & switched back & forth so the tips would stay juicy.
This is the fronts of the large child undershirts. I was getting tired of dabbing markers & needed to speed up my process so I did a lot of the filler with Tulip brand black fabric paint, which is also supposed to be dry in 4 hours & can be washed after 72 hours. I wanted a chunky tip Marvy fabric marker, but they were sold out. Turns out the paint was faster & easier on my hands to apply, even if it was a bit messier. I let them all dry overnight & peeled the freezer paper off in the morning.
This is the fronts of the adult small undershirts. I wanted the word to be on the left shoulder like a name badge but by the time I'd ironed & started it was too late to go back. So to quote a good friend, if you can't be perfect, be consistent! You know who you are & thanks for the gem of knowledge, it got me through!
This is the back of the adult small shirts.
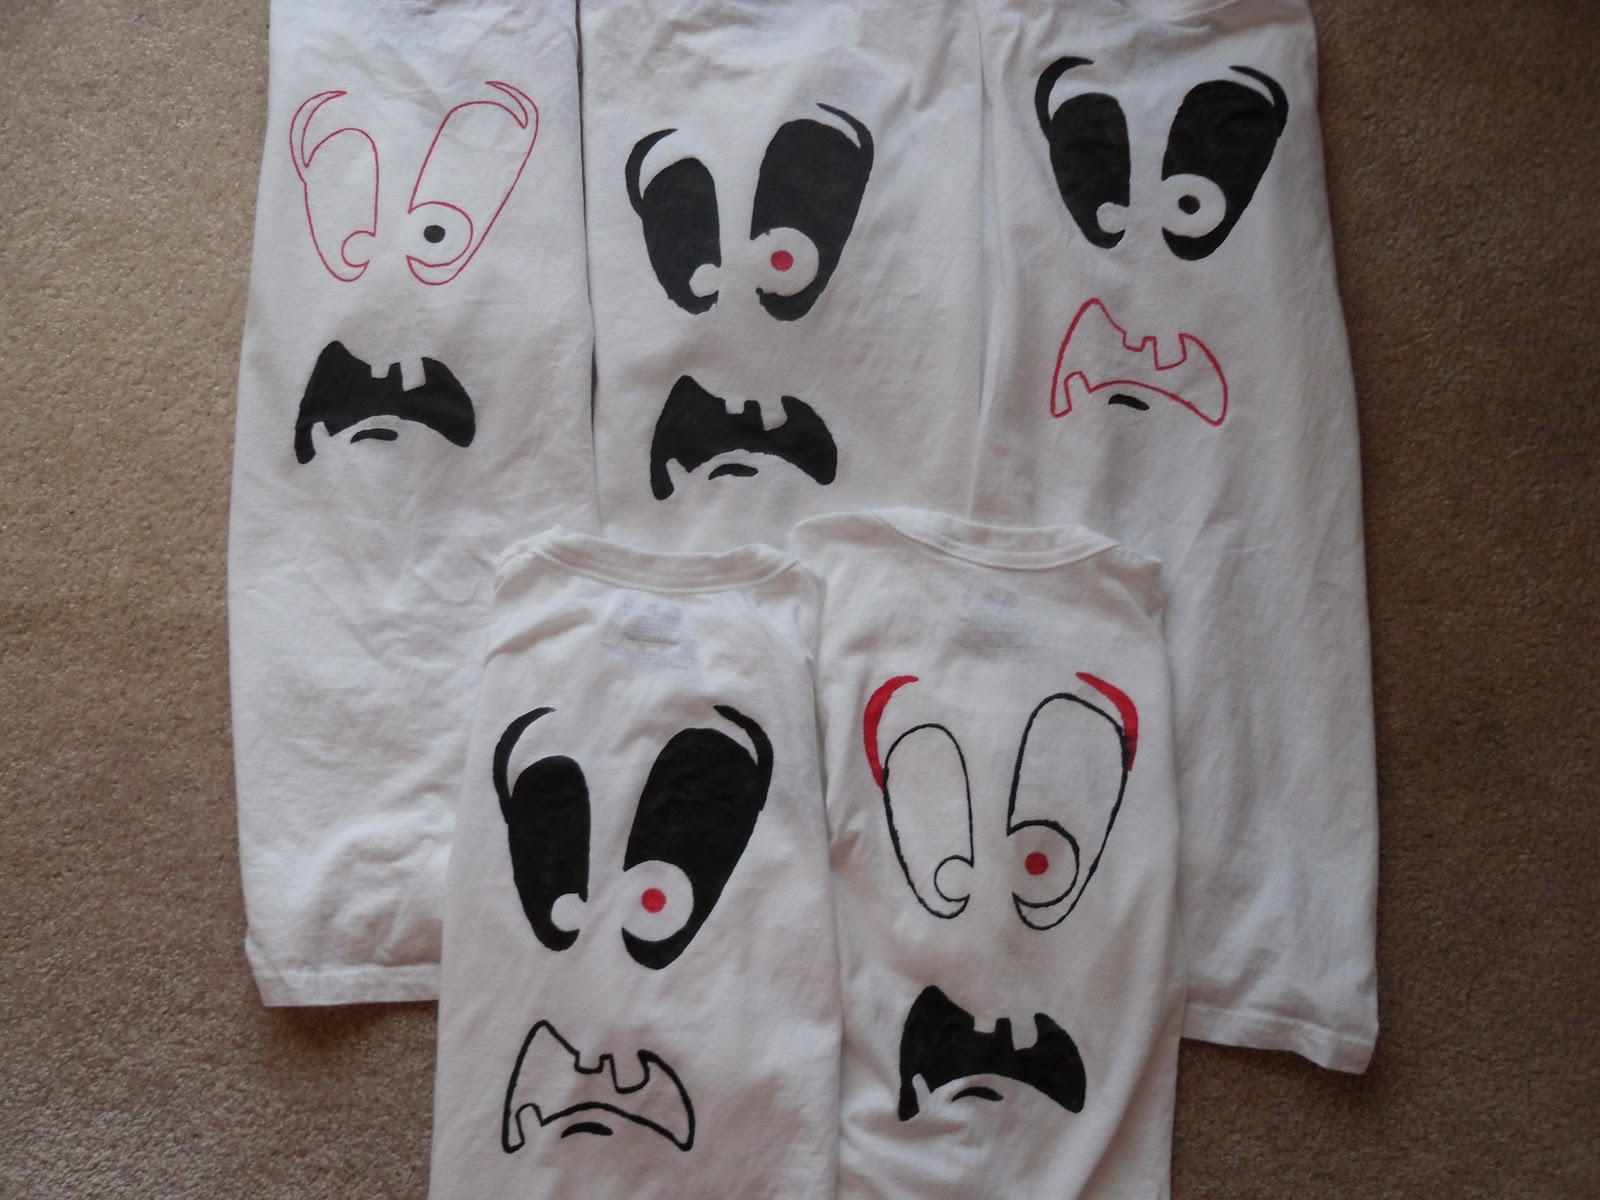
This is some of the zombie bowling league in action! I needed two different sized shirts since zombies are not all the same size!
Stay tuned, there's more zombie goodness coming! I hope you have a great week.
Subscribe to:
Posts (Atom)