Showing posts with label Vinyl. Show all posts

Wednesday, December 11, 2013

Monoprints

These are plastic templates I cut with my cricut expression from the CTMH cricut Artbooking cartridge.  They are dirty because I have been monoprinting with my Hectograph that I made back in July.  To make these templates, I used plastic pocket folders that I got for 30cents each with back to school sales.  That tip I learned from Lindsay at "the Frugal Crafter" on youtube. 
One side is shiny, the other matte.  I saved the scraps and used them as window accents in my recent Halloween-mini-book.
Here is a really good cricut tip:  cricut image direction.  She expains how to know which direction an image will cut on your mat.  I put a piece of tape on my cricut to remind me.  Glamorous?  Fashionable? No, not even remotely.   Practical, you betcha!
The arrow of green painters tape on the handbook shows you the 6" x 12" overlays are in different orientations (vertical and horizontal).
So here are my monoprints!  I was so excited to finally try these.  In about an hour, with a modest selection of cheap inexpensive acrylic paint I got on sale at Michaels, (50 cents each, a real score!), I went with the recomended 4-7 colours, and played with a brayer and wasted printer paper.  Here is a fun video showing how to do it Gelli plate monoprinting layers.  I kept it simple with these, but some of the uglier less pretty pages can get overprinted later to get more visually complex.  That's where some real art comes in.


I have a stack of blank school-work that a certain teenager generates.  Well, the school doles them out, he just leaves a lot of them blank.  They are begging to get monoprinted, and will be even more interesting with the assignment questions and various doodles that did get done.  I will show you in another post what I've done with these papers.

Playing with supplies, it does my art happy!

Wednesday, November 27, 2013

Sparkle Xmas Card

This was a new technique I learned at the November 2013 scrapbooking crop sponsored by Kimi Orton, owner of ScrapTherapy.  She gave very good written & verbal directions on how to use glitter, I will paraphrase them here.
1.  Sprinkle glitter on Sookwang adhesive paper in the usual way, save the remainder & dump it back in the container.
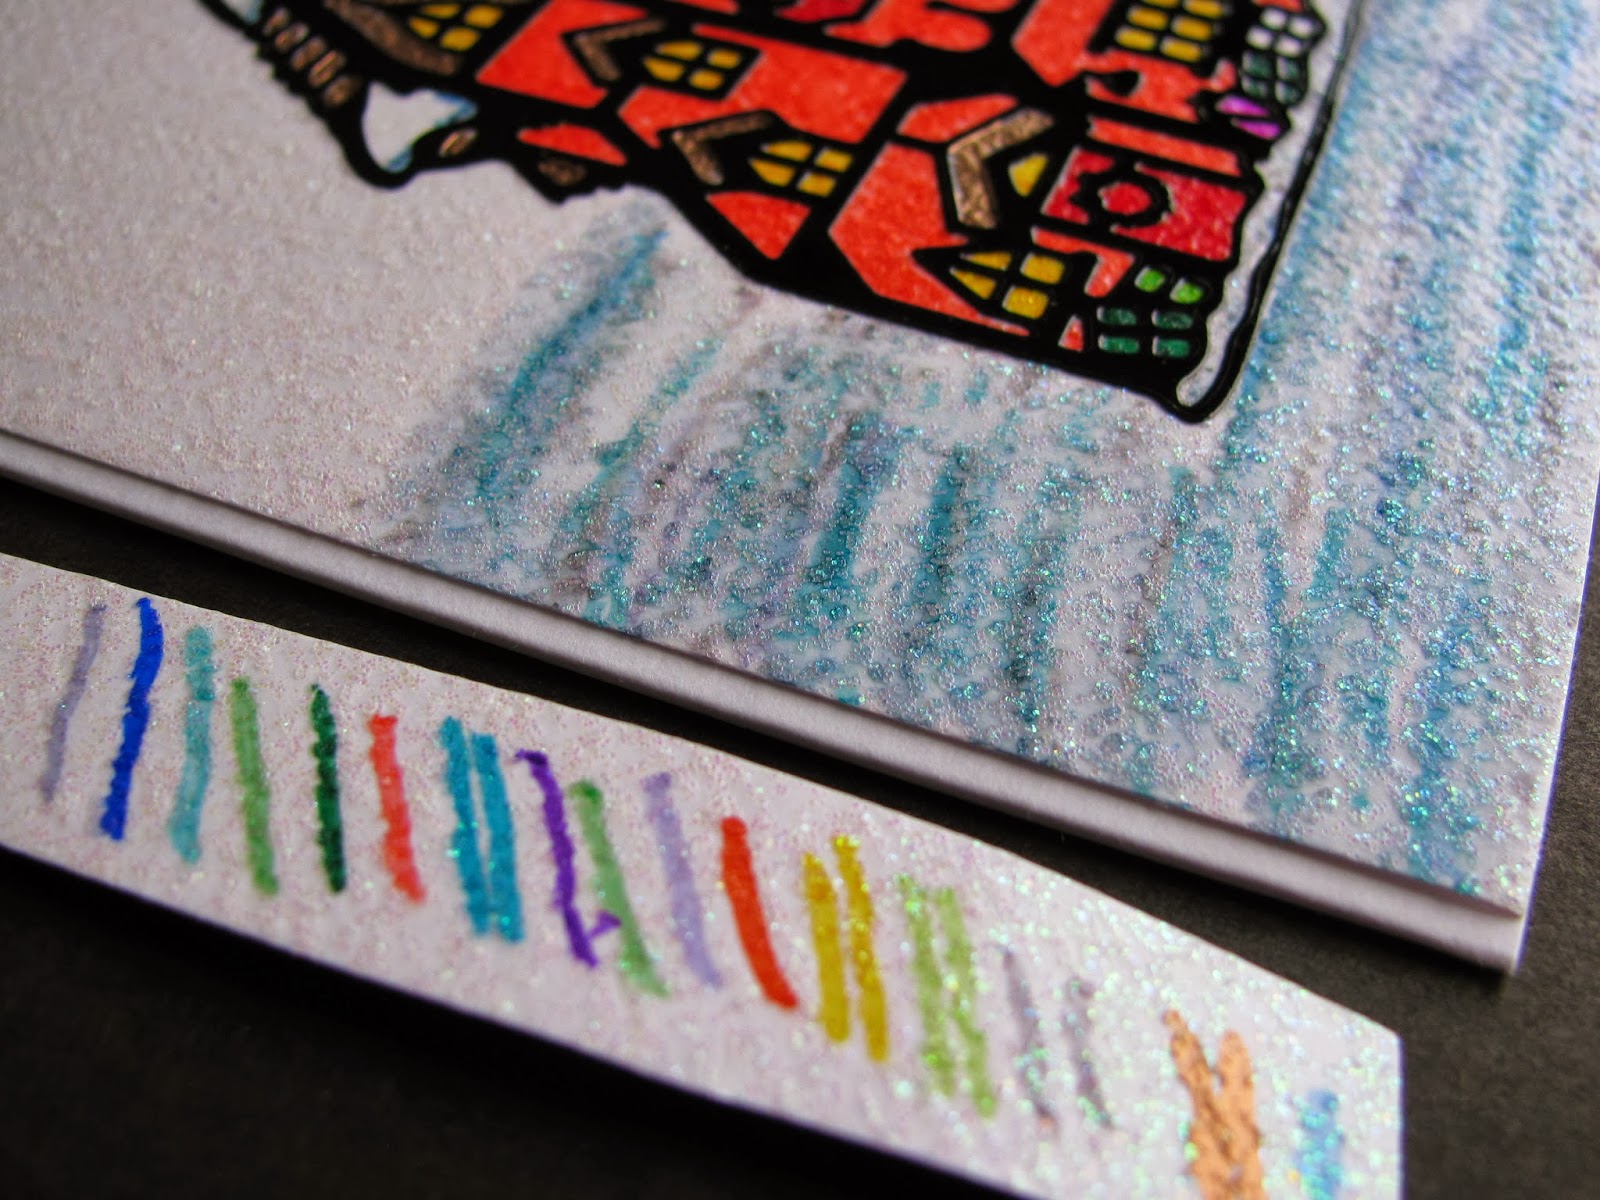
2.  Spend some time with a "peeloff" of choice.  What is a peeloff?  It is a lazer cutout vinyl sticker, sortof like a stained glass window if that makes sense? Peeloffs come in all sorts of variety so have a look at your local scrapbook store to see what you can find.  Weed the vinyl: Use a pokey tool to remove the filler pieces, or save them in a 2 step process with transfer tape if the image allows dual use.  I didn't save the packaging to tell you what this Christmas village house was from, sorry.
Tip:  I used the tip of my microtip nonstick scissors to poke the little bits out.
3.  Trim a piece of transfer tape, apply it to the vinyl, burnish well.
4.  Peel up transfer tape & apply vinyl to glitter paper.  Remove the transfer paper.  Question: is it okay to use preglittered paper?  Answer: YES.
5.  Get busy colouring with alcohol based markers (copic, CTMH, Sharpie, Bick...)
I used Sharpie markers because that is what I have.  I couldn't find my alcohol blending pen, so I bought a Copic 000 no  colour blending pen.  Blending the variegated stripes of colour softened them nicely.  I was even able to fix an oopsie colouring on the overhanging snow in the roof.  You can see I was testing Sharpie markers on a scrap; I used a range of blue, grey, silver for the "snow."  I'm not entirely happy that it looks like the house is floating on the background.  Considering I was first time playing with technique I don't think it was a big deal, it's still pretty.  The card is a CTMH shaped card, from my consultant kit, they come all tucked in their envelopes.   It was a pleasant surprise to have a lovely edge on the card.  I traced the shape on the back of the sparkle paper and manually trimmed it out.  That's it.  I will have to percolate on it a bit to decide what will fix the floating look, maybe some doodling?  Its now winter, so time to enjoy avoiding the cold!

Sunday, January 6, 2013

Nursery Vinyl

This project has been a labour of love.  I planned & thought & was stalled multiple times.  A friend helped me put up the vinyl in the nick of time, 4 days later my baby boy was born.  I will give you the details of what I did & the pictures can be clicked on to enlarge if you like.

 I ordered Oracal 631 (indoor) vinyl from OhMyCrafts.com on a sale of irregular vinyl with bonus transfer tape.  I snipped colour samples of each piece for reference with the cartridge handbook.  I then planned out the colours for the animal layers.  I had to do multiple pages on the gypsy with assigned colours for the layers.  I used cricut Zooballoo cartridge & my Gypsy to plan out the animals & letters. The animals are cute, and mostly only 2 layers.  The animals are 10.6" and the letters are automatically sized to match.  I spelled out the names of the animals on separate pages about 1/3 the size of the animal letters.  After double checking everything I kiss cut the vinyl on my Expression cricut machine (12x24" cutting mats).  I cut apart all the pieces, weeded the waste vinyl out, and sorted the animals layers so they would be ready to apply.  I won't go into vinyl application instructions here, there are plenty of talented youtube videos & other bloggers who have explained it beautifully.  My friend & I used a lazer level & post-it notes to guestimate positioning around the room.  I didn't note what measurement we used but the top of the upper animals is one height, and the bottom of the lower animals is the second height.  If I remember right it is about 2' between those lines.  I also could've cut a shadow layer for the base of each animal but I didn't want to add more work to this project.

The alphabet is purposefully mixed up for visual interest.  It will be a great memory game later, IE Where's the Fox? 

Here they are on your left as you enter the room & look to your right.


 Hippo & Elephant are kind of traitors, they were difficult to align and demanded multiple attempts by hand to apply.  Using transfer tape for the majority of the vinyl helped.  But, those two brats are probably going to have to be recut & redone since they languidly hang on the wall, baiting everyone who looks to smooth them back down (petting?).  They were threatened with the hairdryer to stay stuck but alas, they continue to rebel.  Washing or wiping the walls pre-application might've helped too.  The cricut tool kit was indespensible for this project. 

Sitting nursing my little one I see picky things like funny spacing.  Unicorn, Cat & Elephant layers are all the same with lilac as the top layer, pink as the bottom layer.  Giraffe could have had his layers the other way with tan on top, brown on bottom.  Interestingly, the tan vinyl seems to fade into the pale blue wall & is hard to see.  Sharpie markers helped to distinguish mouthes & details on a few animals.  I really like the hand doodling of lips, eyelashes & whatever other sweet details evolve with love.  Quail was outlined while on the wall , Vulture & Tiger could also use outlining.  It would've been smart to graffiti them before they go on the wall, but hey, they're up now & I might get to it, eventually. 
2 hours paper planning
4 hours planning on gypsy
2 hours cutting
2 hours weeding
1 hour organizing layers
5 hours visiting with friend & putting up
 = 20 hour project worked on over 2 months, well worth it!

Happy New Year everyone!

Sunday, September 23, 2012

Seventh Challenge, reveal photos

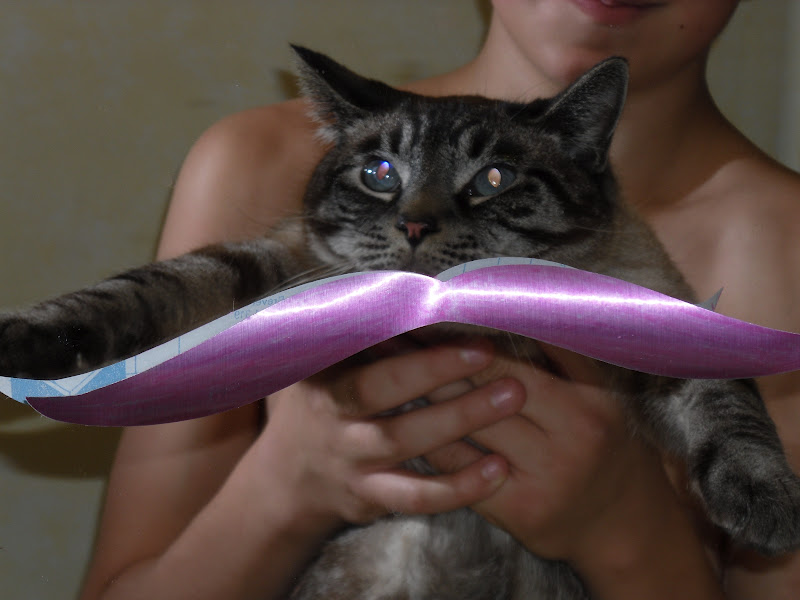
Here's the reveal photos of our photogenic felinne, hee hee!  You will have to pardon my shirtless teenage assistant in the background.  All cats have a super power, shedding like mad when they don't really want to do something.  I can't imagine why Boomer would have trouble posing for pictures?


The 'stashes were stuck to the bathroom mirror with temporary poster tack.  No one was injured in this photo shoot, thankfully!
I like the blue 'stashe since it complements Boomer's blue eyes nicely.  The red one is kindof rakish and dapper.  The white & silver ones are quite distinguished looking don't you think?  So many looks!  I didn't get photos of all the moustashes since Boomer ran out of patience.  That & 2 fell down behind the vanity never to be seen again.  Wouldn't these be a great April Fools joke too!

Saturday, September 22, 2012

Seventh Challenge, Canadian Swarm 2012

Seventh Challenge by: Lilygirl:  Here is my challenge to you!!
1. Steal an object from a family member, friend or neighbour ( for the faint of heart an object found in a thrift store will do in a pinch)
2. Alter object using at least 2 Cricut cuts.
3. Quietly and unnoticed return altered object to original owner/spot (if this is a thrift store find, gift it unnoticed to someone ie. hang on neighbours fence porch, door etc..)


What did I "steal" to meet this challenge?  Identity?  Maybe.  How about I steal some dignity?  We all need more Ha ha's in life!

I was able to use some of the gypsy freebies that came with my circle memberhsip renewal, specifically the "Moustashes & Glasses" digital cartridge.  I figured out it is about 4cm the width of the average nose, very scientific guessing with a ruler, right?  I picked out all the moustashes, and made the very skinny one 43.8mm wide x37.5mm high, and let the others automatically proportion themselves a la gypsy.  These are different types of vinyl, the brown is wood grain ConTact paper, the white & silver is Dollerama shelf liner. 
 The silver is ConTact paper.  It looked quite blah.  All cuts were done "kiss cut,"  blade dial 3, cricut pressure dial 3.
Look how nice they become with some help from Sharpie markers!  The brown & plum coloured ones were done with Permapaque markers by Sakura.  They're nice, but they don't reveal the metallic shine as nicely as Sharpie does.  
 I have another post coming, I just need a photogenic feline for the final reveal of this crime!


Thursday, September 13, 2012

Fifth Challenge, Canadian Swarm 2012

I am so pleased with myself to have finally made something.  This swarm is a good motivator.  I chose to start with how my own challenge inspired me.  That, & what's a challenge without an example?

Here is the challenge:  
1.     Cut a “Gang Symbol” for the circle, or any club you belong to but have been meaning to show pride in membership.  It can temporary or permanent. It can be made from vinyl, a sticker, iron on fabric, a mask to spray-paint, fabric paint & freezer paper…
2.    You must go graffiti it proudly onto something you display & use regularly.  Some suggestions: cell phone, day planner, tablet, laptop, car, t-shirt, jacket, hoodie… 
3.    Have fun Circle member rebels & non-rebels!


For both projects I used Cricut brand pink vinyl, "kiss cut" blade pressure 3, pressure 3 on the Expression machine.  My gypsy made quick & easy work of sizing the images from the "cricut everyday" cartridge.  I didn't even bother using transfer tape since these cuts weren't very big.  I understand this vinyl to be quite durable, yet entirely removeable when required.  Before applying, I wiped both surfaces with rubbing alcohol to remove any residue oils & grime.
Sized 4.5cm on the gypsy (45mm).  Much nicer than the "Hello Kitty" bandaid that was getting pretty tattered looking.

Sized 10cm on the Gypsy (100mm).  See it there on the drivers side hatchback glass?  I didn't want it too big to invite a lot of attention since the Circle is quite an obscure membership here.  That & the more recognizeable a vehicle, the more you risk being "targeted" it seems, sad but true.

Sunday, April 17, 2011

Teachers gifts

Its coming up to that time of the year, summer. These are the gifts we gave last year to the teachers & school bus drivers that work so hard to help my Kiddo with his education.  I used my Gypsy to design & Cricut to kiss cut the vinyl.  "Kiss cut" is just enough pressure to cut the vinyl but not enough to cut through to the backing too.  I knew I wanted black letters over coloured letters.  On the gypsy I organized all the black lettering on one screen to cut from one sheet, all the yellow images on another screen.  It seems complicated but makes sense to not waste vinyl going back & forth.  Taking a bit extra time planning streamlines the cutting process.  Transfer tape makes easy work of getting the vinyl from the backing sheet onto the containers.

Bribes done with "Street Sign" cartridge, rewards done with "caligraphy collection" cartridge fonts.  The teacher's name is done on the other side using "hello kitty" font, but I forgot to get a picture.  This round glass wasn't easy to lay the larger vinyl pieces on, didn't think of that when I chose it.

Mr. S on the lid done with "street signs" cartridge with circles added to the edges of each letter to round them out.  Bribes uses "donjuan" cartridge, rewards uses "wild card" cartridge for the fonts.

Mrs. C done with "lyrical letters," Mrs K done with "ashlyns alphabet" Mrs W done with "storybook" cartridge fonts.  These are frosty glasses.  Other teachers were envious I heard.  
 The bus butterfly & golf clubs (not shown) were all images from the "paperdolls for everyday" cartridge.

What gift isn't complete without candy?  I kept back a few TimHortons gift card for back up last minute gifts for anyone I missed with the candy containing gifts.  I got the images all planned in about 2 hours, cut out in about 30 minutes & Kiddo helped with assembly.  When they were ready to give they each went into clear bags tied with ribbon.  I know its early to even think of June, I can't wait since that means summer time!

Sunday, April 10, 2011

Older projects

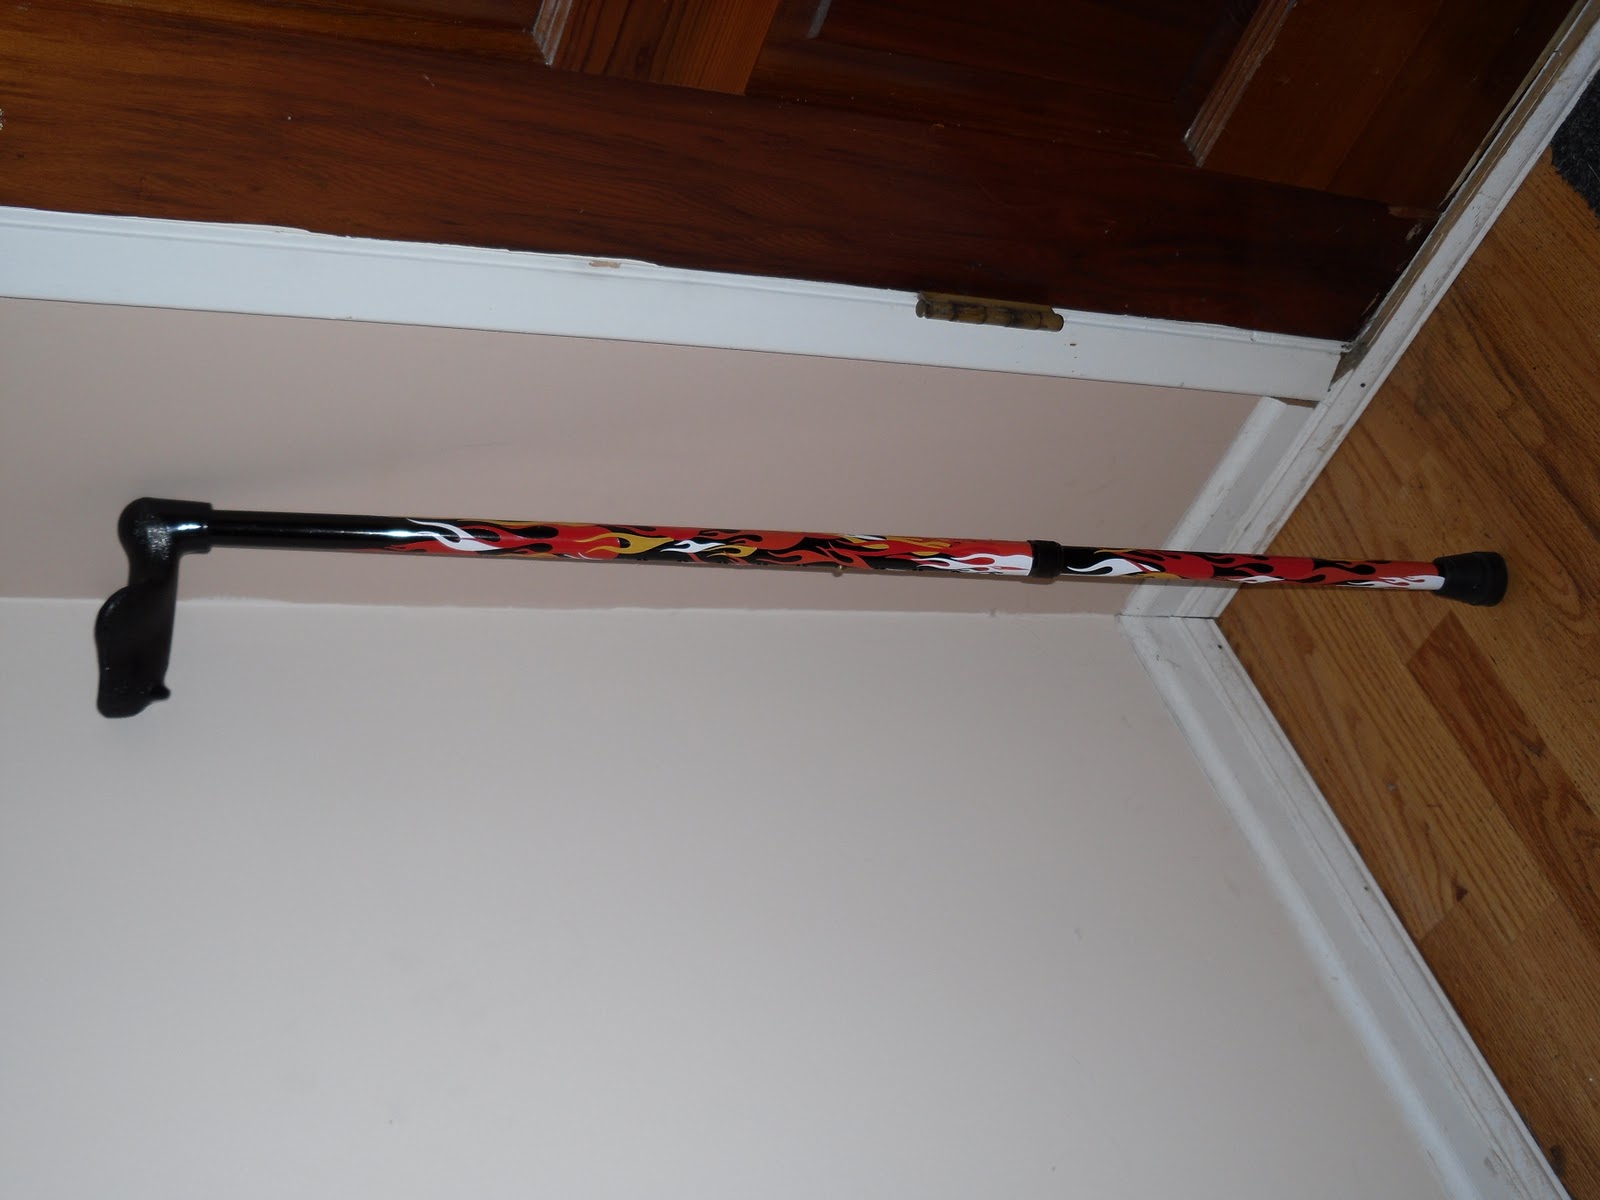
These are some older projects I've done.  A good friend was recuperating from a surgery & I offered loan of a cane.  It was just sitting around & she could use it so the match was made.  We were  gabbing away over tea & a devious idea occurred.  I asked, if the cane were decorated, what would she have on it?  Bubbles?  little cars?  flames?  She replied, "Oh, definitely flames."  I asked ascending or descending?  She specified ascending so it would seem that with every strike the ground was on fire.  The idea was set.  I asked a local auto detailing shop for some scrap vinyl & together with Gypsy & "Indie Art" cartridge I cut out a whole lot of flames in varying sizes, white, yellow, orange, & red.  Again with the sideways pictures, sorry about that.

She didn't know I was doing this & I speedily delivered it on April fools.  We had a happy giggle.  We're all so happy she's mobile again. This is not a reminder to hurry up & return it, its a statement piece now, hee hee! 


I make our own dog beds from time to time.  I take an old blanket & fold it in half, marker a line down it, fold it in half the other direction & marker again (divided into quarters).  I bomb it to my sewing machine & zigzag like crazy 2 seams parallel, bookending the black lines.  Once they are cut apart (between the zigzaging) they make fine dog beds.
 Of course Boomer has to try them first.
 Looks like they are Boomer approved!


Last year I bought Kiddo a foam filled chair.  The problem is it was the last one, on sale & bright orange.  My brain couldn't leave such a good price.  I thought, oh yeah, I can dye that cover.  I bought some RIT dye, several packages of dark blue & several packages of navy blue.  I twisted that cover onto itself, soaked it & added it to a big bucket with the dye.  Thankfully I remembered to wear gloves for this.  Once it had sat for about 20 minutes, it was squeezed out some with Hubs help & re-twisted the other direction for a repeat soak in the dye.  RIT instructions were followed & this is the result.  We called it "the tiger chair" since Kiddo loves tigers.  Occasionally it is called the moldy orange.  Boomer doesn't care, despite the demonic glowing eyes, he approves.

Here's my orchids blooming last year, shared with some mini daffodils.  Yippee for spring!