Showing posts with label Cards. Show all posts

Friday, February 13, 2015

Valentines day cards

 Boomer doesn't care if it's Friday the 13th.  He is loving his little red fortune cookie cat nip toy. He wants everyone to know, he loves you too. 

These are cards I made using the CTMH Heartstrings workshop on the go card kit.  I did all the cutting out in about 40 minutes, assembly in 2 hours. 
 The stamp set is nicely versatile so I can mix the stamped sentiments any which way and still have it turn out nicely.
 I just gave them away at a scrapbooking weekend with friends last weekend.  And of course, I varied it up the placement of pieces, just because I can.  I think the last picture really shows
that no matter what arrangement, they look pretty good.

Happy Valentines Day!  (in advance)

Thursday, February 12, 2015

Artfully Sent Robot Birthday cards


Don't you just love my ghetto watermark?  I'm so pleased I started remembering to do that, LOL  Another card created with Artfully Sent CTMH Cricut cartrige, and unknown papers, possibly Recollections brand.  Just plain cut, it looks okay, but needs brightening.  The orange and red wasn't doing it for me.
Sorry, another sideways picture, but its actually in my favour for once.  I used my pencil trace and layer in holographic glitter tape from the dollar store for the sentiment.  I decided I wanted the outline of the robot to stand out a bit better.  So, I traced it with a black marker, maybe sharpie I forget, and slipped and wrecked the card.  So I just kept going and doodled all over, added some "punchies" for decoration like stars and called it done.

What do you think?  Was it saved or wrecked?

Wednesday, February 11, 2015

Artfully Sent I'm crazy card

Another Artfully Sent CTMH Cricut card, cut at the suggested 7" size, unknown paper brand.
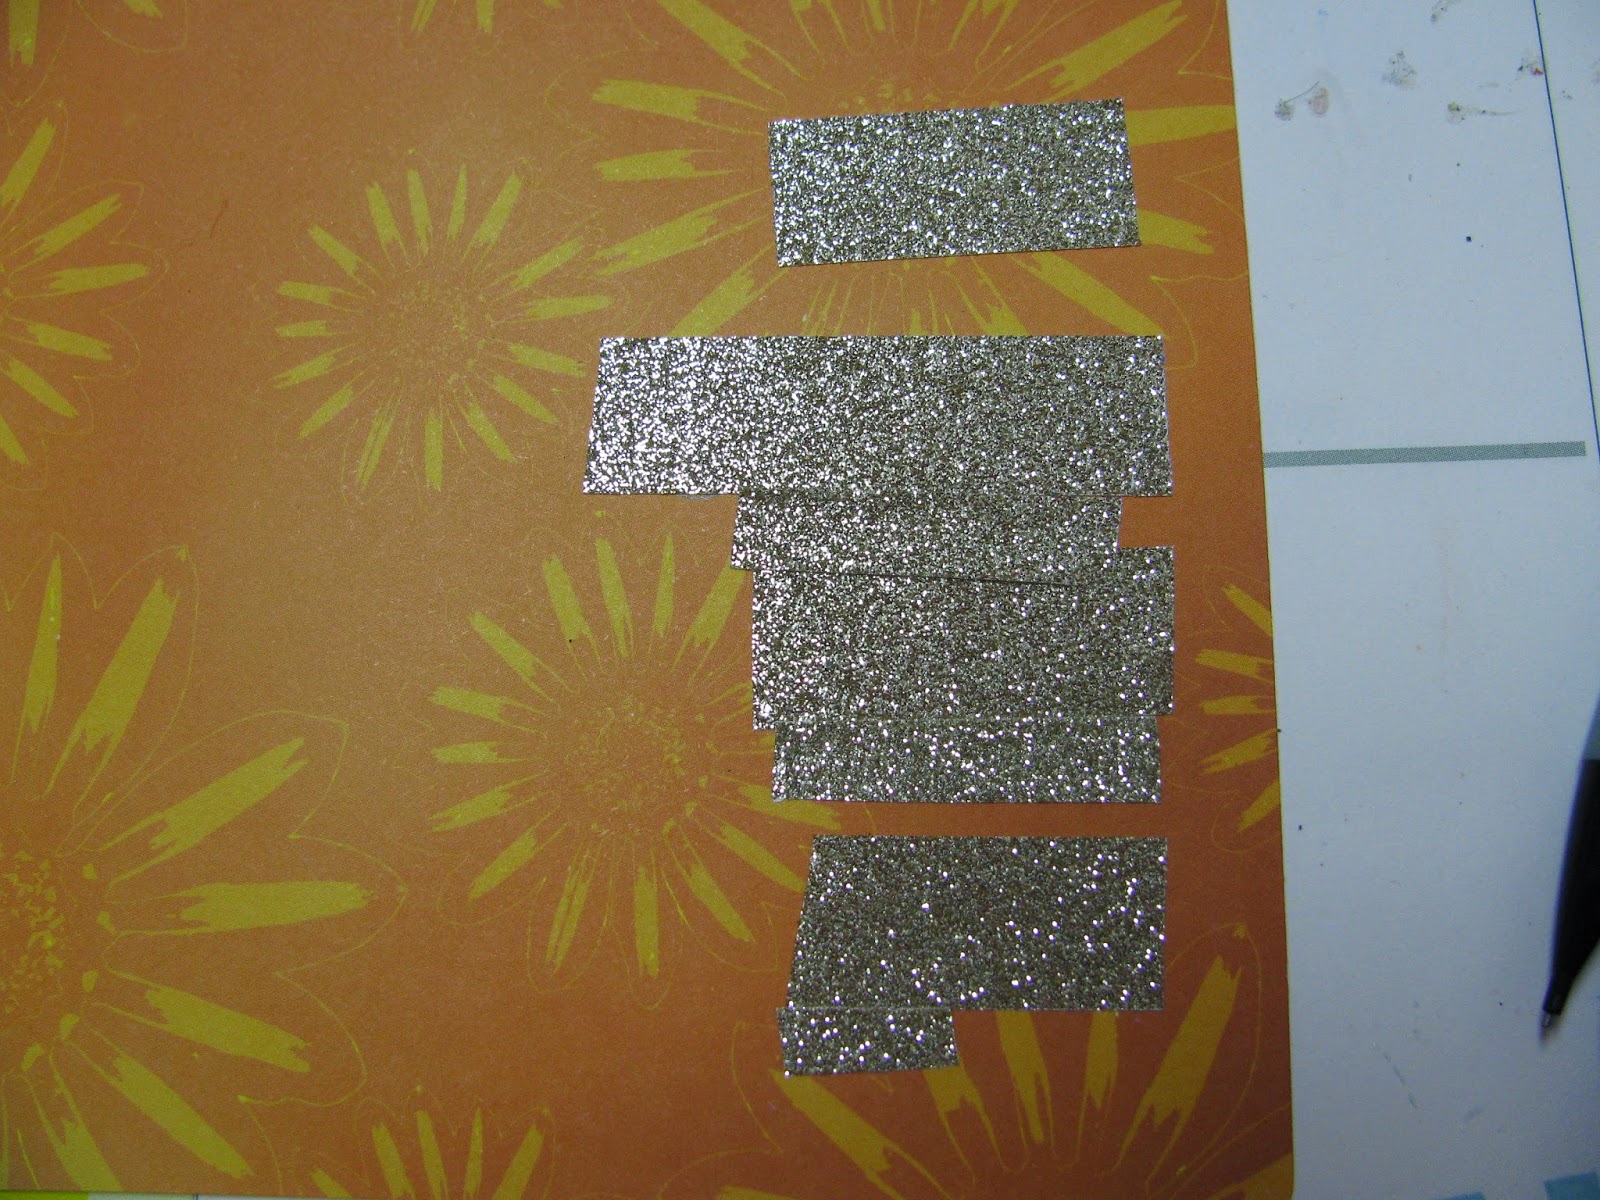
This shows how I lightly penciled through the cutout words.  I then covered my pencil lines with glitter tape from the dollar store.  Because it will be covered by the overlay, the silver really pretties it up compared to the first picture.  I'm all about easy tips, and this is a game changer for overlay cards in my opinion!  I think this took all of 25 minutes to create?  I can spend longer hunting for cards in the store by the time I've loaded up, parked, searched it out, stood in line and returned home to then find postage.  Again, this was all done with my low tech old Cricut Expression machine.

Thanks for looking, I hope you have a fabulous day!

Artfully Sent Happy Birthday card


30 minute card made using CTMH Artfully Sent Cricut cartridge, sized 7", unknown brand papers, CTMH dots embossing folder, and stickles glitter glue.  The "Its time to celebrate" stamp is included with the Cricut cartridge.
I've been purposely using non CTMH papers, because I seem to have a bunch in my stash, and mixing with CTMH products.  I've found that all CTMH products, including inks and papers, really cooperate nicely with other brands.  To me that is the hallmark of a good company practice.  I'm still an independent CTMH consultant, if you need goodies or just want to look at pretty things have a look at my online business address:  http://karenrichardson.ctmh.com/ 
Thanks for stopping by!

Tuesday, February 10, 2015

Artfully Sent Congrats card


Quick card, about 30 minutes, made using unknown papers, and the CTMH Artfully Sent Cricut cartridge.  I backed the "congrats" with silver glitter paper and coloured it with Sharpie markers.  The green starburst behind it was silver, recoloured green with Sharpie marker.  The envelope sized automatically with the automatic settings set at 7".   I made this for a my son's friend who's graduating high school early because he has enough credits.  Every Mom knows that's a success!
Sorry I'm still struggling with some pictures coming out sideways with blogger.  I have no technical fix skills to stop it, so I will continue to apologize each time it happens.

Friday, October 24, 2014

Fourth Annual Canadian Cricut Circle Swarm Challenge #1

On the Canadian Chat in the Cricut Circle messageboard we do an online "swarm" where people that offer prizes can issue challenges to win their prizes.  Its a lot of fun to see what everyone creates.  Unfortunately this is probably the least active year since its begun.  Fortunately, I've found some time and done all 3 challenges!  As always, click on any picture to enlarge details if you like.

Challenge #1: 
My challenge has 3 parts. As everyone knows from previous swarms, we are soooooooooo (not) very strict about our rules, LOL! Just play along, have fun, cross enter your entries in other things if it suits you. Just show us what you make to count as an entry.

I challenge you to fulfill your entry with all 3 components.
A. Create 6 cards: all the same or all different, any size, any theme, but they must be functional cards, not tags or postcards.

B Stamp an image on each card and Colour it however you desire: colour all or part, colour with chalk, colour with ink, colour with markers, colour with pencil-crayons, colour with water-colour... You get the idea. You could even go crazy, colour the embellishments, colour the paper, have fun!
BigGrinBUT, at least one of the 6 cards must be Halloween themed, interpret as you like with colour, season, image, etc...

C. Post a picture of your creations, and then give them away, with envelopes to fit. Give them to a nursing home, an elderly neighbor, a charity group, a shelter program, it's your choice where, just give them away and let us know how that worked out for you. This is a way of celebrating being thankful for our creativity, and the Thanksgiving portion of this season's challenge.


 This is the Blooming heart Stamp #M1045 stamped with Memento tuxedo black ink, coloured with ShinHan twin touch alcohol markers, cut on white daisy cardstock to make 3 inch note cards.  With black pen I hand doodled a rustic outline.  The image is matted on retired CTMH paper.  I've seen these done on youtube and a few blogs and had to try it.  It's a great way to play around with the new markers.

The next 6 cards are made using the "Better with a Friend" #D1608 page 9 Hostess rewards, of the 2014-15 CTMH Idea book.  It (and 2 other stamp sets) came with my new ShinHan markers as a consultant perk.  Images are stamped using Memento Tuxedo black ink, and coloured with those fancy new markers.  The sentiments are stamped from the "Artfully Sent" cartridge.  Yes, I scraped together some cash and got my hands on it, more on that later!  Some of these cards are edged in CTMH Washi Tape.  That's fancy Japanese trend speak for patterned paper tape that is all the rage right now.  Really great value with CTMH, the rolls are not stingy!  A few of the cards are grounded using Bakers Twine, both CTMH metalic, or from "the Twinery" company which I won a few years ago.

 Honestly, I don't know why these are sideways.  If anyone out there in cyberspace can help me figure it out simply and easily, I'd appreciate it.  The silly thing is that I took all the pictures in the same orientation, baffles me why blogger turned some but not all.

 The one above uses remnants from my "Pathfinding Cardmaking Kit."  I doubled it and made 30 cards, and still have scraps to make more cards! 
 The green blocks pattern paper is from my stash, unknown manufacturer.  I love how it complements her skin tone, LOL!

Here is all 6 cards, thankfully not cockeyed!  I will be giving these cards to my pharmacist and his wife to give away to their customers.  Together they run a locally owned business called Tabour Pharmacy.  They are really kind, caring, generous people.  They will know just who will need a little something pretty to share happiness with.

Saturday, September 13, 2014

#30 years of Happy cards

These itty bitty stamps got me to thinking of an article I read in a Cosmo magazine awhile back, about "sexting."  That got your attention I bet!  Sexting is texting using clever emoticon combinations to allude to what you want to communicate.  I can't remember the combinations that were exampled of course, but you can use your imagination.  
Looking at these stamps I saw:
Party like a rock star
Fabulous - you did it
It's your day - Be happy
To you from me SWAK/love  (SWAK = Sealed with a kiss)
heart this party
To you from me repeatedly
YUM or SWEET surrounded by arrows
camera repeatedly - picture perfect inside the card

Pintrest and google images are starting to show some fun results by many tallented bloggers.  There's even a blog-hop-list 30 years of Happy and Sept SOTM if you are interested in seeing more.

Here's my playing around results.  I used the new CTMH ink colours Pixie, Thistle, Flaxen, Canary, and Glacier.  I have given up on CTMH archival ink.  I tried it, it works well, but it is a lot of work to clean the stamps, and it stains stamps like mad.  Many many many YouTube artists and bloggers rely on Memento brand Tuxedo Black fade resistant dye ink for their stamping and marker needs.  I finally bought some to try and it works really well.  It does not stain the CTMH acrylic stamps, it stamps off with very little excess, and cleans off the stamps easily but thoroughly.  What I have stamped and coloured using my new alcohol ink Shin Han markers did not smear, did not transfer to the pen, and performed well.  The sequins are from a multi-colour bag from W@lmart, unknown brand, and glued on with Liquid Glass.
 The "Hello" word bubble is from my Artiste stamp set D1531.   I gave it a wash with "Wink of Stella" white glitter pen.  A word of warning, let the stamped image dry for a day or two before using Wink of Stella products.   Mine is now a funny irregular grey.  I was playing around with making a border with this card.  I'm not sure how to finish it better just now,  I don't care for the gap in the upper right corner. 
 These two cards are just from playing around with the #30daysofHappy stamp set, CTMH Washi tapes Gold PolkaDot, Smoothie Striped, Honey Triangles, Silver Geometric, Ruby Chevron, Sparkles assortment, and a black sharpie pen since it was handy.

These are just simple, flat cards.  They would be perfect notecards for encouraging someone.

Leave me a comment about your favorite card or another combination of the stamps to say something, for a chance to win the finished cards!

Oct 1, CONGRATULATIONS LAURA, you won the cards!

Saturday, February 8, 2014

Cloud 9 Kit Remake

card 1

card 2

card 3

card 4

card 5
The top card of each picture is the Cloud 9 January 2014 promotion.  The bottom pair were made with the discontinued Avonlea paper pack currently $2.00 in the "while supplies last" section on my CTMH online business address, and different inks, washi tapes and embellishments.  I think they turned out more neutral looking or even masculine, but definitely successful.  These kits come with instructions that can be remade 5 different ways: different papers, and different orientation x 4.  How's that for "bang for your buck!"

Saturday, February 1, 2014

LollyDoodle Card Kit!

I just finished making this 15 card kit.  I couldn't resist the fresh spring-like youthful happiness it enthuses!

This kit is in the new Close To My Heart Idea Book Catalogue, Spring/Summer 2014 found on page 75, order number G1080.  I plan to make this kit again in a different paper package, why not?  All the formula work & calculations are done in the instructions, YAY for simplicity!  It's mighty chilly these days, may as well enjoy indoor time.  Thanks for having a look, I'd love to know what you think.

Tuesday, January 7, 2014

Card kit

 The Close to My Heart January 2014 "National Paper-crafting Month" special is a Cloud Nine card kit valued at $46 of products.  It is deeply discounted to just $15 with a minimum $35 purchase.  Here are my slight variations of the 10 cards.

 Aggg, sorry this is sideways, I don't know how to rotate it for you.  This is my second time trying to fix it today so I have to concede to the computer gremlins.  The silly part is that both picture attempts were not taken sideways.  Gotta love it when technology is so smart it goes boink.
Tip #1:   Despite seasoning the stamp by pre-stamping a bunch of times on scrap paper and  using proper technique, some images stamped poorly.  Smart bloggers call that the "distressed look" and call it done.  The right hand side of the mustache is fixed, the left is just okay.  Please click on any pictures to enlarge and you will better see what I am showing you.  The fix is as simple as colouring.  Before opening the ink pad, squish the lid, open it and then pick up ink with the tip of the blending pen item # 3174.  Touch up the faded areas from the lid ink pool.  I think I had trouble because the pre-cut kit shapes were from lesser quality paper?   Thats how it seemed compared to the scraps of CTMH white cardstock scrap I was pre-stamping on anyways.  I used my snowflake waste paper (January 1 post) for stamping off ink and the images were far better.
Tip #2: If the stamp images and your technique are good, but the results are not, try a different paper.
Tip #3:  Save bigger pieces of waste paper to stamp off on before they hit the recycle.  I figured I paid good money for good paper, may as well get all the use of it I can.  If you are inclined, it can be collaged or made into handmade papers too.
Here the card on the right is fixed, the left is still blotchy  distressed looking.  This kit was easy to do. I hope to try it again with different papers just for fun.  Baby nap timer allowing of course.  That's another advantage of a kit, once you have the cutting/assembly instructions, it is yours to make more.  Happy January!

Saturday, December 14, 2013

Monoprint envelopes

Remember those monoprint papers I posted about Dec 4, 2013?  Or the hectograph post from back in July?  Here's what I did with them!  That tube in the middle is to make the envelopes lick-em-stick-em.  Splitcoast stampers has a homemade recipe for it, but for $4, the job is done.  I could always refill it I guess?  I saw http://canadianscrapbooker.ca/  Fall 2013 magazine featured this cool Kreatealope EnvelopeTemplates.  I first saw them on Splitcoast stampers email and I was hooked, I had to try this.  In the summer I found the templates at an out of town scrapbook store.  Who can travel without visiting scrapbook stores, pet stores, candy stores...  I digress :-D

The Kreatealope website has a video that shows just how easy it is; tear, fold, snip corners, glue 2 edges.  Like magic a pile is done very quickly if the steps are done assembly line style.  I don't mind the torn edges, they're just envelopes.  I could always trace & cut out to make neat ones if needed.  The bonus is that I monoprinted the papers double sided so the insides are just as pretty.  I think they would make cool security envelopes too.  This template is sturdy enough to get the job done, yet takes up almost no space to store.  The cellophane packaging is not going to stand the test of time.  I think I will punch a hole in the corners to hang on ring on the wall so they don't get lost in the craft room.  I bet crafty children would have fun making these?
Happy crafting to you!

Saturday, November 30, 2013

Frosted WOTG

This is the "Frosted workshop on the go, card kit" from Close to my Heart.  All that is needed is a paper cutter, and 4 inks (cocoa, olive, ruby, and twilight).  I made 15 cards from this kit with enough scrap papers to make more cards if I get to it.    I followed the cutting diagrams & assembled them in about 2.5 hours.  It would've been faster if my paper cutter wasn't worn out.  Time for a new one! 

Notice the 2 "Holly Jolly Christmas" cards,  particularly the stamping in the upper right corner.  After assembling the 2 vertical strips of paper, how do I align the stamping so it shows up?  With the clear acrylic stamp & block, it is pretty easy.  I placed the phrase panel where I wanted it, inked the snowflake stamp on an acrylic block, hovered it over the phrase until it was approximate, slipped out the phrase, stamped, set aside the stamp/block and then adhered the sentiment.  I felt pretty pleased with myself for figuring out that trick.  I don't mind that there are variations in my cards from the kit directions, that's part of the charm of handmade projects.
Season's greetings!

Wednesday, November 27, 2013

Sparkle Xmas Card

This was a new technique I learned at the November 2013 scrapbooking crop sponsored by Kimi Orton, owner of ScrapTherapy.  She gave very good written & verbal directions on how to use glitter, I will paraphrase them here.
1.  Sprinkle glitter on Sookwang adhesive paper in the usual way, save the remainder & dump it back in the container.
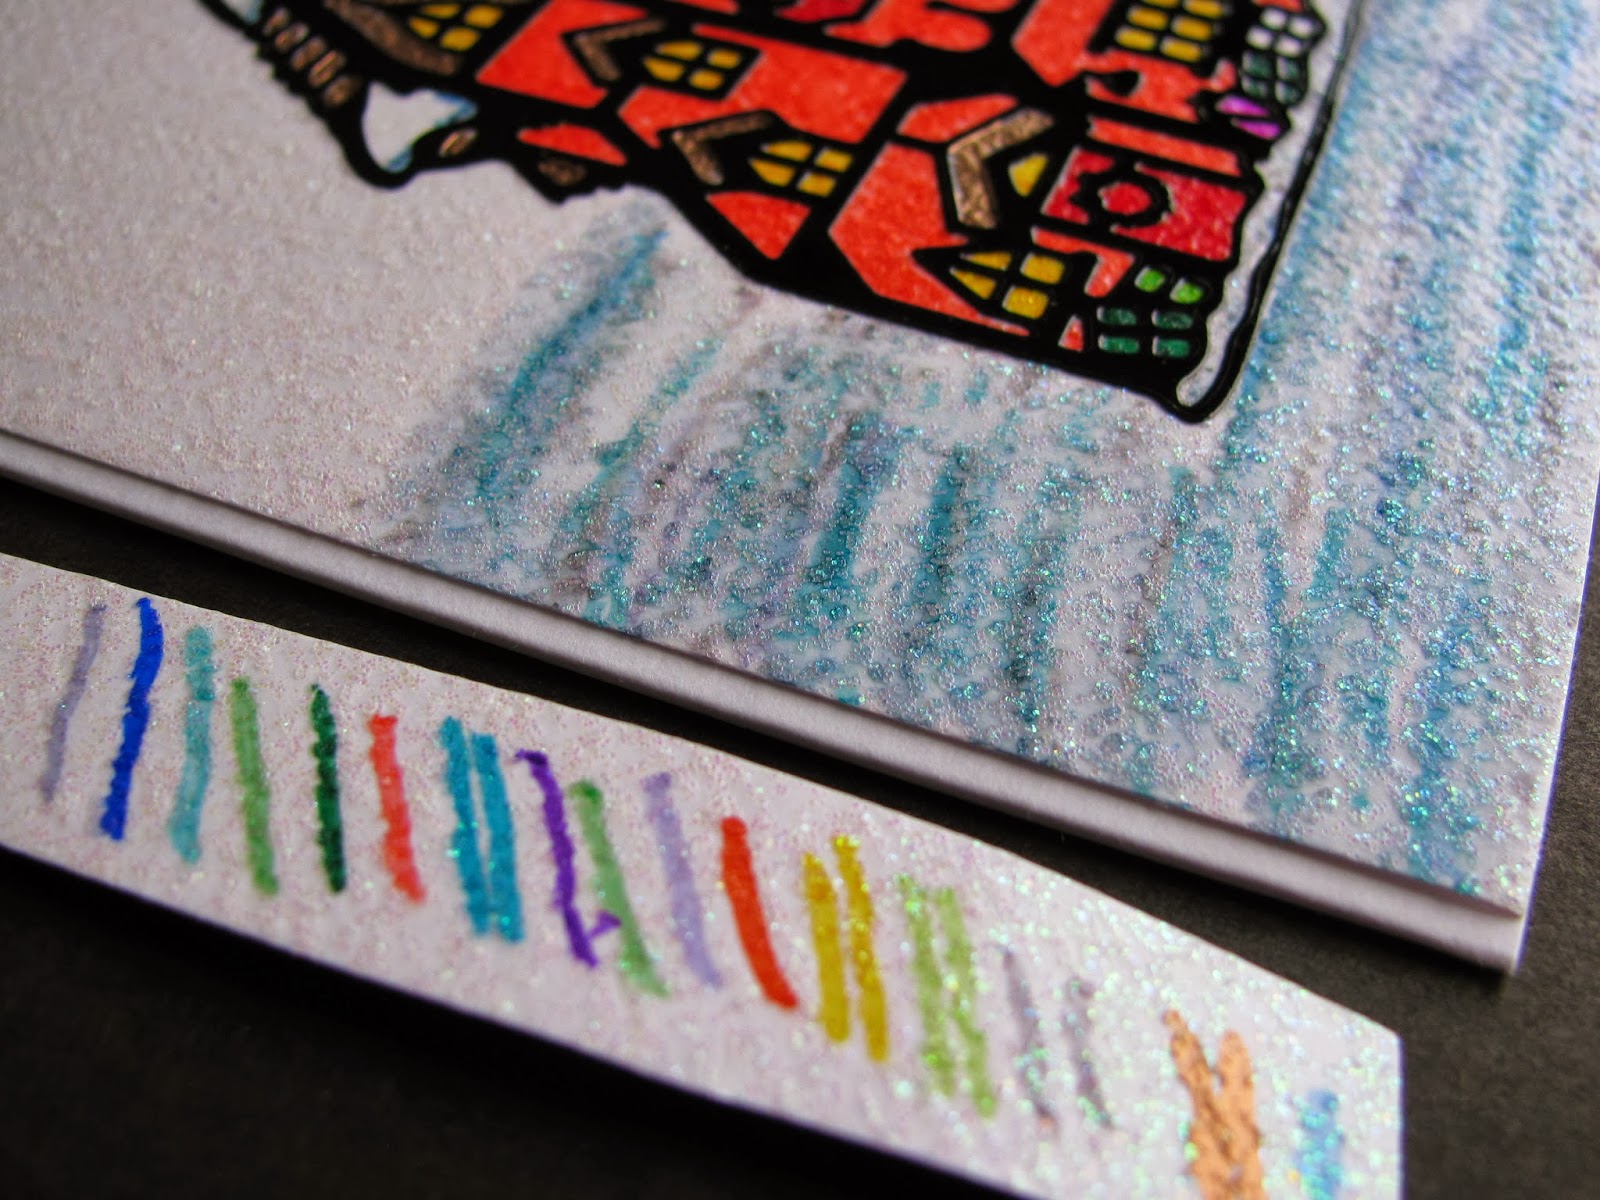
2.  Spend some time with a "peeloff" of choice.  What is a peeloff?  It is a lazer cutout vinyl sticker, sortof like a stained glass window if that makes sense? Peeloffs come in all sorts of variety so have a look at your local scrapbook store to see what you can find.  Weed the vinyl: Use a pokey tool to remove the filler pieces, or save them in a 2 step process with transfer tape if the image allows dual use.  I didn't save the packaging to tell you what this Christmas village house was from, sorry.
Tip:  I used the tip of my microtip nonstick scissors to poke the little bits out.
3.  Trim a piece of transfer tape, apply it to the vinyl, burnish well.
4.  Peel up transfer tape & apply vinyl to glitter paper.  Remove the transfer paper.  Question: is it okay to use preglittered paper?  Answer: YES.
5.  Get busy colouring with alcohol based markers (copic, CTMH, Sharpie, Bick...)
I used Sharpie markers because that is what I have.  I couldn't find my alcohol blending pen, so I bought a Copic 000 no  colour blending pen.  Blending the variegated stripes of colour softened them nicely.  I was even able to fix an oopsie colouring on the overhanging snow in the roof.  You can see I was testing Sharpie markers on a scrap; I used a range of blue, grey, silver for the "snow."  I'm not entirely happy that it looks like the house is floating on the background.  Considering I was first time playing with technique I don't think it was a big deal, it's still pretty.  The card is a CTMH shaped card, from my consultant kit, they come all tucked in their envelopes.   It was a pleasant surprise to have a lovely edge on the card.  I traced the shape on the back of the sparkle paper and manually trimmed it out.  That's it.  I will have to percolate on it a bit to decide what will fix the floating look, maybe some doodling?  Its now winter, so time to enjoy avoiding the cold!

Saturday, April 13, 2013

Spring Cards

 I never used to be a fan of "matchy-matchy" or coordinated sets.  They always seemed to be too perfect, prissy even on my first impression.  I guess I'm a bit damaged from the thought of sweater sets and the 80's pastels?  I have changed, in the name of simplicity & limited time on precious baby naps.  These cards were just playing around experimenting with scraps from the Chantilly paper packet, when I made the MyCreations recipe box in the previous post.  I also used washi tape, Happy Thoughts stamp set, Twilight ink, champagne ink, corner rounder (that does double duty to make scalloped edges too),  4mm gems and scissors.  I don't have any measurements for you other than these are standard A2 cards size - 4 1/4" x 5 1/2".  Some open left to right, others open bottom to top.
 I see everywhere on the internet pretty piecy, layered scraps of paper cards & scrapbook layouts & thought, I can do that too!  Since these are pastel cards I used a piece of black posterboard to pop-up my colours for the pictures.
 I never saw the point of all the inking fussy detail that I see done on scrapbooking & cards.  It always seemed to be done with black or brown & reminds me of dirty tobacco or grubby stains.  I thought about it & decided it could be done with colours, and I like it a lot better.  See that little brown & white polka-dot arrow on the upper left card below?  That's covering a little oopsie with ink.  The upper right card has a scrap of patterned paper fussy-cut as the centre accent.  The little sayings are the "zip strips" from the edge of the patterned papers, one side identifies the paper line & the other side has pretty details so I used it.  I enjoyed clipping in notches & snipping the washi tape to create visual interest.  I was surprised that I really like the look of inking the edges.  Not all of the scraps were inked on the edges for these cards, but that's okay with me.
A little tip I picked up along the way:  Use corrugated cardboard scraps on cards to give dimension, much more economical than foam sticky dots.  As always, click on any of the pictures for a closer look.  I enjoyed the girly spring like impression of these cards.  I used cardstock 8.5x11" weight paper from a box store instead of card/envelope sets because I was just playing around. Now I need to get a bulk pack of A2 envelopes to complete the set.  I hope you are happy where-ever you are & playing with your supplies too.  Thanks for stopping in to look.

Sunday, April 7, 2013

Card box

A friend has been purchasing these MyCreations Recipe box to cover with pretty paper & fill with handmade cards for gifts.  She told me they fit more A2 size cards & envelopes than the MyCreations card box does.  I got to thinking about it & decided to try one too.  I used the Chantilly paper packet, and Champagne ink pad to shade the paper edges, and clear sparkles to trim the edge. 
 I'm not sure if I want to ink the edges of the box, I kinda like the clean look of the white showing.
Sorry this picture is sideways, I had trouble framing it on the black poster board to make it show up nicer in the pictures.  I am thinking of sealing the papers with modge podge or something like that so it doesn't get beat up too fast.  The white paper covering seems to be tender on the edges.  The next post will show you the cards inside.  Thanks for stopping by to look!