Wednesday, June 15, 2011

Shrinky Dinks!

Well, I remember them being called ShrinkyDinks.  I have read a few places online that say plastic with the #6 recycle symbol also works as shrink plastic, but I have not tried that.  Other internet reading cautions that when heating plastic to do it in a well ventilated area.  Apparently some plastics when heated release a very fine powder, and of course fumes are always something to be cautious of.


Here's my nice set of sharpie markers.  I wrote each colour on a scrap of this shrink film to see how the colour changes when heated.  The strip on the right is what some permapaque markers by Sakura look like once shrunken.    A little experimenting up front helps get better results.  The colour gets darker after shrinking for some, more intense for other colours..

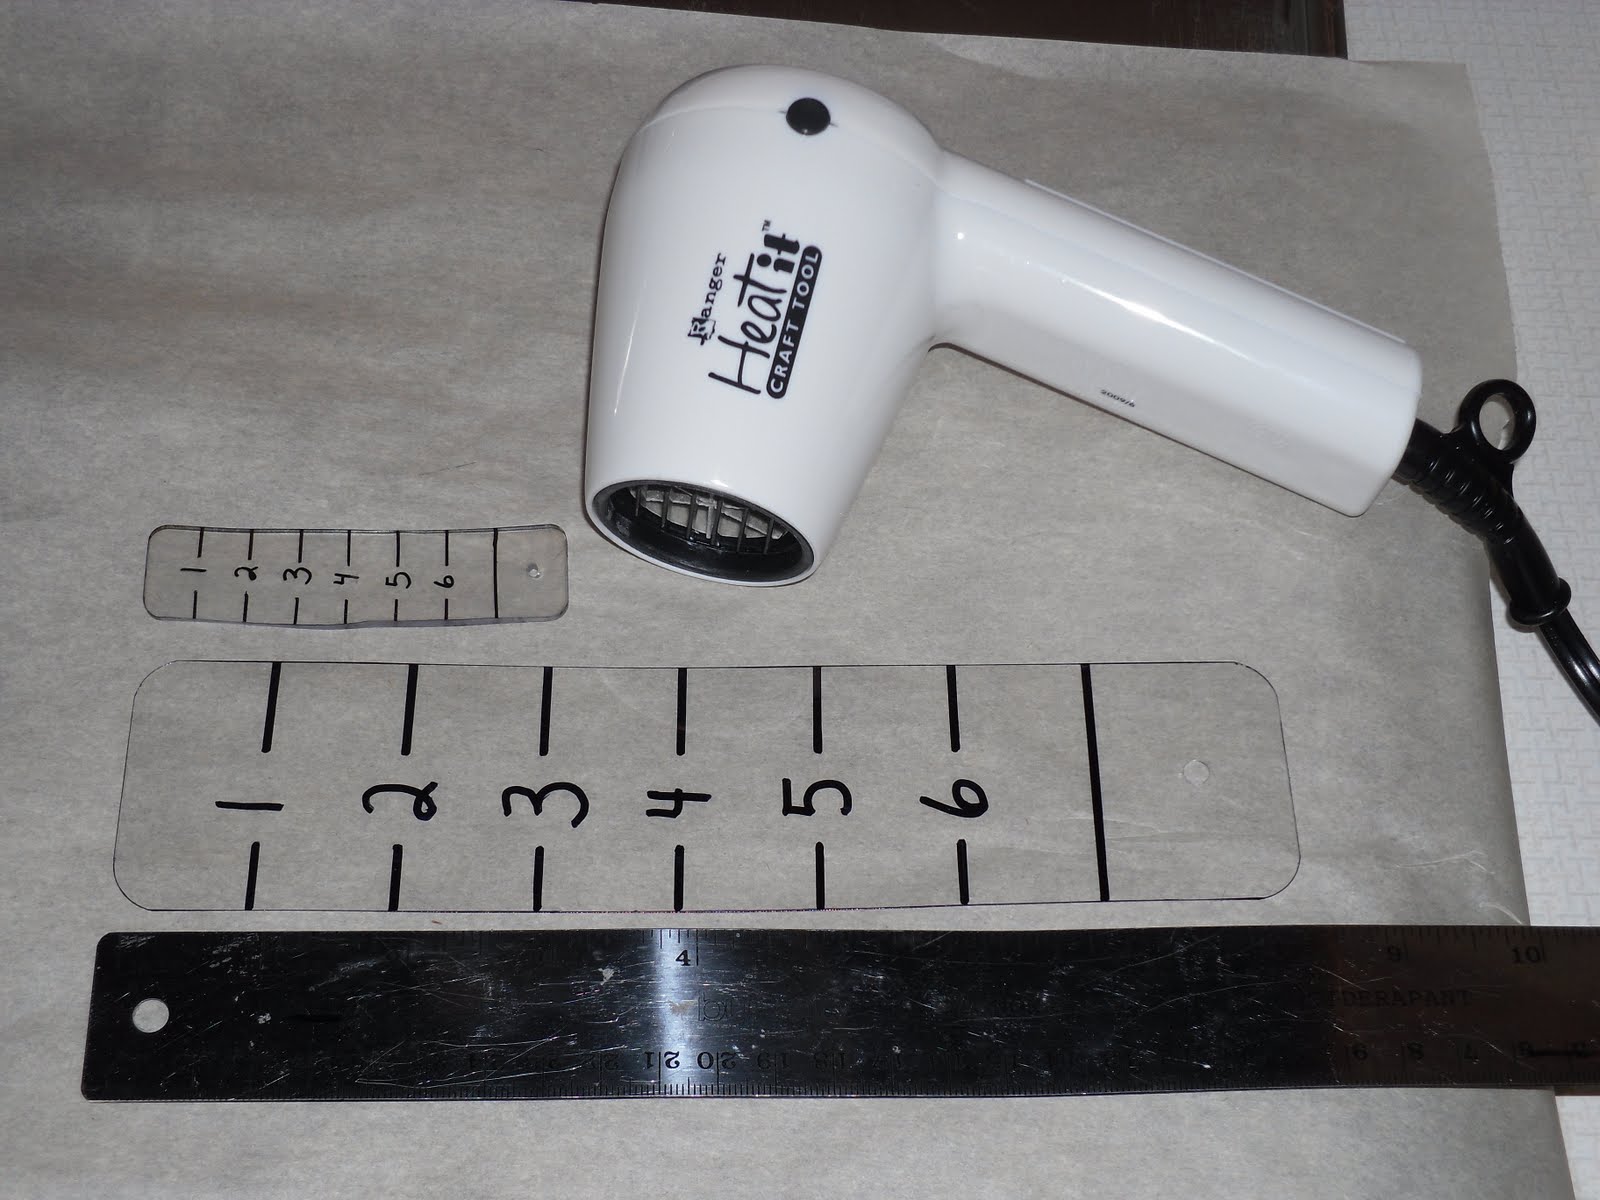
This is a sample ruler to determine shrinkage.  The package says it will shrink 20%.  Ya, using cross multiplication I figured out its more like 35-37% shrinkage.  I'm not a math person but I do remember how useful that equation is to solve for an unknown.  Here is where going back and forth between imperial & metric is an asset for simple measuring.  6"=15cm.  I have no idea how to make a teeny decimal point number translate into imperial.  I'm no math teacher so you can do an internet search for "cross multiplication" if you need a refresher.

I did an inch ruler, each number is one inch apart.  The side bars on one side are 1/2" marks, the other side is 3/4" marks.  They don't lay 100% flat once shrunk to the stopping point.  I really like my Ranger heat gun, its hot, low force, easy to hang onto, and best of all its quiet!
This shrink film stuff gives me ideas like the little shrunken head apple faces from old elementary school projects.  I wonder how distorted I could get doodle faces to look on shrink plastic, hee hee hee!  I shrunk these on an inverted cookie pan with parchment paper to prevent super bonding to the pan.  I used an old chopstick to push the pieces around while heating.  I did it over my stove cooktop with the fan blowing high and the patio door open to drag in fresh air.  Be careful if you try this yourself.  There will be another post using shrink plastic in July.

Sunday, June 12, 2011

Canadian Calling Card swap

I organized the first Canadian Cricut Circle Calling Card Swap.  I have never done this before, I learned a lot & got to know some great new people.  I started it in April & finally mailed them back June 4.  These are what each participant will receive.

Here is how I did it.  I asked people on the messageboard (MB) if anyone would be interested in participating in a Calling Card (CC) swap.  I forgot to add in the request to send a Self Addressed Stamped Envelope, but got feedback that week that it should be SASE so I don't incur extra cost.  Someone else suggested that it would be nice to include a few extra stamps or dollars in case there wasn't enough postage.  Someone else needed them mailed back as flat as possible so they would be able to get them through their postbox.  See, learning as I go...   I set the parameters to commit by April 24 & mail by May 1.  That gave a nice window of time to get participants to commit to the swap and make them.  I asked for 3"x3" cards, with real name, MB name, email address, blog address.  If people wanted to add more information they could but were not obliged.  I posted links to other CC's from other discussion posts for inspiration.   Once the commit-by date came up I private messaged (PM'd) my mailing address to each participant.

Inevitably someone had to back out, I didn't make a bid deal about it because this is meant to be a fun thing for everyone, life does get in the way.  I would rather someone backed out than "flaked" and didn't send their CC's which would hold up the whole thing.  A new MB member appeared & asked if there was time to join so I offered her the opening.  Then Canada Post send back someone's CC & someone else's express post wasn't received in the promised CanPost timeline, then CanPost decided to start rolling strikes...

I have learned:

  • Using the first post to track details of who is participating and how many is smart
  • Be patient & post clear instructions.  People are busy, life is busy, people don't always read instructions, its okay, it does work out.
  • Suggesting looking around at what others have made for inspiration is good.  
  • Suggesting to make extras while learning to make projects to swap is helpful to take the stress off of "messing up" while figuring it out.
  • Asking for help or direction from the group is smart.
  • SASE envelopes are nicer if the participant has already written in the return mailing adress, then I don't have to do it.
  • Postal outlets are not allowed to use scale prepaid postage labels because they are not legal, they are not meant to have the wrong date to return mail.
  • stamps, cash, prepaid Expresspost envelopes are all easy.  To cash a money order CanPost needs to see your ID to cash, but I can't believe the policy is write down the information, I didn't think that was legal.
  • Regular mail cost for 20 CC averaged between $1.25 and $2.06 They arrive in 4-10 days from mailing.
  • Packing flat cost less than packing bulky
  • Saran wrap in bundles of 5 or 10 CC was nice, neat, easy to put into envelopes.
  • Pretty packing tape really looks good for the packaging details
  • Gift enclosures with received CC are such a sweet & unexpected fun bonus!  I didn't post to the main thread but made sure to PM and write a thank you note as they were to received enclose in the return mail.
  • Noting the arrival date on each received parcel for reference is good, as well as noting the MB name,  what extras for postage or directions is helpful.
  • Being flexible for expectations is good, but parameters are important to keep it fair to everyone.  I didn't want this to drift along all summer.
  • A friendly reminder to not post or blog other people's details on the CC they receive is courteous and respectful of participant privacy.  (boy that sounds official!)
  • I asked everyone & got about 50% approval to sent one of each CC to an American friend who used to moderate the MB.  When sending to the USA customs declarations are required, I labeled them as about $10 value & declared them as crafting cards.

We are sooooo politely Canadian, so many apologies & thank you's!  I'm so proud of each participant for jumping in & trying this with me!!!  Aren't they beautiful, now everyone gets a fun day of mail when their CC arrive.

Sunday, June 5, 2011

Random Act of Kindness

These are 4" cuts from my new "Elegant Edges" cricut cartridge.  On the Cricut circle messageboard, Canadian chat, a lady posted that the first person to private message her would win a cartridge.  I sent a message, thinking its gone for sure, she posted 15 minutes earlier.  I won!  She had a spare cartridge & decided to give it away as a "Random Act of Kindness" for Friday the 13th.  I got it, but the plastic case was crushed in delivery.  I've been doing all sorts of test cuts to make sure its okay, so far so good, the cartridge seems to work properly.  After posting to the MB for help, and fairly extensive testing I learned that 54 border cuts will not work if cut at 2", they're too big for the cutting mat.  Thats just one of many interesting quirks that you learn via trial & error with some of the images on the cartridges.  Sometimes images cut out portrait vs landscape & its unexpected.  To check these things in advance the graphics can be checked 4 ways:  trial & error; "design studio"; Gypsy, or the newest program which is online only, "Cricut Craft Room."
 One sheet of double sided paper torn in half yielded all these flower layers & 4 book pages cut with my baby bug (cricut).  

Here's how I made the flower in the centre of the above picture.  I didn't use the same paper so the colours don't match, but you get the idea.  Flowers are trendy again, all over the internet people are making paper, tissue, felt, and cloth flowers.  
 These are cut at 1".  You will need 5 symmetrical flowers, folded into quarters and a stapler or glue gun.  This is my new TimHoltz tiny attacher, with tiny little 1/4" staples.  It is very easy to use.
 Once the flowers are folded into quarters open them into halves.  Lap them one over the next.
 The above picture shows 3 halves.  The below picture shows how the fourth half is lapped in.  It helps to think of how you would lap the 4 flaps of a box to close it if you were not taping it closed.
 Here they are snugged in with one staple to secure it.
 2 staples & its secure.  I pushed open the petals with my finger to bring up the dimension.  I also twisted some of the flaps back on themselves to open them up.  It will need a button, bead or glitter glue in the centre, just something to pretty it up a bit.  You can't be afraid to wreck an experiment, sometimes its in the destruction the learning comes.  This paper isn't as pretty, plum on one side/red flowers on white on the reverse, but it does contrast how the flower looks.
 Here's Boomer sniffing the flower.  I used 3 single binder rings to turn it into a little book with the extra flowers interspersed inside.  Its not quite done yet, need a bit more jazzing up with ribbons & stuff.
By the time this post  is published, I am hoping the recipient will have it because I am giving it away to someone from the Canadian Calling Card Swap.  What do you think?  Have you ever done a Random Act of Kindness (RAK)?  If everyone in the world did one just once a week we may all have something to be happy about.